
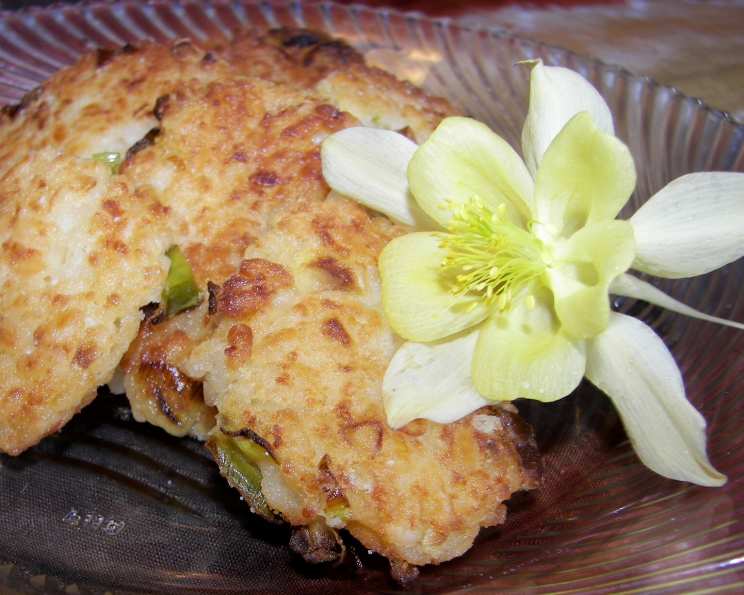
Golden Globes of Goodness: Crispy Fried Risotto Cakes
There’s something inherently comforting about risotto. I remember my first attempt, stirring patiently over a low flame in my tiny student kitchen, the aroma of wine and Parmesan filling the air. It felt like a culinary alchemy, transforming humble grains of rice into creamy indulgence. But it was the next day, when I transformed the leftovers into crispy-edged cakes, that I truly fell in love. Each bite was a symphony of textures – the yielding interior of perfectly cooked rice giving way to a satisfying, golden-brown crust. These Fried Risotto Cakes are not just a dish; they’re a delicious memory.
Recipe Overview
- Prep Time: 20 minutes
- Cook Time: 30 minutes
- Total Time: 50 minutes (plus chilling time)
- Servings: 4-6
- Yield: 8 cakes
- Dietary Type: Not Gluten-Free (can be modified, see Variations)
Ingredients
- 4 ½ cups chicken stock
- ¼ cup unsalted butter
- 1 medium onion, chopped
- 1 ½ cups Arborio rice
- 1 cup white wine (dry, such as Sauvignon Blanc or Pinot Grigio)
- ½ cup Parmesan cheese, grated
- ½ cup scallion, chopped
- 2 tablespoons olive oil
- ½ cup all-purpose flour
Equipment Needed
- Large saucepan
- Medium saucepan
- Greased sheet pan
- Large sauté pan
- Slotted spoon or spatula
Instructions
-
Begin by preparing the risotto. In a large saucepan, bring the chicken stock to a simmer over medium heat. Keep it gently simmering throughout the cooking process; this ensures it’s hot and ready to be absorbed by the rice.
-
In a medium saucepan, melt the butter over medium heat. Add the chopped onion and sauté for about 5 minutes, or until the onion is softened and translucent. Avoid browning the onion; you want it to be sweet and aromatic, not caramelized.
-
Add the Arborio rice to the saucepan with the onions. Stir the rice constantly until each grain is well coated with the butter and onion mixture. This toasting process helps to prevent the rice from becoming mushy during cooking. It should take about 2-3 minutes.
-
Increase the heat to medium-high. Add the white wine to the rice. Cook, stirring constantly, for about 4 minutes, or until the wine is almost completely absorbed by the rice. The alcohol will evaporate, leaving behind a delightful flavor.
-
Now, begin adding the simmering chicken stock to the rice, about 1 cup at a time. Add just enough stock to cover the rice. Cook, stirring constantly, until the stock is absorbed by the rice. It’s crucial to stir frequently to release the starches and create the creamy texture that is characteristic of risotto.
-
Continue adding the stock, 1 cup at a time, stirring constantly and allowing each addition to be absorbed before adding more. This process is essential for achieving the perfect risotto consistency. The rice is done when it is just cooked through (al dente) and lightly bound with a creamy liquid, approximately 15 minutes.
-
Remove the risotto from the heat. Stir in the grated Parmesan cheese and chopped scallion. The cheese will add richness and a savory flavor, while the scallions provide a fresh, vibrant contrast.
-
Spread the cooked risotto evenly in a greased sheet pan. Ensure it is a thin, even layer; this will help it firm up evenly in the refrigerator.
-
Refrigerate the risotto until it is very firm, at least 4 hours, or preferably overnight. This step is crucial for forming the risotto cakes later on. The chilled risotto will be much easier to handle and shape.
-
In a large sauté pan, heat the olive oil over medium heat. Make sure the oil is hot before adding the risotto cakes; this will help to create a crispy crust.
-
Form the risotto cakes by shaping handfuls of the chilled risotto into disks approximately 3 inches in diameter and ½ inch thick. You can use your hands, a cookie cutter, or a ring mold to create uniform cakes.
-
Dredge the risotto cakes in all-purpose flour, ensuring that each cake is evenly coated on all sides. This coating will help to create a golden-brown crust when they are sautéed.
-
Carefully place the flour-dredged risotto cakes into the hot oil in the sauté pan. Be careful not to overcrowd the pan; work in batches if necessary to maintain the oil temperature.
-
Sauté the cakes in the hot oil until they are golden brown and crispy on both sides, flipping them gently with a spatula. This should take about 3-4 minutes per side.
-
Remove the fried risotto cakes from the pan and place them on a paper towel-lined plate to drain any excess oil.
Expert Tips & Tricks
- Risotto Base: Don’t be afraid to experiment with the risotto base. You can use vegetable stock instead of chicken stock for a vegetarian version.
- Flavor Infusion: Infuse your chicken stock with herbs like thyme or rosemary for an extra layer of flavor.
- Parmesan Power: Freshly grated Parmesan makes all the difference. Avoid the pre-grated kind if possible.
- Cake Consistency: If your risotto isn’t firm enough to shape after chilling, add a beaten egg to bind it together before forming the cakes.
- Crisp Perfection: Ensure the oil is hot enough before frying. Test with a small piece of risotto – it should sizzle immediately.
- Even Cooking: Avoid overcrowding the pan while frying; this will lower the oil temperature and result in soggy cakes.
- Flavor Boost: Sprinkle with a little extra Parmesan or fresh herbs immediately after frying for added flavor and presentation.
Serving & Storage Suggestions
Serve the Fried Risotto Cakes immediately while they are hot and crispy. They make a wonderful appetizer, side dish, or even a light meal. Pair them with a marinara sauce, pesto, or a simple aioli for dipping. Garnish with a sprinkle of fresh herbs like parsley or basil.
Leftover risotto cakes can be stored in an airtight container in the refrigerator for up to 3 days. To reheat, bake them in a preheated oven at 350°F (175°C) for about 10-15 minutes, or until heated through and crispy. You can also reheat them in a skillet with a little oil for a crispier result. Freezing is not recommended, as the texture may change.
Nutritional Information
| Nutrient | Amount per Serving | % Daily Value |
|---|---|---|
| Calories | 702.2 kcal | N/A |
| Calories from Fat | N/A | 33% |
| Total Fat | 25.7 g | 39% |
| Saturated Fat | 11.4 g | 56% |
| Cholesterol | 49.6 mg | 16% |
| Sodium | 585.8 mg | 24% |
| Total Carbohydrate | 86.6 g | 28% |
| Dietary Fiber | 3.2 g | 12% |
| Sugars | 6.5 g | N/A |
| Protein | 18.7 g | 37% |
Note: Nutritional information is an estimate and may vary based on specific ingredients and portion sizes.
Variations & Substitutions
- Gluten-Free: Use gluten-free all-purpose flour or a blend of rice flour and cornstarch for dredging. Ensure the chicken stock is also gluten-free.
- Vegan: Substitute the butter with a vegan butter alternative and the Parmesan cheese with a vegan Parmesan cheese. Use vegetable broth instead of chicken broth.
- Flavor Variations: Add cooked mushrooms, sun-dried tomatoes, or roasted vegetables to the risotto for different flavor profiles.
- Cheese Alternatives: Try using different types of cheese in the risotto, such as Gruyere, Fontina, or Asiago.
- Herb Infusion: Incorporate fresh herbs like rosemary, thyme, or sage into the risotto for added aroma and flavor.
FAQs (Frequently Asked Questions)
Q: Can I use leftover risotto that’s been in the fridge for a few days?
A: Yes, absolutely! These cakes are a fantastic way to use up leftover risotto. Just ensure it’s been stored properly and doesn’t show any signs of spoilage.
Q: What if my risotto is too wet to form into cakes?
A: If your risotto is too wet, you can add a beaten egg to help bind it together. Mix well and then chill the risotto for a longer period to firm it up.
Q: Can I bake these instead of frying them?
A: Yes, you can bake them. Place the dredged risotto cakes on a greased baking sheet and bake at 375°F (190°C) for about 20-25 minutes, or until golden brown and crispy, flipping halfway through.
Q: What’s the best dipping sauce to serve with these?
A: Marinara sauce, pesto, aioli, or a creamy garlic dip are all excellent choices. The best dipping sauce will depend on your personal preference and the flavor profile of your risotto.
Q: Can I make these ahead of time and freeze them?
A: While it’s not ideal, you can freeze the formed, undredged risotto cakes. Thaw them completely before dredging in flour and frying. Be aware that the texture might be slightly different after freezing.
Final Thoughts
These Fried Risotto Cakes are a testament to the magic that can happen when humble ingredients are transformed with a little patience and love. Whether you’re using freshly made risotto or repurposing leftovers, this recipe is sure to impress. Don’t be afraid to experiment with different flavors and toppings to create your own signature version. I encourage you to try this recipe and share your feedback. They pair beautifully with a crisp glass of white wine or a light salad for a complete and satisfying experience. Happy cooking!