
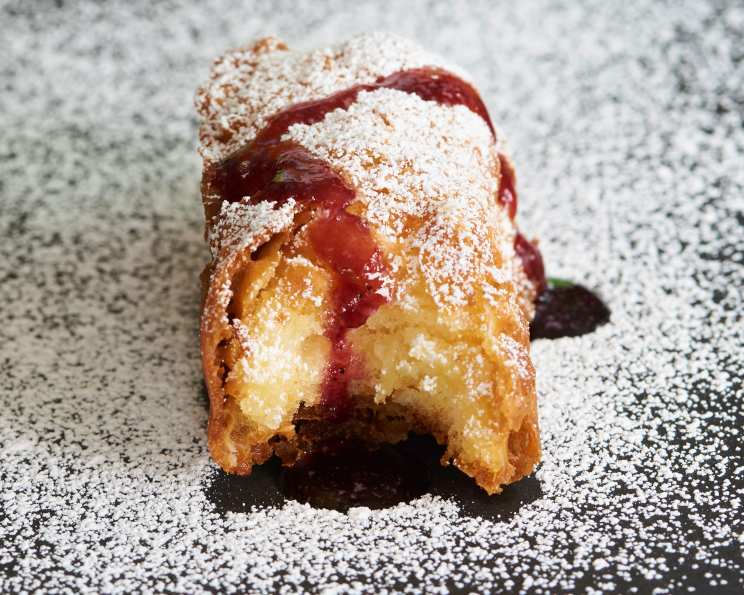
Deep-Fried Twinkie Temptation: A Culinary Adventure
The first time I tasted a fried Twinkie was at a county fair, under the swirling lights of a Tilt-A-Whirl and the irresistible aroma of funnel cakes. I remember thinking, “This is either the most brilliant or the most ridiculous thing I’ve ever seen.” That first bite—the warm, crisp exterior giving way to the familiar, creamy filling—completely won me over. It was pure, unapologetic, state-fair indulgence, and it instantly transported me back to childhood carnivals and summertime fun. Now, I’m excited to share my version of this classic treat with you, so you can experience the magic yourself.
Recipe Overview
- Prep Time: 2 hours 15 minutes (includes freezing time)
- Cook Time: 4 minutes
- Total Time: 2 hours 19 minutes
- Servings: 6
- Yield: 6 Twinkies
- Dietary Type: Not specified (contains dairy and gluten)
Ingredients
- 6 Hostess Twinkies
- 6 wooden popsicle sticks
- Vegetable oil, enough to cover Twinkies for deep frying
- Flour, for dusting
Batter:
- 1 cup milk
- 2 tablespoons vinegar
- 1 tablespoon oil
- 1 cup flour (adjust to achieve desired consistency)
- 1 teaspoon baking powder
- ½ teaspoon salt
Equipment Needed
- Deep fryer or large, heavy-bottomed pot
- Thermometer
- Whisk
- Two mixing bowls
- Tongs or slotted spoon
- Paper towels
Instructions
-
Freeze the Twinkies: Place the Twinkies in the freezer for at least 2 hours. You can freeze them overnight for optimal firmness. This step is crucial for preventing the Twinkies from melting completely during frying.
-
Prepare the Batter: In a medium bowl, combine the milk, vinegar, and oil. The vinegar will help to tenderize the gluten in the flour, resulting in a lighter batter.
-
Mix Dry Ingredients: In a separate bowl, whisk together the flour, baking powder, and salt. The baking powder is essential for creating a light and airy crust.
-
Combine Wet and Dry: Gradually whisk the wet ingredients into the dry ingredients, mixing until smooth. Be careful not to overmix, as this can develop the gluten and result in a tough batter. If the batter seems too thick, add a tablespoon of milk at a time until you reach the desired consistency – it should be thick enough to coat the Twinkies evenly but thin enough to drip off slightly.
-
Refrigerate the Batter: Cover the batter and refrigerate it while the oil heats up. Chilling the batter helps it to adhere better to the Twinkies and prevents excessive oil absorption during frying.
-
Heat the Oil: Pour enough vegetable oil into a deep fryer or large, heavy-bottomed pot to fully submerge the Twinkies. Heat the oil to 375°F (190°C). Use a thermometer to ensure accurate temperature control. Maintaining the correct temperature is essential for achieving a crispy, golden-brown crust without burning the Twinkies.
-
Insert Sticks: Gently insert a wooden popsicle stick into the center of each frozen Twinkie, leaving enough of the stick exposed to hold onto. This makes the Twinkies easier to handle during dipping and frying.
-
Dust with Flour: Lightly dust each Twinkie with flour. This helps the batter adhere to the Twinkie and creates a slightly crispier crust.
-
Dip in Batter: Dip each floured Twinkie into the batter, ensuring that it’s completely coated. Use a utensil or your fingers to gently spread the batter if needed. Make sure the entire Twinkie is covered to prevent any filling from leaking out during frying.
-
Fry the Twinkies: Carefully place each batter-coated Twinkie into the hot oil using tongs or a slotted spoon. Work in batches to avoid overcrowding the fryer, which can lower the oil temperature.
-
Cook Until Golden Brown: Fry the Twinkies for about 3-4 minutes, turning them occasionally to ensure even browning. The Twinkies will float in the oil. They are done when they are golden brown and crispy on all sides.
-
Remove and Drain: Remove the fried Twinkies from the oil and place them on a plate lined with paper towels to drain excess oil. Let them cool for about 5 minutes before serving.
-
Serve: Serve the fried Twinkies warm.
Expert Tips & Tricks
- Freezing is Key: Don’t skip the freezing step! Frozen Twinkies hold their shape better during frying.
- Batter Consistency: Adjust the batter consistency by adding milk or flour until it coats the Twinkie evenly without being too thick or thin.
- Oil Temperature: Maintaining a consistent oil temperature is critical. If the oil is too cool, the Twinkies will absorb too much oil and become greasy. If the oil is too hot, they will burn on the outside before the inside is heated through.
- Don’t Overcrowd: Fry the Twinkies in batches to prevent the oil temperature from dropping.
- For a crispier batter: You can add a tablespoon of cornstarch to the dry ingredients in the batter.
- Flavor Boost: Add a teaspoon of vanilla extract or other flavoring to the batter for extra flavor.
- Make Ahead: While best served immediately, the batter can be made a few hours in advance and stored in the refrigerator.
Serving & Storage Suggestions
Serve your deep-fried Twinkies warm for the best experience. You can dust them with powdered sugar or drizzle them with chocolate sauce for an extra touch of sweetness.
Leftover fried Twinkies are best consumed immediately but can be stored in an airtight container in the refrigerator for up to 2 days. Reheat them in a preheated oven at 350°F (175°C) for a few minutes to re-crisp the crust. Microwaving is not recommended as it will make them soggy. They can be frozen, but the texture will change upon thawing, and they won’t be as crispy.
Nutritional Information
Note: Nutritional information is an estimate and may vary based on specific ingredients and preparation methods.
| Nutrient | Amount per Serving | % Daily Value |
|---|---|---|
| Calories | 350 kcal | 18% |
| Total Fat | 20 g | 31% |
| Saturated Fat | 10 g | 50% |
| Cholesterol | 25 mg | 8% |
| Sodium | 300 mg | 13% |
| Total Carbohydrate | 40 g | 15% |
| Dietary Fiber | 1 g | 4% |
| Sugars | 25 g | – |
| Protein | 4 g | 8% |
Variations & Substitutions
- Gluten-Free: Use a gluten-free flour blend for the batter.
- Dairy-Free: Substitute almond milk, soy milk, or oat milk for the milk in the batter.
- Spiced Twinkies: Add a pinch of cinnamon, nutmeg, or other spices to the batter for a warm, comforting flavor.
- Chocolate Twinkies: Use chocolate Twinkies for a richer, chocolatey treat.
- Different Sauces: Experiment with different sauces for dipping, such as caramel sauce, chocolate ganache, or even a fruit coulis.
FAQs (Frequently Asked Questions)
Q: Why do I need to freeze the Twinkies before frying?
A: Freezing the Twinkies helps them hold their shape during frying and prevents the filling from melting too quickly.
Q: Can I use a different type of oil for frying?
A: Yes, you can use other oils with a high smoke point, such as canola oil or peanut oil.
Q: How do I know when the oil is at the right temperature?
A: Use a thermometer to ensure the oil reaches 375°F (190°C). If you don’t have a thermometer, you can test the oil by dropping a small amount of batter into it. If the batter sizzles and turns golden brown in about 30 seconds, the oil is ready.
Q: Can I bake these instead of frying?
A: While frying is the traditional method, you can try baking them at 350°F (175°C) for about 15-20 minutes. However, they won’t be as crispy as fried Twinkies.
Q: What if my batter is too thick or too thin?
A: If the batter is too thick, add a tablespoon of milk at a time until you reach the desired consistency. If it’s too thin, add a tablespoon of flour at a time.
Final Thoughts
Deep-fried Twinkies might seem like a whimsical indulgence, but they’re a surprisingly delightful treat. The combination of the warm, crispy crust and the familiar, creamy filling is simply irresistible. Don’t be afraid to experiment with different variations and toppings to create your own unique version. Gather your friends and family, fire up the fryer, and get ready to enjoy a truly unforgettable dessert. Let me know what you think!