
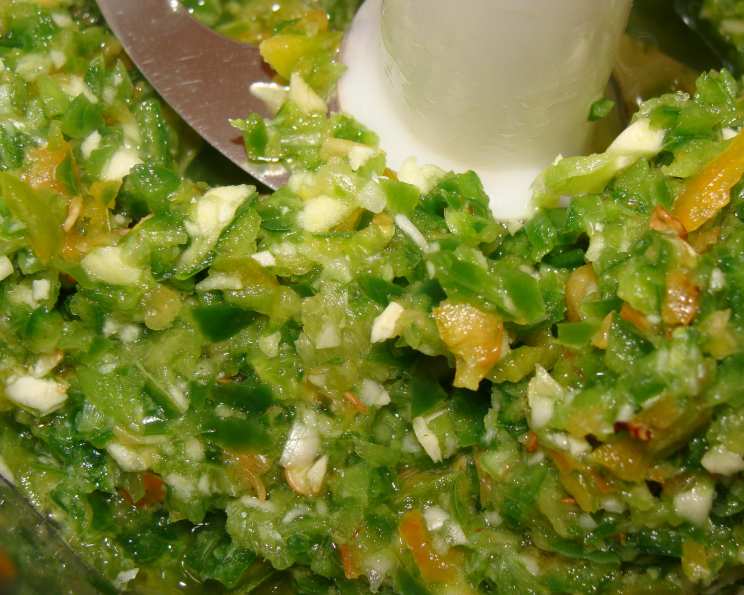
From-Scratch Chili Garlic Sauce: A Culinary Adventure
The scent of chili and garlic sizzling in a pan takes me straight back to my grandmother’s kitchen. She always had a jar of homemade chili garlic sauce on hand, a fiery condiment that could elevate even the simplest meal. It wasn’t just about the heat; it was about the depth of flavor, the perfect balance of spice, tang, and sweetness. That memory, that taste, is what inspires me to make my own version today, a tribute to her culinary magic.
Recipe Overview
- Prep Time: 15 minutes
- Cook Time: 5 minutes
- Total Time: 20 minutes
- Yield: About 1 cup
- Dietary Type: Vegan, Gluten-Free
Ingredients
- 1 lb fresh chili peppers, washed and stemmed (Habanero, Thai, Serrano, jalapeno, or a mix)
- 6-8 garlic cloves
- 4 tablespoons distilled white vinegar
- 1 teaspoon salt
- 1 tablespoon sugar
Equipment Needed
- Food Processor or Blender
- Small Sealable Jar
Instructions
- Prepare the Ingredients: Thoroughly wash the chili peppers and remove the stems. Peel the garlic cloves.
- Combine Ingredients: Place the prepared chili peppers, garlic cloves, distilled white vinegar, salt, and sugar into a food processor or blender.
- Pulse to Puree: Pulse the mixture until it is coarsely pureed. Be careful not to over-process; you want some texture. If you prefer a smoother sauce, blend until smoother.
- Adjust to Taste: Taste the sauce and adjust the sugar, salt, and vinegar to your liking. More sugar will sweeten the sauce, more salt will enhance the flavors, and more vinegar will add tanginess.
- Transfer and Refrigerate: Transfer the finished chili garlic sauce to a small sealable jar. Refrigerate immediately.
Expert Tips & Tricks
- Heat Level: The type of chili peppers you use will significantly impact the heat level of your sauce. Habaneros and Thai chilies are very spicy, while jalapenos are milder. Experiment with different combinations to find your perfect spice level. For a milder sauce, remove the seeds from the peppers before processing. I personally like the heat, so I usually leave them in.
- Garlic Intensity: The number of garlic cloves can be adjusted to your preference. More garlic will result in a stronger, more pungent sauce.
- Texture: For a chunkier sauce, pulse the ingredients briefly. For a smoother sauce, blend for a longer period. You can also add a small amount of water to the blender to help achieve a smoother consistency if needed, but be mindful that this may slightly dilute the flavor and reduce shelf life.
- Flavor Development: The flavor of the chili garlic sauce will continue to develop as it sits in the refrigerator. It’s best to let it sit for at least a few hours before using it.
- Preventing Spoilage: Ensure your jar is clean and dry before filling it with the sauce. This will help prevent spoilage.
- Safety First: When handling hot peppers, consider wearing gloves to protect your skin from irritation. Avoid touching your eyes or face after handling the peppers.
- Aromatics Boost: For an extra layer of flavor, consider adding a small piece of fresh ginger or a few kaffir lime leaves to the mixture before blending. Remember to remove the lime leaves before serving.
Serving & Storage Suggestions
Serve this vibrant chili garlic sauce with a wide variety of dishes. It’s fantastic as a condiment for stir-fries, noodles, rice bowls, spring rolls, dumplings, and grilled meats. You can also use it as a marinade for chicken or tofu, or add it to soups and stews for a spicy kick.
Store the chili garlic sauce in an airtight container in the refrigerator. It will last for several months. The high acidity of the vinegar and the presence of salt help to preserve the sauce. As with any homemade condiment, observe for any signs of spoilage before consuming (e.g., unusual odors, mold growth).
Freezing is not generally recommended, as it can alter the texture of the sauce and make it watery upon thawing.
Nutritional Information
(Note: These are estimates and can vary based on specific ingredients and measurements used.)
| Nutrient | Amount per Serving | % Daily Value |
|---|---|---|
| Calories | 20 kcal | 1% |
| Total Fat | 0g | 0% |
| Saturated Fat | 0g | 0% |
| Cholesterol | 0mg | 0% |
| Sodium | 100mg | 4% |
| Total Carbohydrate | 4g | 1% |
| Dietary Fiber | 1g | 4% |
| Sugars | 2g | |
| Protein | 0g | 0% |
Variations & Substitutions
- Sweetness: If you prefer a sweeter sauce, use honey or maple syrup instead of sugar. Adjust the amount to your desired sweetness level.
- Vinegar Variety: Experiment with different types of vinegar, such as apple cider vinegar or rice vinegar, for a different flavor profile.
- Citrus Zing: Add a tablespoon of lime or lemon juice for a brighter, more citrusy flavor.
- Spice Boost: For extra heat, add a pinch of cayenne pepper or red pepper flakes.
- Umami Depth: Add a teaspoon of fish sauce (for non-vegans) or soy sauce for a deeper, more savory flavor.
- Roasted Garlic: Roast the garlic before blending for a mellower, sweeter garlic flavor.
- Fermented Option: For a richer, more complex flavor, consider fermenting the chili peppers and garlic before blending. This will require a few extra days of preparation.
FAQs (Frequently Asked Questions)
Q: How long will this chili garlic sauce last in the refrigerator?
A: Properly stored in an airtight container, your homemade chili garlic sauce should last for several months in the refrigerator due to the preserving properties of the vinegar and salt.
Q: Can I use dried chili flakes instead of fresh chili peppers?
A: While fresh chili peppers are recommended for the best flavor and texture, you can substitute with dried chili flakes in a pinch. Rehydrate the flakes in hot water for about 30 minutes before blending. Adjust the amount to your desired heat level.
Q: My sauce is too spicy! How can I make it milder?
A: You can reduce the heat by adding more sugar or vinegar to balance the flavors. Also, stir in a small amount of neutral oil like vegetable or canola oil. Another trick is to add a dollop of plain yogurt when serving.
Q: Can I make this recipe without a food processor or blender?
A: Yes, but it will require more manual effort. Finely chop the chili peppers and garlic, then mix them with the vinegar, salt, and sugar. The texture will be chunkier, but the flavor will still be delicious.
Q: Why is my chili garlic sauce so watery?
A: This could be due to excess moisture from the chili peppers. Be sure to dry them thoroughly after washing. Also, avoid adding water unless absolutely necessary to help the blender.
Final Thoughts
Creating your own chili garlic sauce from scratch is a rewarding culinary experience. It allows you to customize the flavors to your exact preferences and enjoy a condiment that is far superior to anything you can buy in a store. So, gather your ingredients, fire up your food processor, and embark on a flavor adventure. Don’t hesitate to experiment with different chili peppers, vinegars, and spices to create your signature version. And most importantly, share your creation with friends and family – they’ll thank you for it! Consider serving it alongside some homemade dumplings or use it to spice up your next batch of stir-fry. Enjoy!