
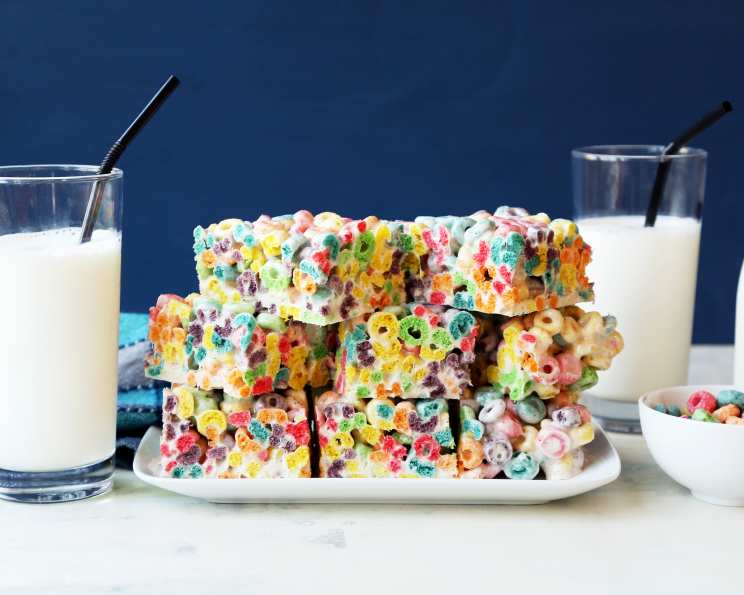
Fruit Loop Dream Bars: A Nostalgic Treat with a Grown-Up Twist
The scent of sugary cereal always takes me back. Saturday mornings spent in front of the television, bowl overflowing with colorful loops swimming in cold milk – it was pure, unadulterated joy. These Fruit Loop Dream Bars capture that childhood magic, but with a slightly elevated twist. They’re intensely fruity, ridiculously easy to make, and dangerously addictive. This recipe reminds me of that carefree joy, transformed into a delightful treat I can now share with everyone.
Recipe Overview
- Prep Time: 15 minutes
- Cook Time: 7 minutes
- Total Time: 2 hours 22 minutes
- Servings: 24
- Yield: 24 bars
- Dietary Type: Not specified
Ingredients
- 3⁄4 cup unsalted butter, plus more for bowl and pan
- 12 cups Fruit Loops cereal (from one 12-ounce box)
- 2 (10 1/2 ounce) bags mini marshmallows
- 1 teaspoon kosher salt
- 1 teaspoon pure vanilla extract or 1 teaspoon vanilla bean paste
- Cold milk (for serving)
Equipment Needed
- Large heatproof bowl
- 13×9″ baking dish
- Large skillet
- Heatproof spatula or large spoon
- Parchment paper
- Serrated knife
Instructions
- First, prepare your workspace. Lightly butter a large heatproof bowl. Add the Fruit Loops cereal to the buttered bowl and set aside. This will be where you’ll combine the cereal with the marshmallow mixture.
- Next, prepare the baking dish. Lightly butter a 13×9″ baking dish, then line it with parchment paper, leaving a 2″ overhang on the long sides. Lightly butter the parchment paper. This overhang will make it easy to remove the treats later.
- Now for the magic: In a large skillet over medium heat, melt 3/4 cup of butter. As the butter melts, swirl the pan to ensure even cooking.
- Continue to cook the butter, swirling frequently, until it foams and then begins to brown. Be vigilant during this step as you don’t want it to burn. This should take about 5–7 minutes. The browned butter will add a depth of flavor that elevates these treats.
- Reduce the heat to low. Add the mini marshmallows and kosher salt.
- Continue to cook, stirring constantly, until the marshmallows are completely melted and the mixture is smooth, about 3 minutes. The marshmallow mixture will have brown specks and almost look grayish in color – this is expected and perfectly fine!
- Pour the melted marshmallow mixture over the Fruit Loops cereal, scraping the pan to get every last bit of that deliciousness into the bowl.
- Using a large heatproof spatula or large spoon, stir the cereal mixture, scraping the bottom of the bowl and folding, until the cereal is completely coated. Work quickly as the mixture will become very sticky and thicken as it cools.
- Scrape the coated cereal into the prepared baking dish.
- Cover with a sheet of parchment paper and press down firmly to create an even, compact layer. Don’t press too hard, or you’ll break the loops!
- Cover the treats loosely with plastic wrap and let sit until completely cool, about 2 hours. This allows the bars to set properly.
- Just before serving, use the parchment paper overhang to lift the treats out of the pan and place them on a cutting board. Remove the parchment paper.
- Use a serrated knife to trim about 1/2″ from all sides to create a squared-off rectangle. Then, cut into an 8×6 grid to make 24 squares.
Expert Tips & Tricks
- Browning the butter is key. Don’t skip this step! The nutty, caramelized flavor it imparts is what takes these treats from ordinary to extraordinary. Watch it carefully, though, as browned butter can quickly turn burnt.
- Work quickly. The marshmallow mixture sets up fast, so have everything ready to go before you start cooking.
- Don’t over-press. When pressing the mixture into the pan, apply firm, even pressure, but avoid crushing the cereal.
- Add-ins are welcome! Consider stirring in sprinkles, chocolate chips, or chopped nuts for added texture and flavor.
Serving & Storage Suggestions
Serve these Fruit Loop Dream Bars chilled or at room temperature. They are fantastic on their own or accompanied by a glass of cold milk – a nostalgic pairing that’s hard to beat.
To store, wrap the bars tightly in plastic wrap or place them in an airtight container. They will keep at room temperature for up to 2 days. For longer storage, you can refrigerate them for up to 5 days. Freezing is not recommended, as it can affect the texture. Cut into squares just before serving for optimal freshness.
Nutritional Information
| Nutrient | Amount per Serving | % Daily Value |
|---|---|---|
| Calories | 184.9 kcal | N/A |
| Calories from Fat | N/A | N/A |
| Total Fat | 6.3 g | 9% |
| Saturated Fat | 4 g | 19% |
| Cholesterol | 15.2 mg | 5% |
| Sodium | 183.8 mg | 7% |
| Total Carbohydrate | 32.9 g | 10% |
| Dietary Fiber | 1.4 g | 5% |
| Sugars | 20.6 g | 82% |
| Protein | 1.2 g | 2% |
Variations & Substitutions
- Gluten-Free: While Fruit Loops themselves are not gluten-free, you can easily adapt this recipe by using a similar gluten-free cereal.
- Different Cereal: Feel free to experiment with other cereals! Rice Krispies, Corn Flakes, or even a mix of your favorites would work well.
- Vegan: Unfortunately, marshmallows typically contain gelatin, making this recipe not vegan. Vegan marshmallows are available, but ensure the butter used is also plant-based.
FAQs (Frequently Asked Questions)
Q: Can I use a different size pan?
A: Yes, but the thickness of the bars will change. A smaller pan will result in thicker bars, while a larger pan will make them thinner. Adjust the cooling time accordingly.
Q: My marshmallow mixture is too thick. What should I do?
A: Add a tablespoon of milk or water to the mixture and stir until smooth.
Q: Can I add food coloring to the marshmallow mixture?
A: Absolutely! If you want to enhance the colors or create a themed treat, a few drops of food coloring can be added to the melted marshmallows.
Q: What if I don’t have vanilla extract or vanilla bean paste?
A: You can omit the vanilla extract without significantly impacting the flavor. However, it does add a subtle depth, so if possible, try to include it.
Q: How do I prevent the treats from sticking to the knife when cutting?
A: Lightly grease the serrated knife with butter or cooking spray before cutting. You can also run the knife under hot water and dry it between cuts.
Final Thoughts
These Fruit Loop Dream Bars are a guaranteed crowd-pleaser. Whether you’re looking to relive your childhood or create a fun and colorful treat for a party, this recipe is sure to deliver. The combination of nostalgic flavors and simple preparation makes it a winner in my book. So, go ahead, grab a box of Fruit Loops, and whip up a batch of these delightful bars. I’d love to hear what you think – feel free to share your feedback and variations!