
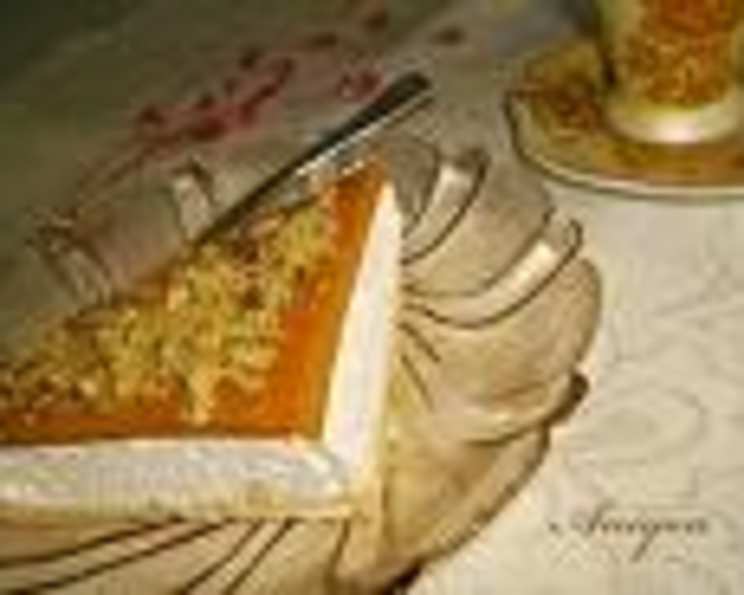
Fruit Parfait Cake
I remember the first time I tasted a parfait cake. It was at my grandmother’s house, during one of our summer visits. The vibrant layers of fruit and cream, stacked beautifully between delicate ladyfingers, were a feast for the eyes as much as the palate. My grandmother always used fresh peaches from her garden, and the simple sweetness of that cake, combined with the warmth of her kitchen, remains one of my most cherished childhood memories. While she loved peaches, she always encouraged me to try different fruits, saying that the best recipes are those adapted to your own taste.
Recipe Overview
- Prep Time: 30 minutes
- Cook Time: 0 minutes
- Total Time: at least 14 hours (including chilling time)
- Servings: 12
- Yields: 1 rectangular cake
- Dietary Type: Not specified (can be adapted, see variations)
Ingredients
- 9 ounces ripe apricot halves
- 200 ml milk
- 2 tablespoons sugar
- 20 g Jello gelatin
- 500 ml whipping cream
- 1 lb ladyfingers
Equipment Needed
- Food processor
- Mixing bowls
- Hand mixer
- Rectangular pan (e.g., 9×13 inch)
- Water bath setup (pot and heat-safe bowl)
- Refrigerator
- Serving tray
Instructions
- Begin by preparing the apricot puree. In a bowl, warm 100 ml of the milk. It shouldn’t be boiling, just warm enough to dissolve the sugar effectively. Add the 2 tablespoons of sugar to the warmed milk and stir until completely dissolved.
- Next, prepare the apricots. Using a food processor, puree the 9 ounces of ripe apricot halves until smooth. While the food processor is running, gradually add the sweetened milk to the pureed apricots until fully incorporated. This will create a smooth, fruity mixture.
- Prepare the gelatin. Using a water bath, dissolve 10 g of Jello gelatin in the remaining 100 ml of milk. To create a water bath, fill a pot with a few inches of water and bring it to a simmer. Place a heat-safe bowl on top of the pot, ensuring the bottom of the bowl doesn’t touch the water. Add the gelatin and milk to the bowl and stir continuously until the gelatin is completely dissolved and the mixture is smooth.
- Add the dissolved gelatin to the apricot mixture and stir well to ensure it’s evenly distributed. Pour the mixture into a rectangular pan. A 9×13 inch pan works well. Place the pan in the refrigerator and chill for at least 2 hours, or until the apricot mixture is set but not completely firm. You want it to be firm enough to support the cream layer.
- While the apricot layer is chilling, prepare the whipped cream. Using a hand mixer, whip the 500 ml of whipping cream until stiff peaks form. This usually takes about 5-7 minutes, depending on your mixer and the temperature of the cream. Chilling the bowl and beaters beforehand can help the cream whip faster and hold its shape better.
- Dissolve the remaining 10 g of Jello gelatin (yes, another 10g – be sure you have 20g total!) in a small amount of cold water (about 2-3 tablespoons) according to package directions. This ensures the whipped cream holds its shape well and doesn’t become watery. Gently fold the dissolved gelatin into the whipped cream, ensuring it’s evenly distributed. Be careful not to overmix, as this can cause the cream to deflate.
- Remove the chilled apricot layer from the refrigerator. Spread the whipped cream evenly over the cooled apricot mixture. Ensure the cream layer is smooth and covers the entire apricot base.
- On the very bottom (which will be the top when you flip it!), arrange a single layer of ladyfingers over the whipped cream. You may need to break some of the ladyfingers to fit them neatly in a single layer. This layer adds a delicate sponge cake base to the finished cake.
- Return the pan to the refrigerator and refrigerate for at least 12 hours, or preferably overnight. This allows the flavors to meld together and the cake to set completely.
- Before serving, carefully flip the dessert onto a serving tray. To do this, you can run a thin knife or spatula around the edges of the pan to loosen the cake. Place a serving tray over the pan and carefully invert the cake onto the tray. If it doesn’t release immediately, gently tap the bottom of the pan.
Expert Tips & Tricks
- Fruit Selection: While this recipe calls for apricots, feel free to experiment with other fruits such as peaches, berries, or mangoes. Adjust the amount of sugar depending on the sweetness of the fruit.
- Ladyfinger Placement: For a neater presentation, trim the ladyfingers to the same length before arranging them on the cream layer. This will ensure a more uniform edge when the cake is flipped.
- Water Bath Alternative: If you don’t have a water bath setup, you can dissolve the gelatin in the microwave. Use short bursts of heat (10-15 seconds) and stir in between to prevent the gelatin from boiling.
- Preventing a Soggy Base: To prevent the ladyfingers from becoming too soggy, you can lightly brush them with a simple syrup or a thin layer of melted white chocolate before arranging them on the cream. This will create a barrier and help them retain their texture.
- Cream Stability: If you’re making this cake in advance, stabilize the whipped cream by adding a small amount of powdered sugar or cornstarch while whipping. This will help prevent it from weeping or separating.
Serving & Storage Suggestions
Serve the fruit parfait cake chilled. Its refreshing flavors make it an excellent dessert for warm weather. Cut into slices and serve immediately after flipping onto the serving tray. The cake can be stored in the refrigerator for up to 3 days. Cover it loosely with plastic wrap to prevent it from drying out. It’s not recommended to freeze this cake, as the texture of the whipped cream and fruit may change upon thawing.
Nutritional Information
| Nutrient | Amount per Serving | % Daily Value |
|---|---|---|
| Calories | 313 kcal | N/A |
| Calories from Fat | 168 kcal | N/A |
| Total Fat | 18.7 g | 28% |
| Saturated Fat | 10.8 g | 54% |
| Cholesterol | 194.7 mg | 64% |
| Sodium | 87.3 mg | 3% |
| Total Carbohydrate | 31.6 g | 10% |
| Dietary Fiber | 0.7 g | 2% |
| Sugars | 16.4 g | N/A |
| Protein | 5.6 g | 11% |
Please note that these values are estimates and may vary based on specific ingredients and serving sizes.
Variations & Substitutions
- Dairy-Free Version: Substitute the milk and whipping cream with coconut milk and coconut cream, respectively. Ensure you use full-fat coconut milk for a richer texture.
- Gluten-Free Version: Use gluten-free ladyfingers or sponge cake. You can also make a gluten-free crumble base instead.
- Vegan Version: Combine the substitutions above. Use agar-agar in place of gelatin.
- Seasonal Variations: Adapt the fruit to the season. Use berries in the summer, apples and pears in the fall, and citrus fruits in the winter.
- Flavor Enhancements: Add a splash of vanilla extract or almond extract to the whipped cream for extra flavor. You can also add a layer of jam or curd between the apricot and cream layers.
FAQs (Frequently Asked Questions)
Q: Can I use frozen apricots?
A: Yes, you can use frozen apricots. Make sure to thaw them completely and drain any excess liquid before pureeing.
Q: Can I make this cake ahead of time?
A: Absolutely! In fact, it’s recommended to make it at least 12 hours in advance to allow the flavors to meld and the cake to set properly.
Q: What if my apricot layer doesn’t set properly?
A: Ensure you’ve used the correct amount of gelatin and that it’s been dissolved properly. You can also try chilling the apricot layer for a longer period of time.
Q: Can I use a different type of cookie instead of ladyfingers?
A: Yes, you can use other types of cookies such as shortbread or sponge cake. Adjust the sweetness of the apricot layer accordingly.
Q: How do I prevent the cake from sticking to the pan when flipping?
A: Line the pan with parchment paper before pouring in the apricot mixture. This will make it easier to release the cake when flipping.
Final Thoughts
This fruit parfait cake is a delightful dessert that’s perfect for any occasion. Its vibrant layers and refreshing flavors are sure to impress your guests. Don’t be afraid to experiment with different fruits and flavor combinations to create your own unique version. Whether you’re a seasoned baker or a beginner, this recipe is easy to follow and yields a stunning result. So, gather your ingredients, put on your apron, and get ready to create a masterpiece. I’d love to hear your feedback and see your creations – share your photos and comments below! And if you’re looking for a beverage pairing, try it with a chilled glass of Moscato d’Asti or a light herbal tea.