
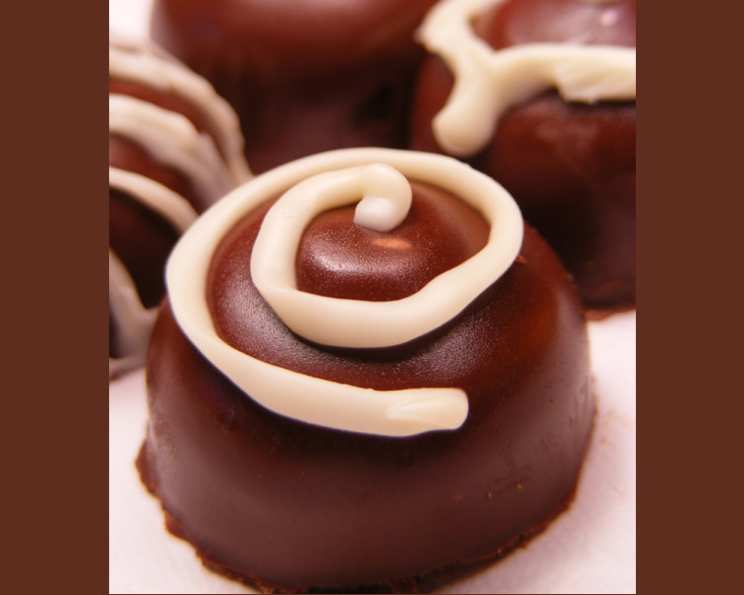
Mastering the Art of Ganache: The Soft Filling of Your Chocolate Dreams
My first real encounter with exquisitely crafted ganache was a revelation. It wasn’t in a fancy Parisian patisserie, but rather a small, unassuming chocolate shop in Delft, Netherlands. On a team-building trip (yes, those exist!), we were given a hands-on lesson in the art of chocolate making. The shop owner, a true artisan, shared his secrets, and I was immediately captivated. I tried recreating the magic at home with a cookbook recipe, but it fell flat. Discouraged, I went back to the Delft shop, and thankfully, he shared the exact quantities he used. Those chocolates, filled with soft, decadent ganache, were unlike anything I’d ever tasted, and now, I can share that experience with you!
Recipe Overview
- Prep Time: 55 minutes
- Yields: 20-25 chocolates
- Dietary Type: Not specified
Ingredients
Chocolate Cases
- 200 g dark baking chocolate or 200 g bitter baking chocolate
Ganache Filling
- 120 g cream
- 60 g butter
- 140 g milk chocolate (as preferred) or 140 g white chocolate (as preferred)
- 25 g Tia Maria (Baileys is our favourite!) or 25 g rum (Baileys is our favourite!)
- 2-3 drops food flavoring (optional)
- 1 teaspoon strawberry flavoring (optional) or 1 teaspoon banana flavoring (optional)
Equipment Needed
- Saucepan
- Heatproof bowl (for melting chocolate)
- Mini muffin papers or silicone ice cube forms
- Teaspoon
- Piping bag (optional)
- Refrigerator
Instructions
-
Melt the chocolate for the cases: In a heatproof bowl set over a pan of gently simmering water (making sure the bottom of the bowl doesn’t touch the water), melt 200g of dark or bitter baking chocolate. Be careful not to overheat the chocolate. Overheating will cause it to seize and become grainy. When about three-quarters of the chocolate is melted, remove the bowl from the heat and stir vigorously. The residual heat will melt the remaining chocolate, preventing it from overheating.
-
Create the chocolate cases: Take a small teaspoon of the melted chocolate and carefully “paint” the inside of each mini muffin paper or the cavity of your silicone ice cube forms. Don’t worry if the coverage is a little thin at first. It’s better to apply two thin coats than one thick coat, which is more prone to cracking. Place the coated forms in the refrigerator to harden.
-
Reserve chocolate: Set aside enough of the melted chocolate to cover the bottom of the forms once they have been filled with the ganache. This will act as the “lid” for your chocolates.
-
Prepare the ganache: In a saucepan, combine 120g of cream and 60g of butter. Bring the mixture to a boil over medium heat, stirring constantly to prevent scorching.
-
Infuse the ganache: Remove the saucepan from the heat and add 140g of your preferred chocolate (milk or white) and 25g of your chosen liqueur (Tia Maria or rum). Stir well until the chocolate is completely melted and the mixture is smooth and glossy. The heat of the cream and butter mixture will melt the chocolate.
-
Add flavour (optional): If desired, stir in 2-3 drops of food flavoring and/or 1 teaspoon of strawberry or banana flavoring to enhance the taste of your ganache. Remember that a little goes a long way with flavor extracts.
-
Cool the ganache: Allow the ganache to cool slightly before filling the chocolate cases.
-
Fill the chocolate cases: Once the ganache has cooled sufficiently (it should still be pourable but not too hot), carefully fill the chocolate cases using a piping bag or a teaspoon. Leave a small space at the top of each case to allow for the chocolate “lid.”
-
Chill the filled chocolates: Place the filled chocolate cases back into the refrigerator for a while to allow the ganache to set a little.
-
Seal the chocolates: Once the ganache has partially solidified, spoon or pipe a layer of the reserved melted chocolate over the top of each case, sealing the ganache filling inside.
-
Final chill: Return the chocolates to the refrigerator and chill until the top chocolate layer is completely solid. I prefer to keep them in the fridge for at least a few hours, or even overnight, to ensure they are firm and easy to remove from the molds.
-
Unmold the chocolates: If using mini muffin papers, carefully peel away the papers from the chocolates. Be gentle to avoid breaking the chocolate. If using silicone ice cube forms, gently ease the chocolates out of the forms. They should pop out easily due to the flexibility of the silicone.
-
Serve and enjoy! Plate up your homemade chocolates and amaze your guests with your delicious creation.
Expert Tips & Tricks
- Chocolate Tempering: For a professional-looking shine and snap to your chocolate cases, consider tempering your chocolate. Tempering involves carefully heating and cooling the chocolate to specific temperatures to stabilize the cocoa butter crystals. There are many online resources available that detail the process of tempering chocolate.
- Liqueur Infusion: For a more pronounced liqueur flavor, you can infuse the cream with the liqueur before bringing it to a boil. Simply add the liqueur to the cream and let it steep for 30 minutes before heating.
- Silicone Molds are Your Friend: Using silicone molds, particularly the smaller forms found in ice cube trays, simplifies the process significantly. The flexibility of the silicone makes unmolding the chocolates effortless and eliminates the need to peel away mini muffin papers, which can be a tedious task.
- Ganache Consistency: The consistency of the ganache will change depending on the ratio of chocolate to cream. For a firmer ganache, use more chocolate; for a softer ganache, use more cream.
- White Chocolate Sensitivity: White chocolate is more sensitive to heat than dark or milk chocolate. Be extra careful not to overheat it when melting.
Serving & Storage Suggestions
Serve your homemade ganache-filled chocolates as a decadent dessert, an elegant after-dinner treat, or a thoughtful homemade gift. They are best enjoyed at room temperature, where the ganache will be soft and creamy.
Store the chocolates in an airtight container in a cool, dry place, away from direct sunlight and strong odors. Good quality chocolate should not be refrigerated as this can cause the chocolate to bloom, resulting in a dull, whitish appearance. However, if you live in a very warm climate, refrigerating them may be necessary to prevent the ganache from melting.
The chocolates will last for up to 1 week at room temperature, or up to 2 weeks in the refrigerator. They can also be frozen for up to 2 months. To thaw, transfer the chocolates to the refrigerator overnight.
Nutritional Information
Please note that these values are estimates and may vary based on specific ingredients and portion sizes.
| Nutrient | Amount per Serving | % Daily Value |
|---|---|---|
| Calories | 137 kcal | N/A |
| Calories from Fat | 107 kcal | N/A |
| Total Fat | 12 g | 18% |
| Saturated Fat | 7.4 g | 36% |
| Cholesterol | 14.3 mg | 4% |
| Sodium | 22.9 mg | 0% |
| Total Carbohydrate | 8.8 g | 2% |
| Dietary Fiber | 2 g | 8% |
| Sugars | 5.1 g | 20% |
| Protein | 1.8 g | 3% |
Variations & Substitutions
- Dairy-Free Ganache: Use coconut cream instead of dairy cream for a vegan-friendly ganache.
- Dark Chocolate Ganache: Use all dark chocolate for a more intense chocolate flavor.
- Nutty Ganache: Add a tablespoon of your favorite nut butter (peanut, almond, cashew) to the ganache for a nutty twist.
- Espresso Ganache: Add a teaspoon of instant espresso powder to the ganache for a coffee-flavored filling.
- Spiced Ganache: Add a pinch of cinnamon, nutmeg, or cardamom to the ganache for a warm, spiced flavor.
FAQs (Frequently Asked Questions)
Q: Can I use chocolate chips instead of baking chocolate?
A: While you can use chocolate chips, baking chocolate is generally preferred for its higher cocoa butter content, which results in a smoother, richer ganache.
Q: My ganache is too thin. What can I do?
A: If your ganache is too thin, you can add more melted chocolate to thicken it up. Add the chocolate in small increments, stirring well after each addition, until you reach the desired consistency.
Q: My ganache is grainy. What went wrong?
A: Grainy ganache is usually caused by overheating the chocolate or adding cold ingredients to the hot cream. To prevent this, melt the chocolate slowly and gently, and make sure all ingredients are at room temperature before combining them.
Q: Can I make the ganache ahead of time?
A: Yes, you can make the ganache ahead of time and store it in the refrigerator for up to 3 days. Before using, let it come to room temperature and stir well to restore its smooth consistency.
Q: What other liqueurs can I use besides Tia Maria or rum?
A: You can use any liqueur you like, such as Grand Marnier, Frangelico, or Kahlua. Just be sure to adjust the amount of liqueur to taste, as some liqueurs are stronger than others.
Final Thoughts
Now that you’re armed with this knowledge, it’s time to transform your kitchen into your very own Delft chocolate shop! The beauty of this recipe lies in its simplicity and adaptability. Don’t be afraid to experiment with different flavors and liquors to create a truly unique ganache. And as you savor each bite of your homemade chocolates, remember that even the most delicious creations often start with a little inspiration and a willingness to learn from the masters. So, go ahead, indulge your inner chocolatier, and don’t hesitate to share your creations and feedback with me!