
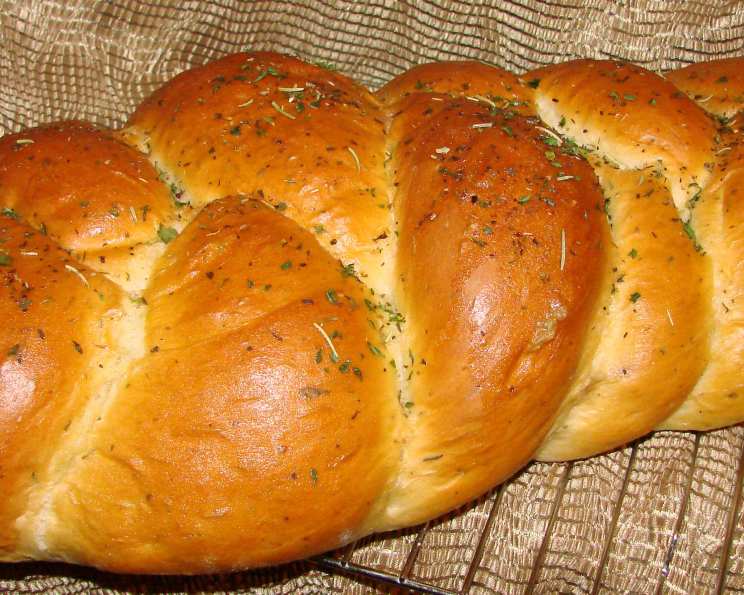
Garden Herb Braid: A Taste of Sunshine
The memory of my grandmother’s kitchen is forever laced with the scent of baking bread and fragrant herbs. I can still picture her, flour dusting her apron, carefully braiding dough while humming a cheerful tune. This Garden Herb Braid isn’t just a recipe; it’s a fragrant echo of those cherished moments, a way to bring a piece of that comforting warmth into my own home. Each strand, infused with aromatic herbs, carries a whisper of nostalgia and a promise of deliciousness.
Recipe Overview
- Prep Time: 25 minutes
- Cook Time: 25-30 minutes
- Total Time: 50-55 minutes
- Yield: 1 loaf (16 slices)
- Dietary Type: Vegetarian
Ingredients
- 4 – 4 1⁄2 cups all-purpose flour
- 3 tablespoons sugar
- 2 (1/4 ounce) packages fast rise yeast
- 1 1⁄2 teaspoons salt
- 3⁄4 teaspoon dried marjoram
- 3⁄4 teaspoon dried thyme
- 3⁄4 teaspoon parsley flakes
- 3⁄4 teaspoon dried basil
- 3⁄4 teaspoon dried oregano
- 3⁄4 teaspoon dried rosemary, crushed
- 3⁄4 teaspoon crushed sage
- 3⁄4 cup milk
- 1⁄2 cup water
- 1⁄4 cup butter, cubed
- 1 egg
Topping
- 1 tablespoon butter, melted
- 1⁄8 teaspoon dried marjoram
- 1⁄8 teaspoon dried thyme
- 1⁄8 teaspoon dried parsley flakes
- 1⁄8 teaspoon dried basil
- 1⁄8 teaspoon dried oregano
- 1⁄8 teaspoon dried rosemary, crushed
- 1⁄8 teaspoon crushed sage
Equipment Needed
- Large mixing bowl
- Saucepan
- Measuring cups and spoons
- Greased baking sheet
- Wire rack
Instructions
- In a large mixing bowl, combine 1-1/2 cups of the all-purpose flour, sugar, fast rise yeast, salt, dried marjoram, dried thyme, parsley flakes, dried basil, dried oregano, dried rosemary, and crushed sage. It’s important to thoroughly combine these dry ingredients to ensure even distribution of flavor and yeast activation.
- In a saucepan, heat the milk, water, and cubed butter to a temperature between 120°F and 130°F. This temperature range is crucial for activating the yeast without killing it. Use a thermometer to ensure accuracy.
- Add the heated liquid mixture to the dry ingredients in the mixing bowl. Beat the mixture just until moistened. The dough will appear shaggy at this stage, and that’s perfectly normal.
- Add the egg to the bowl. Beat the mixture until it is smooth, incorporating the egg fully. This adds richness and structure to the dough.
- Stir in just enough of the remaining flour to form a soft dough. You may not need to use all of the remaining flour, so add it gradually until the dough comes together. The dough should be slightly sticky but manageable.
- Turn the dough out onto a lightly floured surface. Knead the dough until it is smooth and elastic, approximately 4-6 minutes. Proper kneading develops the gluten in the flour, which is essential for the bread’s structure.
- Cover the kneaded dough and let it rest for about 10 minutes. This allows the gluten to relax, making it easier to shape the dough.
- Divide the dough into three equal portions.
- Shape each portion into a 15-inch rope. Try to make the ropes as uniform in thickness as possible for an even braid.
- Place the ropes on a greased baking sheet and braid them together. Pinch the ends to seal and tuck them under the braid to create a neat finish.
- Cover the braided loaf and let it rise in a warm place until doubled in size, approximately 20 minutes. Be careful not to over-proof, as this can cause the bread to collapse during baking.
- Preheat your oven to 375°F (190°C).
- Bake the loaf at 375°F for 25-30 minutes, or until it is golden brown. A good way to check for doneness is to insert a toothpick into the center of the loaf. If it comes out clean, the bread is ready.
- While the loaf is baking, prepare the topping by melting the remaining tablespoon of butter. Combine it with the dried marjoram, dried thyme, parsley flakes, dried basil, dried oregano, dried rosemary, and crushed sage.
- Once the loaf is baked, brush it with the melted herb butter mixture. Sprinkle the remaining herbs evenly over the top of the bread.
- Remove the bread from the baking sheet and transfer it to a wire rack to cool completely. This prevents the bottom of the loaf from becoming soggy.
Expert Tips & Tricks
- Herb Infusion: For an even more intense herb flavor, consider infusing the milk and water mixture with fresh herbs while heating. Simply add a sprig of rosemary or thyme to the liquid and remove it before adding the butter.
- Egg Wash Alternative: If you prefer a shinier crust, brush the loaf with an egg wash (1 egg beaten with 1 tablespoon of water) before baking instead of the herb butter.
- Make-Ahead Option: You can prepare the dough ahead of time and let it rise in the refrigerator overnight. This will develop a deeper flavor in the bread. Just be sure to bring the dough back to room temperature before shaping and baking.
- Kneading Assistance: If you find kneading by hand challenging, you can use a stand mixer with a dough hook attachment to knead the dough.
- Adjusting for Humidity: Depending on the humidity in your area, you may need to adjust the amount of flour slightly. If the dough is too sticky, add a tablespoon of flour at a time until it reaches the desired consistency.
Serving & Storage Suggestions
This Garden Herb Braid is delicious served warm with a simple pat of butter or a drizzle of olive oil. It’s also a wonderful accompaniment to soups, salads, and cheese boards. Leftovers can be stored at room temperature in an airtight container for up to 2 days, in the refrigerator for up to 5 days, or in the freezer for up to 2 months. To reheat, wrap the bread in foil and bake at 350°F (175°C) for 10-15 minutes, or until warmed through. You can also slice the bread and toast it.
Nutritional Information
| Nutrient | Amount per Serving | % Daily Value |
|---|---|---|
| Calories | 170 kcal | 8% |
| Total Fat | 4.7 g | 7% |
| Saturated Fat | 2.7 g | 14% |
| Cholesterol | 10 mg | 3% |
| Sodium | 255 mg | 11% |
| Total Carbohydrate | 27.3 g | 9% |
| Dietary Fiber | 1.2 g | 5% |
| Sugars | 2.5 g | – |
| Protein | 4.4 g | 9% |
Note: Nutritional information is an estimate and may vary based on specific ingredients and serving sizes.
Variations & Substitutions
- Gluten-Free: Substitute all-purpose flour with a gluten-free blend. You may need to add a binder like xanthan gum to help with the dough’s structure.
- Vegan: Replace the milk with a plant-based milk alternative like almond or soy milk. Use a vegan butter substitute and omit the egg, or replace it with a flax egg (1 tablespoon ground flaxseed mixed with 3 tablespoons water).
- Cheese Infusion: Add shredded Parmesan or Asiago cheese to the dough for a cheesy herb braid.
- Garlic Herb: Add 1-2 cloves of minced garlic to the herb mixture for an extra layer of flavor.
- Seasonal Herbs: Use fresh herbs instead of dried herbs when they are in season. You’ll need to use about three times the amount of fresh herbs as you would dried herbs.
- Seed Topping: Sprinkle the loaf with sesame seeds, poppy seeds, or sunflower seeds before baking for added texture and flavor.
FAQs (Frequently Asked Questions)
Q: Can I use active dry yeast instead of rapid rise yeast?
A: Yes, you can. However, you will need to proof the active dry yeast in warm water with a pinch of sugar for about 5-10 minutes before adding it to the other ingredients.
Q: My dough isn’t rising. What could be the problem?
A: Several factors can affect the dough’s rise. Ensure your yeast is fresh and hasn’t expired. The liquid temperature is also critical – too hot, and it can kill the yeast; too cold, and it won’t activate. A warm, draft-free environment is also important for rising.
Q: Can I freeze the baked loaf?
A: Absolutely! Wrap the cooled loaf tightly in plastic wrap and then in foil before freezing. It will keep for up to 2 months. Thaw overnight in the refrigerator before reheating.
Q: The crust of my bread is getting too dark before the inside is cooked. What can I do?
A: Tent the loaf with aluminum foil during the last 10-15 minutes of baking to prevent the crust from burning.
Q: Can I add sun-dried tomatoes to the dough?
A: Yes, chopped sun-dried tomatoes would be a delicious addition! Add about 1/2 cup of chopped sun-dried tomatoes to the dough along with the herbs.
Final Thoughts
I hope you’re inspired to try this Garden Herb Braid. Its comforting aroma and delightful flavor are sure to bring a touch of sunshine to your kitchen. Whether you bake it for a special occasion or a simple weeknight dinner, this bread is a beautiful and delicious addition to any meal. Don’t be afraid to experiment with different herbs and seasonings to create your own unique flavor combinations. And, most importantly, enjoy the process! Happy baking!