
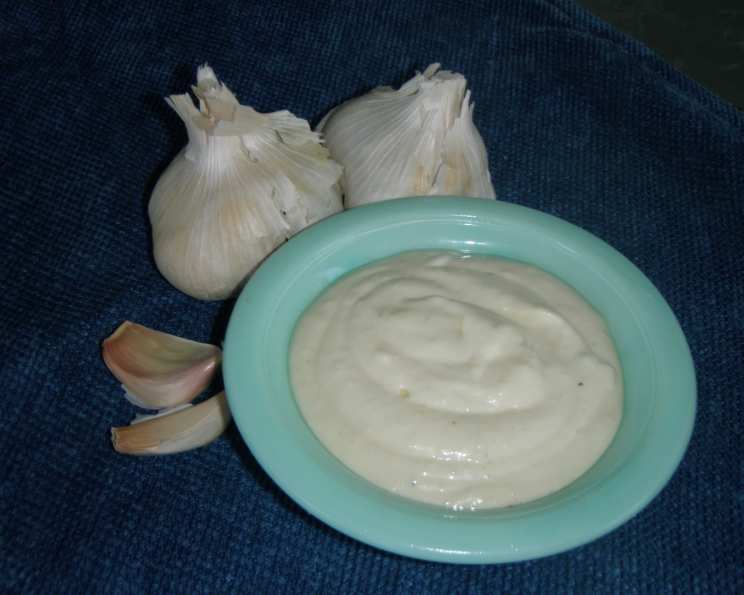
Garlic Aioli: A Taste of the Mediterranean Sun
The first time I tasted true aioli, I was in a small seaside village in Catalonia. The air smelled of salt and grilling fish, and the sun warmed my skin. A simple plate of crusty bread arrived, accompanied by a creamy, intensely garlicky dip. One bite, and I was transported. It wasn’t just mayonnaise; it was something far more vibrant, a concentrated burst of sunshine and spice. This garlic aioli recipe, adapted from that experience, captures that same magic, bringing the flavors of the Mediterranean to your table.
Recipe Overview
- Prep Time: 10 minutes
- Cook Time: 0 minutes
- Total Time: 10 minutes
- Yields: 1 1/2 cups
- Dietary Type: Vegetarian
Ingredients
- 1 1/2 tablespoons minced garlic
- 1 egg, at room temperature
- 1 1/2 cups fruity olive oil
- 1 – 1 1/2 tablespoons fresh lemon juice, to taste
- 1/2 teaspoon salt
- 1/4 teaspoon fresh ground white pepper
Equipment Needed
- Blender or food processor
- Pouring jar
- Bowl
Instructions
-
Begin by combining the minced garlic and egg in a blender or food processor. Puree until the mixture is smooth and homogenous. This step is crucial to evenly distribute the garlic flavor.
-
In a separate pouring jar, mix the olive oil and lemon juice. This mixture will be slowly drizzled into the garlic-egg mixture, emulsifying into a creamy aioli.
-
With the blender or food processor running, gradually add the oil and lemon juice mixture in a very thin, steady stream. This slow incorporation is critical for achieving a stable emulsion. Rushing this step can cause the aioli to separate.
-
Once all the oil mixture has been incorporated and the aioli has thickened, add the salt and white pepper.
-
Whirl the aioli for an additional 10 seconds to fully incorporate the seasonings.
-
Taste the aioli and adjust the seasoning as needed. You may want to add a bit more lemon juice for brightness or salt for flavor enhancement.
-
Transfer the aioli to a bowl, cover it tightly, and refrigerate.
-
Important Note on Emulsification Failure: If the mixture separates or does not thicken properly, do not discard it! You can correct it. Pour all but 1 tablespoon of the separated aioli into another container.
-
Add 1 tablespoon of water to the remaining tablespoon of aioli in the food processor.
-
With the motor running, slowly add the separated aioli back in, drop by drop. The mixture should regain the right consistency. If it doesn’t, repeat the process with another fresh tablespoon of water and aioli. This technique is like magic, gently coaxing the emulsion back together.
-
It is best to prepare this aioli a day in advance. This allows the flavors to mingle and mellow, resulting in a more complex and delicious aioli.
Expert Tips & Tricks
- Use Room Temperature Eggs: This is key for a smooth emulsion. Cold eggs are more likely to cause the aioli to separate.
- High-Quality Olive Oil Matters: Choose a fruity, extra virgin olive oil for the best flavor. Avoid overly bitter oils.
- Garlic Intensity: Adjust the amount of garlic to your preference. Start with less and add more to taste. Remember, the garlic flavor will intensify as it sits.
- The Drizzle is Crucial: The slow, steady drizzle of oil is the most important step. Be patient, and don’t rush it!
- Pulse vs. Continuous Run: Some blenders work better when pulsing the mixture while adding the oil. Experiment to see what works best for your equipment.
- Troubleshooting: If your aioli is too thick, add a teaspoon of water or lemon juice at a time until you reach the desired consistency.
Serving & Storage Suggestions
Serve garlic aioli chilled or at room temperature. It is a versatile condiment that pairs beautifully with a variety of dishes.
- As a Dip: Serve with crusty bread, raw vegetables, or grilled artichokes.
- As a Sauce: Drizzle over grilled fish, chicken, or vegetables. It’s especially delicious with roasted potatoes.
- As a Spread: Use it as a flavorful spread for sandwiches or wraps.
Store leftover aioli in an airtight container in the refrigerator for up to 3-4 days. The flavor may intensify over time. Due to the raw egg content, it is not recommended to freeze aioli. It will separate and lose its creamy texture upon thawing. Aioli should not be left at room temperature for more than 2 hours due to the risk of bacterial growth.
Nutritional Information
| Nutrient | Amount per Serving | % Daily Value |
|---|---|---|
| Calories | 1972.9 kcal | N/A |
| Calories from Fat | 1973 g | 100% |
| Total Fat | 219.2 g | 337% |
| Saturated Fat | 30.9 g | 154% |
| Cholesterol | 124 mg | 41% |
| Sodium | 828.4 mg | 34% |
| Total Carbohydrate | 4 g | 1% |
| Dietary Fiber | 0.3 g | 1% |
| Sugars | 0.5 g | 1% |
| Protein | 4.8 g | 9% |
Note: Nutritional information is an estimate and may vary based on specific ingredients used.
Variations & Substitutions
- Roasted Garlic Aioli: Roast the garlic before mincing it for a milder, sweeter garlic flavor. Wrap a whole head of garlic in foil with olive oil and roast at 400°F (200°C) for 45-60 minutes, or until soft.
- Spicy Aioli: Add a pinch of cayenne pepper or a few drops of your favorite hot sauce for a kick.
- Herb Aioli: Incorporate fresh herbs like parsley, chives, or dill for added flavor and freshness. Finely chop the herbs and add them to the aioli after it has emulsified.
- Lemon Zest Aioli: Add the zest of one lemon for an extra burst of citrus flavor.
- Vegan Aioli: Substitute the egg with 3 tablespoons of aquafaba (the liquid from canned chickpeas) or silken tofu for a vegan version.
- Smoked Paprika Aioli: Add a teaspoon of smoked paprika for a smoky flavor.
- Garlic-Free Aioli (Mayonnaise): If you want to skip the garlic altogether, simply omit it for a basic homemade mayonnaise.
FAQs (Frequently Asked Questions)
Q: Can I use a hand mixer instead of a blender or food processor?
A: While it’s possible, it’s much harder to achieve a stable emulsion with a hand mixer. The steady stream of oil is more difficult to control.
Q: What kind of olive oil is best for aioli?
A: A good quality extra virgin olive oil with a fruity flavor is ideal. Avoid oils that are too bitter or peppery.
Q: How can I tell if my aioli has gone bad?
A: If the aioli has a sour or off smell, or if there is any visible mold, discard it immediately.
Q: My aioli is too garlicky! What can I do?
A: Unfortunately, you can’t remove the garlic flavor once it’s in there. Next time, start with less garlic and add more to taste. You could try serving it with something mild to balance the flavors.
Q: Can I make aioli without lemon juice?
A: Yes, you can substitute the lemon juice with white vinegar or even a bit of water, but the lemon juice adds a brightness that complements the garlic and richness of the oil.
Final Thoughts
Garlic aioli is more than just a sauce; it’s an experience. It’s the taste of sunshine, the aroma of the Mediterranean, and a testament to the power of simple, high-quality ingredients. Don’t be intimidated by the emulsification process – with a little patience and these tips, you’ll be whipping up batches of creamy, flavorful aioli in no time. Try it with grilled seafood, roasted vegetables, or simply slathered on crusty bread. Share your creations and feedback – I’d love to hear how you make this recipe your own.