
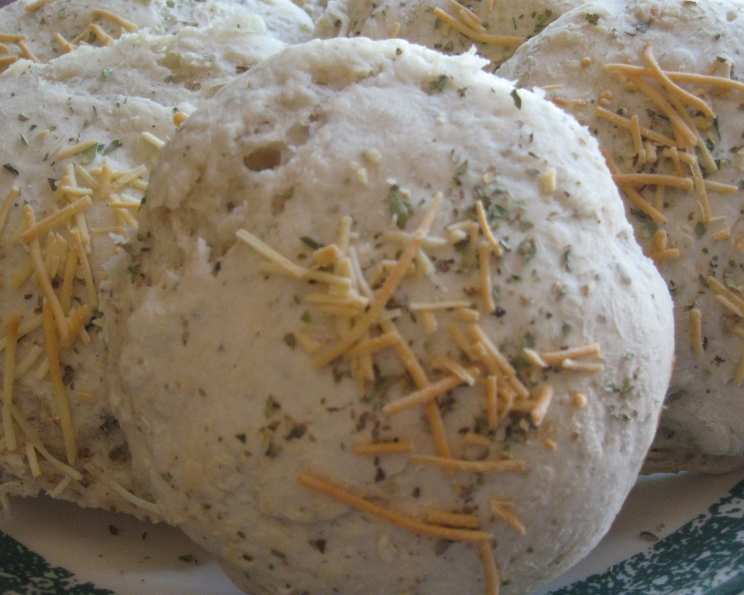
Garlic and Herb Parmesan Buns (ABM)
The aroma alone is enough to transport me back to Sunday dinners at my grandmother’s. She always had a basket overflowing with freshly baked rolls, each one more tempting than the last. But the ones that truly stood out were her garlic and herb rolls – a symphony of savory goodness that perfectly complemented her hearty roasts and simmering stews. The golden crust crackled ever so slightly as you bit into them, giving way to a soft, pillowy interior infused with the earthy flavors of garlic and herbs. These buns are my humble attempt to recapture that warmth and share it with you.
Recipe Overview
- Prep Time: 30 minutes (includes shaping)
- Cook Time: 15 minutes
- Total Time: 55 minutes (plus dough cycle time)
- Servings: 8 buns
- Yield: 8 buns
- Dietary Type: Vegetarian
Ingredients
- 1 1⁄4 cups water
- 1 tablespoon sugar
- 2 teaspoons garlic (minced, or use garlic powder, adjust to taste)
- 2 teaspoons dried Italian herb seasoning
- 1⁄3 cup parmesan cheese, grated
- 3 cups bread flour
- 1 tablespoon fast rising yeast
Equipment Needed
- Bread machine
- Measuring cups and spoons
- Lightly oiled surface
- Knife or dough cutter
- Greased cookie sheet
- Pastry brush or spoon
- Oven
Instructions
-
Prepare the Dough: Place all ingredients into your bread machine, following the specific order recommended by your machine’s manufacturer. Typically, wet ingredients go in first, followed by dry ingredients, with the yeast added last.
-
Start the Dough Cycle: Program your bread machine to the dough cycle. Press Start and let the machine do its work! The dough cycle will handle the kneading and the first rise, which is crucial for developing the gluten and creating a light and airy texture.
-
Shape the Buns: Once the dough cycle is complete, gently remove the dough from the bread machine and place it onto a lightly oiled surface. This will prevent the dough from sticking and make it easier to work with. Use a knife or dough cutter to divide the dough into 8 equal pieces.
-
Form the Buns: Take each piece of dough and shape it into a ball. A simple way to do this is to gently tuck the edges of the dough underneath, creating a smooth, round surface on top.
-
Arrange and Flatten: Place the dough balls onto a greased cookie sheet, leaving some space between each one to allow for expansion during the second rise. Gently flatten each ball slightly with your hand or the bottom of a glass. This will help them bake evenly and create a desirable shape.
-
Second Rise: Cover the cookie sheet with a clean kitchen towel or plastic wrap and place it in a warm area to rise. Let the buns rise until they have doubled in size, which typically takes about 30-60 minutes. The exact time will depend on the temperature and humidity of your kitchen.
-
Preheat the Oven: About 15 minutes before the end of the rising time, preheat your oven to 400°F (200°C). Make sure your oven rack is positioned in the center of the oven for even baking.
-
Prepare for Baking: Once the buns have doubled in size, gently brush the tops with water. This will help them achieve a golden-brown crust.
-
Add Toppings: Sprinkle the tops of the buns with a little bit of extra parmesan cheese. For added flavor variations, you can also sprinkle with garlic powder, Italian herbs, or a pinch of spicy herb mix.
-
Bake: Place the cookie sheet in the preheated oven and bake for 15 minutes, or until the buns are lightly browned. Keep an eye on them during the last few minutes of baking to prevent them from burning.
-
Cool and Serve: Once the buns are baked, remove them from the oven and transfer them to a wire rack to cool slightly. Serve warm and enjoy!
Expert Tips & Tricks
- Garlic Intensity: If you’re a true garlic lover, don’t hesitate to increase the amount of garlic in the recipe. You can also use freshly minced garlic for a more intense flavor. Just be sure to mince it very finely so that it distributes evenly throughout the dough.
- Cheese Variations: Experiment with different types of cheese. Asiago, Romano, or even a blend of Italian cheeses would work beautifully in this recipe.
- Herb Combinations: Feel free to customize the herb blend to your liking. Fresh herbs like rosemary, thyme, and oregano would add a wonderful depth of flavor. If using fresh herbs, use about 1 tablespoon of finely chopped herbs in place of the dried herbs.
- Shiny Crust: For an extra shiny crust, brush the buns with an egg wash (1 egg beaten with 1 tablespoon of water) before baking.
- Make Ahead: The dough can be made ahead of time and stored in the refrigerator for up to 24 hours. Just punch down the dough before refrigerating and let it come to room temperature before shaping and baking.
- Troubleshooting Dough: If your dough is too sticky, add a tablespoon of flour at a time until it becomes manageable. If your dough is too dry, add a teaspoon of water at a time.
Serving & Storage Suggestions
Serve these garlic and herb parmesan buns warm as a delicious accompaniment to soups, salads, pasta dishes, or grilled meats. They’re also fantastic for making sandwiches or serving as a side with brunch.
To store leftovers, let the buns cool completely and then wrap them tightly in plastic wrap or place them in an airtight container. They will keep at room temperature for up to 2 days, in the refrigerator for up to 5 days, or in the freezer for up to 1 month.
To reheat frozen buns, thaw them completely and then warm them in a preheated oven at 350°F (175°C) for about 5-10 minutes, or until heated through. You can also reheat them in the microwave, but they may become slightly softer.
Nutritional Information
| Nutrient | Amount per Serving | % Daily Value |
|---|---|---|
| Calories | 250 kcal | 13% |
| Total Fat | 6g | 8% |
| Saturated Fat | 3g | 15% |
| Cholesterol | 5mg | 2% |
| Sodium | 300mg | 13% |
| Total Carbohydrate | 40g | 15% |
| Dietary Fiber | 2g | 7% |
| Sugars | 3g | |
| Protein | 8g | 16% |
Note: Nutritional information is an estimate and may vary based on specific ingredients and preparation methods.
Variations & Substitutions
- Vegan Option: Substitute the parmesan cheese with a vegan parmesan alternative. Ensure your yeast is vegan-friendly.
- Gluten-Free Option: Use a gluten-free bread flour blend. You may need to adjust the amount of liquid depending on the blend you use. Also, gluten-free doughs often benefit from the addition of xanthan gum.
- Spicy Buns: Add a pinch of red pepper flakes or a dash of cayenne pepper to the dough for a spicy kick.
- Sweet Buns: Reduce the garlic and herbs and add a touch of cinnamon for a sweeter roll, perfect for breakfast or dessert.
- Whole Wheat Buns: Replace up to half of the bread flour with whole wheat flour for a nuttier flavor and increased fiber.
FAQs (Frequently Asked Questions)
Q: Can I make these buns without a bread machine?
A: Yes, you can! You’ll need to knead the dough by hand or with a stand mixer until it’s smooth and elastic, about 8-10 minutes. Then, follow the same rising and baking instructions as described above.
Q: My buns didn’t rise very much. What could be the problem?
A: Several factors can affect rising. Ensure your yeast is fresh, the water is warm (not hot), and the environment is warm enough for the dough to rise.
Q: Can I freeze the unbaked dough?
A: Yes, you can freeze the unbaked dough after shaping it into buns. Place the buns on a baking sheet lined with parchment paper and freeze until solid. Then, transfer them to a freezer bag and store for up to 1 month. When ready to bake, thaw the buns overnight in the refrigerator and then let them rise in a warm place before baking.
Q: The bottoms of my buns are browning too quickly. What should I do?
A: Place another baking sheet underneath the one with the buns to insulate them from the direct heat. This will help prevent the bottoms from burning.
Q: Can I use active dry yeast instead of instant yeast?
A: Yes, you can. Proof the active dry yeast in warm water with a pinch of sugar for 5-10 minutes before adding it to the bread machine.
Final Thoughts
I hope you’ll give these Garlic and Herb Parmesan Buns a try! They’re incredibly versatile and always a crowd-pleaser. Feel free to experiment with different herbs and cheeses to create your own unique flavor combinations. And, most importantly, don’t be afraid to share your creations with friends and family – the joy of baking is best enjoyed when shared! Pair these with a hearty Italian soup for a complete and satisfying meal. Let me know in the comments how your baking adventure goes!