
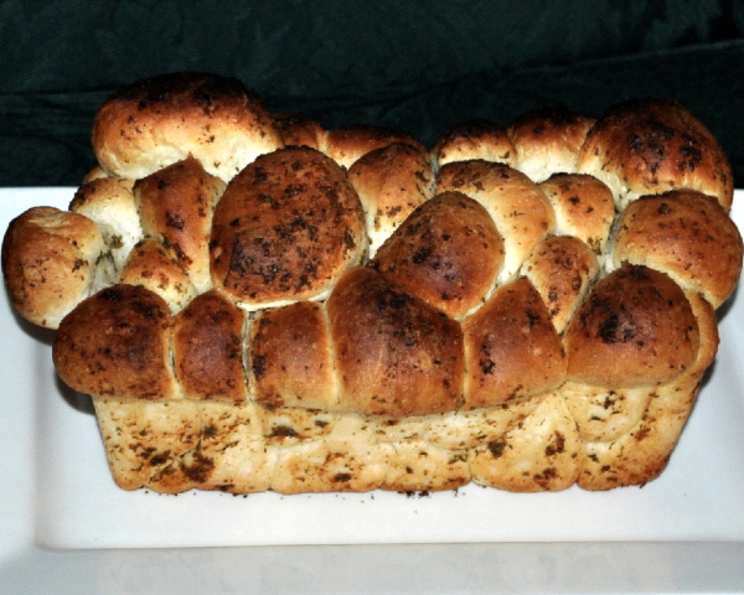
Garlic Bread Loaf: A Symphony of Flavor
The scent of garlic bread baking…it’s a memory etched in my childhood. I can still picture my grandmother, a whirlwind in the kitchen, pulling a golden-brown loaf from the oven. The buttery aroma would fill the entire house, a promise of comfort and simple joy. It wasn’t just bread; it was love baked into every delicious, garlicky bite. This recipe is my humble attempt to recapture that magic.
Recipe Overview
- Prep Time: 10 minutes
- Cook Time: 30 minutes
- Total Time: 40 minutes
- Servings: 6
- Yields: 1 loaf
- Dietary Type: Vegetarian
Ingredients
- 1⁄4 cup butter, melted
- 1 tablespoon dried parsley flakes
- 1 teaspoon garlic powder
- 1⁄4 teaspoon garlic salt
- 1 loaf frozen white bread dough, thawed
Equipment Needed
- Small bowl
- 9×5 inch loaf pan
Instructions
-
Begin by preheating your oven to 350 degrees Fahrenheit (175 degrees Celsius). Make sure the oven rack is positioned in the center for even baking.
-
In a small bowl, prepare the aromatic butter mixture. Combine the melted butter, dried parsley flakes, garlic powder, and garlic salt. Stir well to ensure all ingredients are evenly distributed throughout the butter. This mixture is the key to that intense garlic flavor we all crave.
-
Now, take the thawed white bread dough. The dough should be pliable and easy to work with. If it’s still slightly frozen, let it sit at room temperature for a few more minutes until it softens.
-
Using a sharp knife or kitchen shears, carefully cut the dough into approximately 1-inch pieces. These bite-sized pieces will allow for maximum garlic butter absorption.
-
Dip each piece of dough into the prepared butter mixture, ensuring that each side is well coated. The more butter mixture clinging to the dough, the more flavorful the final product will be.
-
Take a 9×5 inch loaf pan and grease it lightly. This will prevent the bread from sticking and ensure easy removal once baked.
-
Begin layering the butter-soaked dough pieces into the prepared loaf pan. There’s no specific arrangement required, just make sure they’re relatively evenly distributed within the pan. Stacking them loosely will allow for optimal rising.
-
Once all the dough pieces are in the pan, cover it with a clean kitchen towel or plastic wrap.
-
Let the dough rise in a warm place until it has doubled in size. This usually takes about 1 hour, but the exact time may vary depending on the temperature of your environment. A slightly warm oven (turned off!) can provide an ideal environment for proofing.
-
Once the dough has doubled, remove the cover and place the loaf pan in the preheated oven.
-
Bake for 30 minutes, or until the garlic bread is golden brown on top. Keep an eye on it during the last few minutes of baking to prevent burning. If the top starts to brown too quickly, you can loosely tent it with aluminum foil.
-
Once baked, remove the garlic bread loaf from the oven and let it cool in the pan for a few minutes before transferring it to a wire rack to cool slightly.
-
Serve warm and enjoy!
Expert Tips & Tricks
- Garlic Infusion: For an even more intense garlic flavor, consider infusing the butter with fresh garlic cloves. Gently heat the butter with minced garlic over low heat for a few minutes, being careful not to burn the garlic. Strain out the garlic before mixing with the other ingredients.
- Cheese, Please!: Add a layer of shredded mozzarella or Parmesan cheese on top of the loaf during the last 10 minutes of baking for a cheesy garlic bread variation.
- Herb Power: Experiment with different herbs like oregano, basil, or thyme for a unique flavor profile. Fresh herbs, finely chopped, can also be added to the butter mixture.
- Make-Ahead Tip: Prepare the butter mixture ahead of time and store it in the refrigerator. Bring it to room temperature before using. You can also assemble the loaf a few hours in advance and keep it refrigerated until ready to bake; just allow a little extra rising time.
- Don’t Overbake: Overbaking can result in dry, hard garlic bread. Keep an eye on it and remove it from the oven as soon as it reaches a golden-brown color.
Serving & Storage Suggestions
Serve this garlic bread loaf warm, ideally within an hour of baking, for the best flavor and texture. It’s a perfect accompaniment to pasta dishes, soups, salads, or as a standalone appetizer.
- Room Temperature: Leftover garlic bread can be stored at room temperature in an airtight container for up to 2 days.
- Refrigeration: For longer storage, refrigerate the bread in an airtight container for up to 4 days.
- Freezing: To freeze, wrap the cooled garlic bread tightly in plastic wrap, then in foil. It can be frozen for up to 2 months. Thaw completely at room temperature before reheating.
Reheating: To reheat, wrap the garlic bread in foil and bake at 350°F (175°C) for 10-15 minutes, or until warmed through. You can also reheat individual slices in a toaster oven or microwave.
Nutritional Information
| Nutrient | Amount per Serving | % Daily Value |
|---|---|---|
| Calories | 250 kcal | 13% |
| Total Fat | 12g | 18% |
| Saturated Fat | 7g | 35% |
| Cholesterol | 30mg | 10% |
| Sodium | 400mg | 17% |
| Total Carbohydrate | 30g | 10% |
| Dietary Fiber | 1g | 4% |
| Sugars | 3g | – |
| Protein | 5g | 10% |
Note: Nutritional information is an estimate and can vary based on specific ingredients and portion sizes.
Variations & Substitutions
- Whole Wheat: Use a whole wheat bread dough for a healthier twist.
- Gluten-Free: Look for a gluten-free bread dough to make this recipe suitable for those with gluten sensitivities.
- Dairy-Free: Substitute the butter with a dairy-free butter alternative. Ensure all other ingredients are also dairy-free.
- Spicy Garlic Bread: Add a pinch of red pepper flakes to the butter mixture for a spicy kick.
- Italian Herb Blend: Instead of just parsley, use an Italian herb blend for a more complex flavor.
- Sun-Dried Tomato Garlic Bread: Incorporate finely chopped sun-dried tomatoes into the butter mixture for a burst of flavor.
FAQs (Frequently Asked Questions)
Q: Can I use fresh garlic instead of garlic powder?
A: Absolutely! Mince fresh garlic finely and sauté it in the melted butter for a richer, more pungent flavor. Be careful not to burn the garlic.
Q: My dough isn’t rising. What should I do?
A: Ensure your yeast is active and that the rising environment is warm. A slightly warm (but not hot) oven or a sunny spot can help.
Q: Can I use a different type of bread dough?
A: Yes, you can use other types of bread dough, such as Italian bread dough or French bread dough, but adjust baking time as needed.
Q: How do I prevent the bottom of the bread from getting soggy?
A: Make sure to grease the loaf pan well. You can also place a baking sheet underneath the loaf pan to help distribute the heat evenly.
Q: What’s the best way to reheat garlic bread so it stays crispy?
A: Reheating in the oven or toaster oven is best for maintaining crispness. Avoid microwaving, as it can make the bread soggy.
Final Thoughts
This Garlic Bread Loaf is more than just a recipe; it’s an invitation to create memories in your own kitchen. The simplicity of the ingredients and the straightforward instructions make it accessible to bakers of all skill levels. Don’t be afraid to experiment with variations and personalize it to your liking. Gather your loved ones, bake a loaf, and let the irresistible aroma fill your home with warmth and joy. I encourage you to try this recipe and share your feedback! Perhaps pair it with a comforting bowl of tomato soup or a hearty plate of spaghetti – the possibilities are endless. Happy baking!