
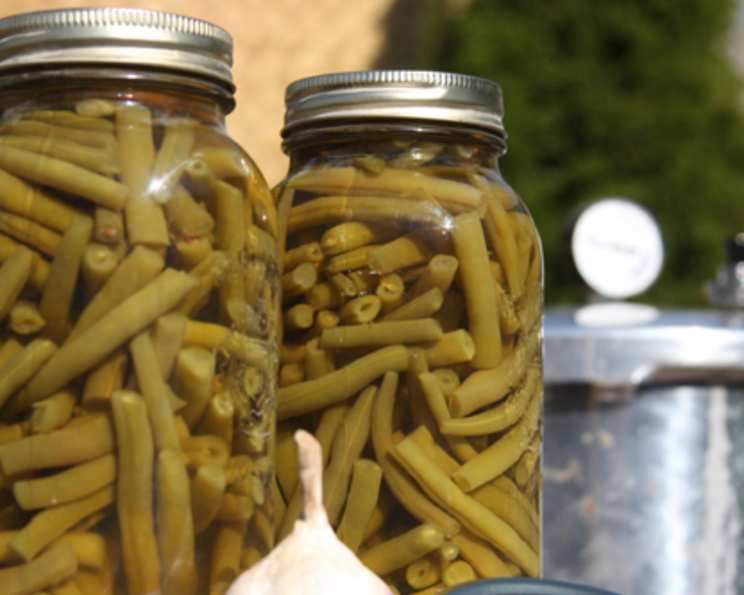
Garlic Canned Green Beans: A Taste of Home, Preserved
The scent of simmering green beans always takes me back to my grandmother’s kitchen. She had the most bountiful garden, and in late summer, it seemed like we were perpetually snapping beans. The rhythmic snap, snap, snap filled the air as we prepared them for canning. While her recipe was simple, the flavor was unmatched – the beans, crisp and bright, tasted of pure sunshine. I remember one year, she experimented by adding a clove of garlic to each jar, and the subtle, savory flavor elevated those humble beans to something truly special. To this day, that hint of garlic reminds me of her warm kitchen and the love she poured into every jar.
Recipe Overview
- Prep Time: 60 minutes
- Cook Time: 25 minutes
- Total Time: 85 minutes
- Yield: Approximately 8 pints
- Dietary Type: Vegan, Gluten-Free, Dairy-Free, Low-Sodium (if salt is omitted)
Ingredients
- 5 lbs fresh green beans
- Water (for washing and boiling)
- Salt (optional, for flavor)
- 8 whole garlic cloves, peeled
Equipment Needed
- Large pot
- Canning jars (pint-sized)
- Canning lids and rings
- Jar lifter
- Pressure canner
- Clean kitchen towels
Instructions
- Begin by thoroughly washing the green beans. Snap or cut off the ends, and then break the beans into bite-sized pieces, approximately 1-2 inches long.
- Place the broken green beans into a large pot, and wash and rinse them again to remove any remaining dirt or debris. This step is crucial for ensuring the cleanliness of your canned goods.
- Cover the green beans in the pot with water. Bring the water to a rolling boil over high heat. Once boiling, let the beans cook for approximately 5-10 minutes. This pre-cooking process helps to reduce the bulk of the beans and ensures even processing later.
- While the beans are boiling, prepare your canning equipment. Sterilize the canning jars in a boiling water bath for at least 10 minutes. Ensure they are completely submerged in the boiling water.
- Also, sterilize the canning lids in hot (not boiling) water. Follow the manufacturer’s instructions for sterilizing the lids. Keep the jars and lids hot until ready to use.
- Once the green beans have boiled for 5-10 minutes, remove them from the heat.
- Place 1 garlic clove into each sterilized pint jar. This will infuse the beans with a delicious garlic flavor during the canning process.
- Using a ladle, carefully pack the hot green beans into the hot jars, leaving approximately 1/4 inch of headspace at the top. Headspace refers to the space between the top of the beans and the lid of the jar.
- Fill the jars with the hot bean water from the pot, maintaining the 1/4 inch headspace. Be sure to remove any air bubbles by gently tapping the jars on a towel-padded surface or by using a non-metallic spatula to run along the inside of the jar.
- If using salt, add 1/4 teaspoon of salt to each pint jar. The salt enhances the flavor of the beans and acts as a natural preservative.
- Carefully wipe the rims of the jars with a clean, damp cloth to remove any food particles or residue. This ensures a proper seal.
- Place the hot, sterilized lids on the jars, and then screw on the bands until they are fingertip tight. Avoid over-tightening, as this can prevent the jars from sealing properly.
- Carefully place the filled jars into a pressure canner, following the manufacturer’s instructions for your specific canner model. Ensure there is enough water in the canner to meet the manufacturer’s requirements.
- Seal the pressure canner, and bring it to the required pressure (10 lbs pressure). Process the green beans for 20 minutes at 10 lbs pressure. Adjust processing time for altitude according to your pressure canner’s manufacturer’s instructions. Incorrect processing can lead to spoilage.
- Once the processing time is complete, turn off the heat and allow the pressure to release naturally inside the canner. Do not attempt to force the pressure down by running cold water over the canner, as this can cause the jars to break or prevent proper sealing.
- Once the pressure has completely returned to zero and the canner has cooled slightly, carefully remove the lid. Use a jar lifter to carefully remove the jars from the canner and place them on a towel-lined surface, leaving space between each jar.
- Allow the jars to cool completely, undisturbed, for 12-24 hours. As the jars cool, you should hear a “popping” sound as the lids seal.
- After the cooling period, check the seals on the jars. Press down on the center of each lid. If the lid doesn’t flex or move, it is properly sealed. If the lid flexes or pops up, the jar did not seal properly. Unsealed jars should be refrigerated immediately and consumed within a few days, or reprocessed with a new lid.
- Remove the rings from the sealed jars. Wash the jars and label them with the date and contents. Store in a cool, dark, and dry place.
Expert Tips & Tricks
- For the best flavor, use freshly picked green beans at their peak ripeness.
- Don’t overcook the beans during the initial boiling stage, as they will continue to cook during the canning process. You want them to retain some firmness.
- If you prefer a stronger garlic flavor, you can add two garlic cloves per jar instead of one.
- Proper headspace is crucial for successful canning. Too little headspace can cause the jars to overflow during processing, while too much headspace can prevent a proper seal.
- Always follow the manufacturer’s instructions for your pressure canner carefully. Improper canning techniques can lead to food spoilage and potential health risks.
- If your green beans are particularly dirty, soak them in cold water for 30 minutes before washing them thoroughly.
- Consider blanching the beans in boiling water then shocking in an ice bath before putting into jars. This can help keep the green beans crispier.
Serving & Storage Suggestions
These garlic canned green beans are a versatile side dish that pairs well with a variety of main courses. Serve them alongside roasted chicken, grilled pork, or a hearty vegetarian casserole. They can be enjoyed warm or cold, straight from the jar.
Once opened, refrigerate any leftover beans in an airtight container and consume them within 3-4 days. Properly sealed and stored canned green beans can last for up to 1 year in a cool, dark, and dry place. Discard any jars that show signs of spoilage, such as bulging lids, a foul odor, or mold.
Nutritional Information
| Nutrient | Amount per Serving (approx. 1/2 cup) | % Daily Value* |
|---|---|---|
| Calories | 30 kcal | 2% |
| Total Fat | 0g | 0% |
| Saturated Fat | 0g | 0% |
| Cholesterol | 0mg | 0% |
| Sodium | 5mg (without added salt) | 0% |
| Total Carbohydrate | 7g | 3% |
| Dietary Fiber | 3g | 12% |
| Sugars | 2g | |
| Protein | 2g | 4% |
| Vitamin A | 350 IU | 7% |
| Vitamin C | 7mg | 12% |
| Iron | 0.5mg | 3% |
*Percent Daily Values are based on a 2,000 calorie diet. Your daily values may be higher or lower depending on your calorie needs.
Variations & Substitutions
- Spicy Green Beans: Add a pinch of red pepper flakes to each jar for a touch of heat.
- Dilled Green Beans: Include a sprig of fresh dill in each jar for a fresh, herbaceous flavor.
- Onion Green Beans: Add a few slices of onion to each jar along with the garlic.
- Vinegar Green Beans: Add a tablespoon of vinegar (white or apple cider) to each jar to add acidity.
- Lower Sodium: Omit the salt entirely or use a low-sodium salt substitute.
FAQs (Frequently Asked Questions)
Q: Why do I need a pressure canner for green beans?
A: Green beans are a low-acid food, which means they require a pressure canner to reach a high enough temperature to kill potentially harmful bacteria like Clostridium botulinum, which causes botulism. Boiling water canning is not safe for low-acid foods.
Q: Can I use frozen green beans instead of fresh?
A: While technically possible, it’s not recommended. Frozen green beans tend to become mushy during processing. Fresh beans will provide the best texture and flavor.
Q: How do I know if my jars are sealed correctly?
A: After cooling for 12-24 hours, the lid of a properly sealed jar should be concave and not flex when pressed. You should also hear a distinct “pop” sound when the jar seals during cooling.
Q: What if my jars don’t seal?
A: If a jar doesn’t seal, you can either reprocess it with a new lid within 24 hours, or refrigerate the beans immediately and consume them within a few days.
Q: Can I reuse canning lids?
A: No, it is not recommended to reuse canning lids. They are designed for single use only and may not create a proper seal if reused. However, canning rings can be reused as long as they are not rusty or damaged.
Final Thoughts
Canning your own garlic green beans is a rewarding experience that allows you to enjoy the taste of fresh, homegrown produce all year round. Not only are these beans delicious, but they’re also a healthier alternative to commercially canned options, with no added preservatives or artificial flavors. So gather your ingredients, put on some music, and embark on this culinary adventure. Share your canned creations with friends and family, and savor the simple pleasure of homemade goodness. Enjoy!