
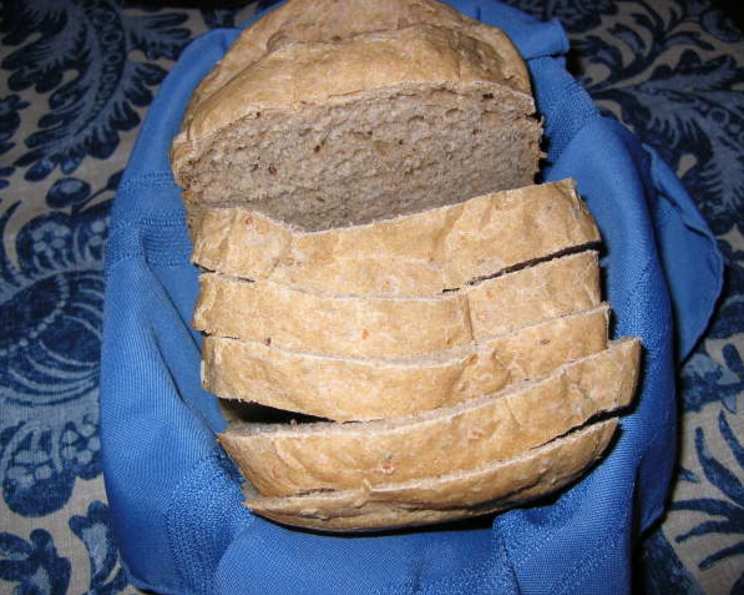
Garlic Dill Bread: A Bread Machine Masterpiece
I still remember the aroma that would fill my grandmother’s kitchen whenever she baked bread. But it wasn’t just any bread; it was the unmistakable scent of garlic and dill, a savory symphony that promised warmth and comfort. As a child, I would eagerly await the moment that loaf emerged from the oven, its crust golden and fragrant. This Garlic Dill Bread, made effortlessly in a bread machine, attempts to capture that same comforting magic. It’s a simpler process than my grandmother’s, perhaps, but the result – that beautiful, flavorful loaf – still connects me to those cherished memories.
Recipe Overview
- Prep Time: 10 minutes
- Cook Time: 4 hours 10 minutes
- Total Time: 4 hours 20 minutes
- Servings: 12
- Yield: 1 ½ lb loaf
- Dietary Type: Vegetarian
Ingredients
- 1 cup water
- ⅓ cup chopped garlic (bottled, for convenience)
- 1 ½ tablespoons butter
- 1 tablespoon dill seed
- ¾ teaspoon salt
- 1 ⅔ cups white bread flour
- 1 ⅔ cups wheat flour
- 1 tablespoon gluten
- 1 ½ teaspoons fast rising yeast or 1 ½ teaspoons quick-rising yeast
Equipment Needed
- Bread Machine
Instructions
-
Carefully measure all ingredients. This is crucial for successful bread making in a bread machine.
-
Place the ingredients into your bread machine pan in the order specified by your bread machine manufacturer. This order is important, as it helps the machine properly incorporate the ingredients. Generally, liquids go in first, followed by dry ingredients, with yeast on top, away from the water and salt.
-
Select the appropriate cycle on your bread machine. This recipe works best with a wheat, sweet, or white bread cycle.
-
Choose the light crust setting. This will ensure the crust doesn’t become too dark or hard.
-
Start the bread machine.
-
If your bread machine has a timer feature, you can use it to delay the start of the baking process so that your bread is fresh and warm when you want it. Just make sure the ingredients are fresh.
-
Once the bread machine cycle is complete, carefully remove the bread from the pan. Use oven mitts, as the pan will be hot.
-
Place the loaf on a wire rack to cool completely before slicing. This allows the steam to escape, preventing a soggy loaf.
Expert Tips & Tricks
- Garlic Intensity: The amount of garlic can be adjusted to your preference. If you love a strong garlic flavor, consider adding a bit more than the recipe calls for. However, be mindful not to add too much, as it can affect the bread’s texture.
- Dill Options: If you don’t have dill seed, you can use dried dill weed. Use about 1 tablespoon of dried dill weed as a substitute. The flavor will be slightly different, but still delicious.
- Flour Power: Using a combination of white bread flour and wheat flour adds both flavor and texture. Bread flour has a higher protein content, which helps to create a good gluten structure. If you only have all-purpose flour, you can use it, but the bread might not rise as high.
- Gluten Boost: Adding gluten is particularly helpful when using a significant amount of whole wheat flour. It strengthens the dough and improves the bread’s rise and texture.
- Yeast Matters: Ensure your yeast is fresh for best results. Expired yeast won’t activate properly, leading to a flat, dense loaf. You can test your yeast by adding a small amount to warm water with a pinch of sugar. If it foams within 5-10 minutes, it’s good to use.
- Dough Consistency: During the initial mixing phase, check the dough’s consistency. If it seems too dry, add a tablespoon of water at a time until it forms a smooth, slightly sticky ball. If it’s too wet, add a tablespoon of flour at a time until the desired consistency is reached.
- Room Temperature: Make sure the water is lukewarm, not hot or cold. Lukewarm water activates the yeast properly.
Serving & Storage Suggestions
This Garlic Dill Bread is delicious served warm with butter, cream cheese, or alongside soups and salads. It’s also a fantastic accompaniment to grilled meats or roasted vegetables. For an extra touch, brush the top of the loaf with melted butter and sprinkle with extra dill before serving.
To store, wrap the cooled loaf tightly in plastic wrap or place it in an airtight container. It will stay fresh at room temperature for 2-3 days. For longer storage, you can freeze the bread for up to 2-3 months. To freeze, slice the bread first, then wrap the slices individually or in small batches before placing them in a freezer-safe bag. This allows you to thaw only what you need. To reheat frozen bread, toast it directly from frozen or thaw it at room temperature before toasting or warming in the oven.
Nutritional Information
| Nutrient | Amount per Serving | % Daily Value |
|---|---|---|
| Calories | 141.2 kcal | N/A |
| Calories from Fat | 18 kcal | N/A |
| Total Fat | 2 g | 3% |
| Saturated Fat | 1 g | 5% |
| Cholesterol | 3.8 mg | 1% |
| Sodium | 158.2 mg | 6% |
| Total Carbohydrate | 27.1 g | 9% |
| Dietary Fiber | 2.8 g | 11% |
| Sugars | 0.1 g | 0% |
| Protein | 4.6 g | 9% |
Variations & Substitutions
- Vegan Option: Substitute the butter with a vegan butter alternative or use olive oil for a different flavor profile.
- Gluten-Free: This recipe contains gluten, but you could experiment with gluten-free bread flour blends designed for bread machines. Be aware that the texture may be different. You may also need to add xanthan gum or other binding agents to improve the dough’s structure.
- Cheese Addition: For a cheesy twist, add ½ cup of shredded cheddar or Parmesan cheese to the bread machine along with the other ingredients.
- Herb Variations: Experiment with different herbs. Rosemary, thyme, or oregano would all complement the garlic flavor nicely.
- Sweet Garlic Dill Bread: Add 2 tablespoons of sugar to the recipe for a sweeter version. This can be great for toast or sandwiches.
FAQs (Frequently Asked Questions)
Q: Can I use fresh garlic instead of bottled chopped garlic?
A: Yes, you can! Use about 4-5 cloves of fresh garlic, minced finely. The flavor will be even more intense and delicious.
Q: What if my bread machine doesn’t have a “wheat” setting?
A: Use the “basic” or “white bread” setting. Monitor the dough during the kneading process and adjust water or flour if needed.
Q: My bread is always dense and doesn’t rise well. What am I doing wrong?
A: Ensure your yeast is fresh, and measure your ingredients accurately. Also, make sure the liquid is lukewarm, not hot, which can kill the yeast.
Q: Can I knead this dough by hand and bake it in the oven?
A: Yes! After the initial mixing in the bread machine, remove the dough, knead it for 5-7 minutes, let it rise in a warm place for 1-1.5 hours, then bake at 375°F (190°C) for 30-35 minutes.
Q: My crust is too dark. How can I prevent this?
A: If your bread machine doesn’t have a crust control setting, try reducing the baking time slightly or placing a piece of foil loosely over the top of the bread during the last 15 minutes of baking.
Final Thoughts
I hope this recipe brings the same joy to your kitchen that it has brought to mine. The beauty of bread-making, especially with a bread machine, is its simplicity. It allows us to create something truly special with minimal effort. This Garlic Dill Bread is more than just a recipe; it’s an invitation to slow down, savor the simple pleasures, and connect with the timeless tradition of baking. So, go ahead, give it a try, and let the aroma of garlic and dill fill your home. And don’t hesitate to share your own variations and feedback – I’d love to hear how it turns out! Perhaps pair it with a hearty tomato soup for the ultimate comfort meal.