
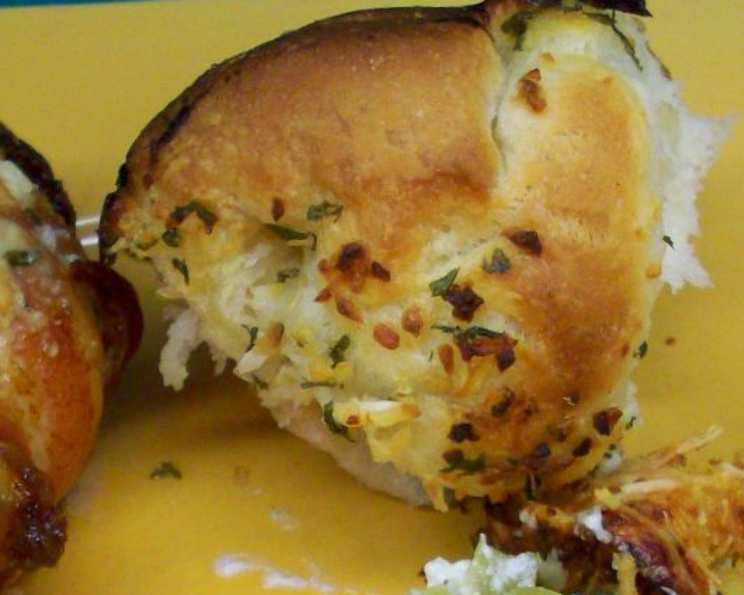
Garlic Lover’s Pull-Apart Bread: A Symphony of Flavor and Fun
I still remember the first time I encountered pull-apart bread. It wasn’t some fancy bakery creation; it was at a potluck, a humble, golden mound radiating an irresistible garlicky aroma. The entire thing was gone in minutes, everyone laughing and tearing off pieces, sticky fingers be damned. From that moment, I was hooked – both on the taste and the communal joy it brought. This recipe aims to recreate that simple magic, transforming ordinary dinner rolls into an extraordinary, shareable delight.
Recipe Overview
- Prep Time: 15 minutes
- Cook Time: 30 minutes
- Rise Time: 1 hour
- Total Time: 1 hour 45 minutes
- Servings: 8
- Yield: 1 loaf
- Dietary Type: Vegetarian
Ingredients
- 12 frozen dinner rolls, thawed
- 1/3 cup butter, melted
- 2 tablespoons fresh parsley, chopped
- 2 tablespoons onions, finely chopped
- 2 teaspoons garlic, finely chopped
Equipment Needed
- Large bowl
- Greased bundt pan or tube pan
Instructions
-
Begin by gently separating the thawed dinner rolls into halves. Place all the halves in a large bowl. This separation allows the flavorful garlic mixture to penetrate every nook and cranny.
-
In a separate small bowl, combine the melted butter, chopped parsley, finely chopped onions, and finely chopped garlic. Stir well to ensure all the ingredients are evenly distributed. This mixture is the heart and soul of the pull-apart bread, so don’t skimp on the garlic!
-
Pour the butter-garlic mixture over the separated dinner rolls in the large bowl. Gently toss the rolls to ensure they are thoroughly coated in the mixture. The goal is to have each roll glistening with garlicky goodness.
-
Arrange the coated dinner rolls in a greased bundt pan or tube pan. Don’t worry about being too precise; a slightly haphazard arrangement adds to the rustic charm of the finished product.
-
Cover the pan with a clean kitchen towel or plastic wrap. Let the rolls rise in a warm place for approximately 1 hour, or until they have doubled in size. This step is crucial for achieving a light and airy texture. The rising time may vary depending on the temperature of your kitchen.
-
Preheat your oven to 350°F (175°C).
-
Once the rolls have doubled in size, carefully place the pan in the preheated oven.
-
Bake for 30 minutes, or until the bread is golden brown on top. Keep a close eye on it during the last few minutes of baking to prevent burning. If the top starts to brown too quickly, you can tent it with aluminum foil.
-
Remove the baked pull-apart bread from the oven and let it cool in the pan for a few minutes before inverting it onto a serving plate. This allows the bread to firm up slightly, making it easier to handle.
Expert Tips & Tricks
- Garlic Power: For an even more intense garlic flavor, consider using roasted garlic in addition to the finely chopped garlic. Roasting mellows the garlic and brings out its sweetness, adding another layer of complexity to the bread.
- Herb Infusion: Feel free to experiment with different herbs. Rosemary, thyme, or oregano would all be delicious additions to the garlic butter mixture.
- Cheese Please: If you’re a cheese lover, sprinkle some grated Parmesan or mozzarella cheese over the rolls before baking for an extra layer of flavor and gooeyness.
- Make-Ahead Magic: You can prepare the rolls up to the point of baking and store them in the refrigerator overnight. Just be sure to let them come to room temperature and rise before baking.
- Don’t Overbake: Overbaking can result in dry bread. Check for doneness by inserting a toothpick into the center; it should come out clean.
Serving & Storage Suggestions
Serve the Garlic Lover’s Pull-Apart Bread warm, as soon as it’s out of the oven, for the best flavor and texture. The aroma alone is enough to draw a crowd! It’s fantastic as an appetizer, a side dish with pasta or soup, or even as a snack on its own.
Leftovers can be stored in an airtight container at room temperature for up to 2 days or in the refrigerator for up to 4 days. To reheat, wrap the bread in foil and warm it in a preheated oven at 350°F (175°C) for about 10-15 minutes, or until heated through. You can also microwave individual portions, but be careful not to overdo it, as this can make the bread tough. Freezing is not generally recommended, as it can affect the texture.
Nutritional Information
| Nutrient | Amount per Serving | % Daily Value |
|---|---|---|
| Calories | 470 kcal | N/A |
| Total Fat | 16g | 24% |
| Saturated Fat | 6.6g | 33% |
| Cholesterol | 25.5mg | 8% |
| Sodium | 759.7mg | 31% |
| Total Carbohydrate | 67.7g | 22% |
| Dietary Fiber | 2.7g | 10% |
| Sugars | 7.3g | N/A |
| Protein | 14.2g | 28% |
Note: Nutritional information is an estimate and may vary based on specific ingredients and preparation methods.
Variations & Substitutions
- Gluten-Free Option: Use gluten-free dinner rolls to make this bread suitable for those with gluten sensitivities.
- Vegan Twist: Substitute the butter with a vegan butter alternative. Ensure the dinner rolls are also vegan-friendly.
- Spicy Kick: Add a pinch of red pepper flakes to the garlic butter mixture for a subtle heat.
- Italian Herb Garden: Replace the parsley with a blend of Italian herbs like basil, oregano, and thyme for a different flavor profile.
- Everything Bagel Seasoning: Sprinkle everything bagel seasoning over the rolls before baking for a savory, crunchy topping.
FAQs (Frequently Asked Questions)
Q: Can I use fresh dinner rolls instead of frozen?
A: Yes, you can use fresh dinner rolls. Just make sure they are roughly the same size as the frozen ones for consistent baking.
Q: Do I have to use a bundt pan?
A: While a bundt pan creates a visually appealing presentation, you can also use a tube pan or even a regular loaf pan. The baking time may need to be adjusted slightly depending on the pan you use.
Q: How can I tell if the bread is done?
A: The bread is done when it’s golden brown on top and a toothpick inserted into the center comes out clean.
Q: What if my rolls don’t double in size during the rising time?
A: Ensure the rolls are in a warm place. If they still don’t rise sufficiently, you can try placing them in a slightly warmed (but turned-off) oven with a bowl of hot water. The steam will help create a humid environment that encourages rising.
Q: Can I add cheese to the garlic butter mixture?
A: Absolutely! Grated Parmesan, mozzarella, or cheddar cheese would all be delicious additions. Just sprinkle it over the rolls before baking.
Final Thoughts
This Garlic Lover’s Pull-Apart Bread is more than just a recipe; it’s an invitation to gather around the table, share, and enjoy the simple pleasures of life. The combination of savory garlic, fragrant herbs, and soft, warm bread is simply irresistible. So, go ahead, give this recipe a try. Don’t be afraid to experiment with different flavors and make it your own. And most importantly, be prepared to share – because this bread is meant to be enjoyed with friends and family! Pair it with a hearty Italian soup or a crisp salad for a complete and satisfying meal. Enjoy!