
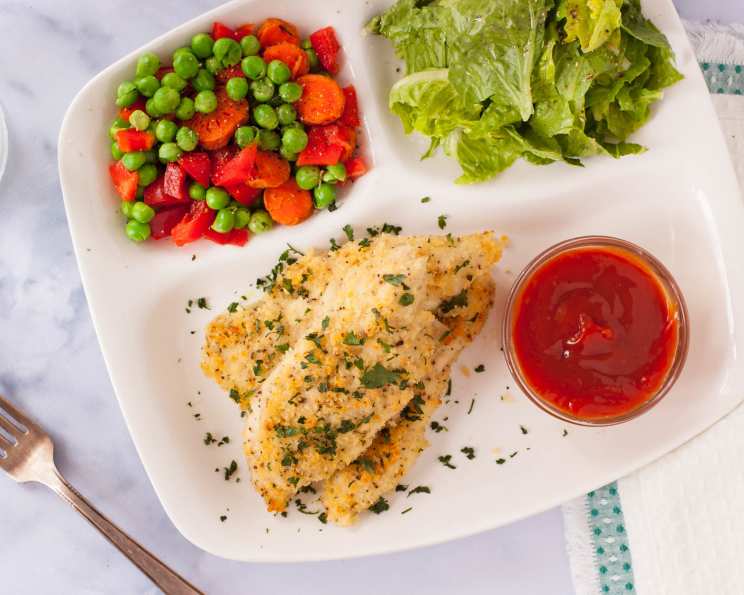
Garlic Panko Chicken Strips: A Crunchy, Flavorful Delight
I remember one particularly hectic week when I was juggling catering gigs, recipe deadlines, and a toddler who decided sleep was optional. Dinner felt impossible. I rifled through the fridge, spotting some chicken breasts and a half-empty bag of panko. The result, born of desperation and a craving for something savory and satisfying, was these Garlic Panko Chicken Strips. The incredible aroma of garlic-infused butter and the satisfying crunch with every bite made even that crazy week feel just a little bit better. Now, it’s a family favorite—a quick, flavorful meal that always delivers.
Recipe Overview
- Prep Time: 15 minutes
- Cook Time: 15-20 minutes
- Total Time: 30-35 minutes
- Servings: 4-6
- Dietary Type: Not Gluten-Free
Ingredients
- 5 tablespoons butter
- 2 cloves garlic, minced
- ¾ cup panko breadcrumbs
- ¼ cup freshly shredded Parmesan cheese
- 1 tablespoon finely chopped fresh parsley (optional)
- Salt and pepper to taste
- 1 ¼ – 1 ½ lbs boneless skinless chicken breasts
Equipment Needed
- Small saucepan
- Shallow dish (e.g., soup plate or pie pan)
- Another shallow dish
- Baking pan
- Non-stick cooking spray
Instructions
- First, melt the butter in a small saucepan over medium-low heat. As the butter begins to melt, add the minced garlic. You want the garlic to infuse the butter without burning, so keep the heat low and watch it closely.
- Once the butter is completely melted and the garlic is fragrant (about 2-3 minutes), remove the saucepan from the heat. Pour this garlic butter mixture into a shallow, flat dish like a soup plate or pie pan. This will be used to coat the chicken.
- In another shallow dish, combine the panko breadcrumbs, shredded Parmesan cheese, and finely chopped fresh parsley (if using). Season generously with salt and pepper to your liking. Remember that Parmesan is already salty, so taste as you go.
- Preheat your oven to 400°F (200°C). Lightly spray a baking pan with non-stick cooking spray to prevent the chicken strips from sticking.
- Prepare the chicken. If you have chicken breasts, remove the tenderloin (the small strip of meat that runs along one side) and leave it whole. Then, cut the breasts crosswise into strips, about 1-inch thick. This ensures even cooking.
- Now, the fun part! Take each chicken piece and roll it in the garlic butter mixture, ensuring it’s well coated. Then, immediately dredge the buttered chicken in the panko mixture, pressing gently to help the breadcrumbs adhere. Make sure the chicken is completely covered in the panko mixture for maximum crunch.
- Place the breaded chicken strips on the prepared baking pan, leaving a little space between each piece.
- If you have any panko mixture left over after coating the chicken, sprinkle it evenly over the chicken strips for extra crunch. Similarly, if there’s any garlic butter remaining, drizzle it over the chicken strips for added flavor and moisture.
- Bake in the preheated oven for 15 to 20 minutes, or until the chicken is just cooked through. The internal temperature should reach 165°F (74°C). The panko crust should be golden brown and crispy.
Expert Tips & Tricks
- Don’t overcrowd the pan: Overcrowding will steam the chicken instead of baking it, resulting in a less crispy crust. Bake in batches if necessary.
- Use high-quality Parmesan: Freshly grated Parmesan will melt better and provide a more intense flavor than the pre-shredded kind.
- Panko substitute: If you absolutely can’t find panko, use regular breadcrumbs, but know that the texture will be different. Pulse the breadcrumbs in a food processor to get a finer crumb for better adherence.
- Flavor boost: Add a pinch of red pepper flakes to the panko mixture for a subtle kick of heat.
- Garlic powder: If you want an even stronger garlic flavor, add a teaspoon of garlic powder to the panko mixture.
- Make ahead: You can bread the chicken strips ahead of time and store them in the refrigerator for up to 24 hours before baking. This is a great time-saver for busy weeknights.
Serving & Storage Suggestions
Serve these Garlic Panko Chicken Strips immediately for the best flavor and crunch. They’re delicious with a variety of dipping sauces, such as honey mustard, ranch, or a simple aioli. They also pair well with sides like roasted vegetables, mashed potatoes, or a crisp salad.
Leftovers can be stored in an airtight container in the refrigerator for up to 3 days. To reheat, bake in a preheated oven at 350°F (175°C) for about 10-15 minutes, or until heated through. Reheating in the oven will help maintain some of the crispness. You can also reheat them in an air fryer for a quicker and crispier result. Microwaving is not recommended as it can make the breading soggy. These are best enjoyed fresh, but reheating is a great way to reduce food waste.
Nutritional Information
| Nutrient | Amount per Serving | % Daily Value |
|---|---|---|
| Calories | 530.9 kcal | N/A |
| Calories from Fat | 251 g | 47% |
| Total Fat | 27.9 g | 42% |
| Saturated Fat | 15 g | 75% |
| Cholesterol | 179.3 mg | 59% |
| Sodium | 713.8 mg | 29% |
| Total Carbohydrate | 20.4 g | 6% |
| Dietary Fiber | 1.3 g | 5% |
| Sugars | 1.8 g | 7% |
| Protein | 47.3 g | 94% |
Note: Nutritional information is an estimate and may vary based on specific ingredients and portion sizes.
Variations & Substitutions
- Gluten-Free: Use gluten-free panko breadcrumbs and gluten-free Parmesan cheese to make this recipe gluten-free.
- Dairy-Free: Substitute the butter with a plant-based butter alternative and omit the Parmesan cheese. You can add nutritional yeast to the panko mixture for a cheesy flavor.
- Spice it up: Add a pinch of cayenne pepper or a dash of hot sauce to the garlic butter for a spicier version.
- Herb variations: Experiment with different herbs in the panko mixture. Try Italian seasoning, dried thyme, or rosemary.
- Lemon zest: Add the zest of one lemon to the panko mixture for a bright and zesty flavor.
- Air Fryer: For a quicker and healthier option, cook the chicken strips in an air fryer at 375°F (190°C) for 12-15 minutes, or until cooked through and golden brown, flipping halfway through.
FAQs (Frequently Asked Questions)
Q: Can I use chicken tenders instead of chicken breasts?
A: Yes, chicken tenders work perfectly well in this recipe. You may need to reduce the baking time slightly as they are generally thinner than chicken breast strips.
Q: Can I prepare the chicken strips ahead of time?
A: Absolutely! You can bread the chicken strips and store them in the refrigerator for up to 24 hours before baking. Just be sure to cover them tightly to prevent the panko from drying out.
Q: How do I know when the chicken is cooked through?
A: The best way to check for doneness is to use a meat thermometer. The internal temperature of the chicken should reach 165°F (74°C).
Q: My panko breadcrumbs are burning before the chicken is cooked. What can I do?
A: Lower the oven temperature slightly to 375°F (190°C) and continue baking until the chicken is cooked through. You can also tent the baking pan with foil to prevent further browning.
Q: Can I freeze the cooked chicken strips?
A: Yes, you can freeze the cooked chicken strips in an airtight container for up to 2 months. Reheat them in the oven or air fryer for the best results.
Final Thoughts
This Garlic Panko Chicken Strips recipe is a winner for its simplicity, speed, and incredible flavor. The combination of garlic-infused butter and crispy panko breadcrumbs creates a dish that’s both comforting and satisfying. I hope you’ll give it a try and discover why it’s become a regular on my family’s dinner table. Feel free to experiment with different variations and let me know what you think! Pair these delightful chicken strips with a crisp green salad and your favorite dipping sauce for a complete and delicious meal.