
Garlic Potato Bread: A Flavorful Twist on a Classic
The aroma of freshly baked bread is a language all its own, instantly transporting me back to my grandmother’s kitchen. She always had a loaf rising on the counter, its yeasty scent a constant comfort. While her classic white bread was a masterpiece, it was her occasional experiments that truly sparked my culinary curiosity. I still remember the first time she pulled a garlic and potato-infused loaf from the oven – the crispy crust, the soft, pillowy interior, and that unforgettable garlicky punch. It was pure magic, and this recipe is my attempt to recapture that delicious memory.
Recipe Overview
- Prep Time: 15 minutes
- Cook Time: 3 hours
- Total Time: 3 hours 15 minutes
- Yields: 1 (2 lb) loaf
- Dietary Type: Vegetarian
Ingredients
- 1 1⁄4 cups water
- 3 tablespoons butter
- 1 egg
- 4 cups bread flour
- 2⁄3 cup instant mashed potatoes (from a box)
- 1 tablespoon sugar
- 1 1⁄2 teaspoons salt
- 1⁄4 – 1⁄2 teaspoon garlic powder, to taste
- 2 teaspoons yeast
Equipment Needed
- Bread machine
Instructions
- Add all ingredients to your bread machine in the order listed: water, butter, egg, bread flour, instant mashed potatoes, sugar, salt, garlic powder (to taste), and yeast. It’s crucial to add the ingredients in the correct order as per your bread machine’s instructions for optimal mixing and rising.
- Select the basic cycle on your bread machine and press start. The machine will handle the kneading, rising, and baking processes automatically. The basic cycle usually includes a kneading phase, a rise, and a bake. Be sure to check your bread machine’s manual for the precise timing of these phases for the basic cycle.
- Allow the bread machine to complete the entire cycle. The total time for a basic cycle varies by machine, but typically lasts around 3 hours.
- Once the cycle is complete, carefully remove the loaf from the bread machine using oven mitts or pot holders, as the pan will be hot.
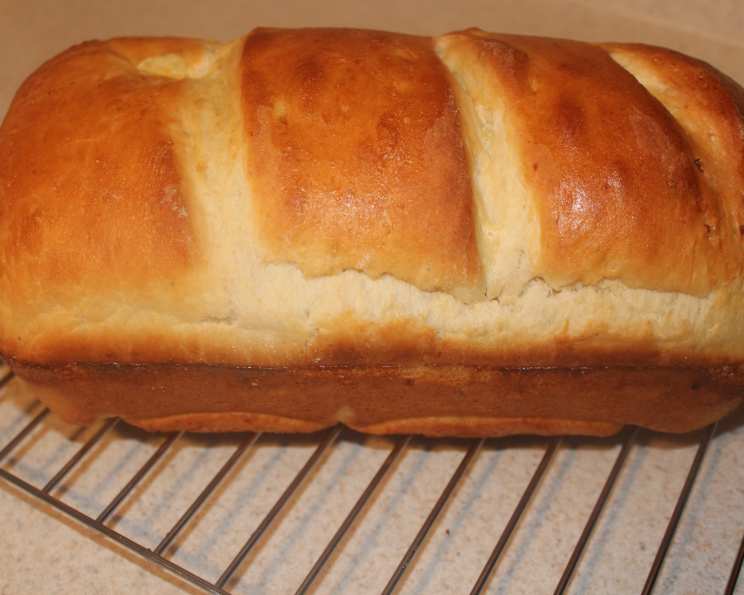
- Let the bread cool completely on a wire rack before slicing and serving. This prevents a gummy texture.
Important Note: If you intend to make a smaller loaf, it is essential to increase the amount of yeast by an additional 1/4 teaspoon to ensure proper rising. Adjusting the other ingredients proportionally is also advisable to maintain the desired flavor and texture.
Expert Tips & Tricks
- Garlic Powder Precision: The amount of garlic powder can be adjusted to your personal preference. Start with 1/4 teaspoon and taste the dough after the initial kneading phase, if possible (refer to your bread machine’s manual), to determine if you want a stronger garlic flavor. Add more, 1/8 teaspoon at a time, until you reach your desired intensity.
- Butter Matters: Using softened butter (but not melted) helps it incorporate more evenly into the dough. This results in a more tender and uniform crumb.
- Potato Power: The instant mashed potato flakes contribute to the bread’s soft texture and subtle potato flavor. Be sure to use plain, unflavored flakes.
- Proofing Perfection: Although the bread machine handles the proofing, ensuring your yeast is active beforehand is essential. You can proof the yeast by mixing it with a tablespoon of warm water and a teaspoon of sugar. If it foams after 5-10 minutes, it’s good to go.
- Enhance the Crust: For a shinier crust, brush the top of the dough with an egg wash (1 egg beaten with 1 tablespoon of water) just before the baking cycle begins.
- Don’t Overbake: Keep an eye on the bread towards the end of the baking cycle. If the crust is browning too quickly, you can tent the loaf with aluminum foil to prevent burning.
Serving & Storage Suggestions
This garlic potato bread is incredibly versatile. It’s delicious served warm with a simple pat of butter, as a base for gourmet grilled cheese sandwiches, or as an accompaniment to hearty soups and stews.
To store the bread, allow it to cool completely before wrapping it tightly in plastic wrap or placing it in an airtight container. At room temperature, it will stay fresh for 2-3 days. For longer storage, you can freeze the bread for up to 2 months. To freeze, wrap the cooled loaf tightly in plastic wrap, then in a layer of aluminum foil. Thaw the bread at room temperature before slicing and serving. You can also reheat individual slices in a toaster or oven for a warm, crusty texture.
Nutritional Information
Note: Nutritional information is an estimate and can vary based on specific ingredient brands and measurements.
| Nutrient | Amount per Serving (approx. 1/12 of loaf) | % Daily Value |
|---|---|---|
| Calories | 101 kcal | 5% |
| Total Fat | 2g | 3% |
| Saturated Fat | 1.1g | 6% |
| Cholesterol | 11.5mg | 4% |
| Sodium | 163.7mg | 7% |
| Total Carbohydrate | 17.9g | 6% |
| Dietary Fiber | 0.8g | 3% |
| Sugars | 0.6g | 1% |
| Protein | 2.7g | 5% |
Variations & Substitutions
- Herbaceous Twist: Add 1-2 tablespoons of chopped fresh herbs, such as rosemary, thyme, or parsley, to the dough along with the other ingredients for an extra layer of flavor.
- Cheesy Goodness: Stir in 1/2 cup of shredded cheddar, Parmesan, or Asiago cheese to the dough for a cheesy garlic potato bread.
- Spicy Kick: Add a pinch of red pepper flakes or a dash of hot sauce to the dough for a touch of heat.
- Gluten-Free Option: While this recipe is specifically designed for bread flour, you can experiment with gluten-free bread flour blends, but be aware that the texture and rise may be different. You might need to adjust the amount of liquid.
- Dairy-Free: Substitute the butter with a dairy-free butter alternative or vegetable oil.
FAQs (Frequently Asked Questions)
Q: Can I make this bread without a bread machine?
A: Yes, although this recipe is written for a bread machine, you can adapt it for traditional baking. You’ll need to knead the dough by hand or with a stand mixer, allow it to rise in a warm place for about an hour, shape it into a loaf, and bake it in a preheated oven at 350°F (175°C) for about 30-35 minutes.
Q: My bread is dense and didn’t rise properly. What could be the reason?
A: This is most often caused by inactive yeast or too much salt. Make sure your yeast is fresh and properly proofed, and measure the salt accurately.
Q: Can I use regular potatoes instead of instant mashed potatoes?
A: While you can experiment with cooked and mashed regular potatoes, instant mashed potato flakes are preferred for their consistent texture and ease of use. If using regular potatoes, make sure they are completely smooth and free of lumps.
Q: The crust of my bread is too hard. How can I prevent this?
A: Try brushing the top of the loaf with melted butter immediately after removing it from the bread machine. You can also tent the loaf with aluminum foil during the last 10-15 minutes of baking to prevent over-browning.
Q: Can I add roasted garlic to this bread?
A: Absolutely! Roasted garlic adds a wonderfully mellow and sweet flavor. Use a 1/4 cup of roasted garlic cloves, mashed into a paste, and add it to the dough along with the other ingredients. You may want to reduce the garlic powder slightly to balance the flavors.
Final Thoughts
This Garlic Potato Bread is more than just a recipe; it’s a warm hug in loaf form, a flavorful tribute to simple pleasures and cherished memories. Don’t be afraid to experiment with different variations to create your own signature loaf. Whether you’re enjoying it with a comforting bowl of soup or slathering it with butter for a quick snack, I hope this bread brings as much joy to your kitchen as it has to mine. Share your creations and feedback – I’d love to hear about your garlic potato bread adventures!