
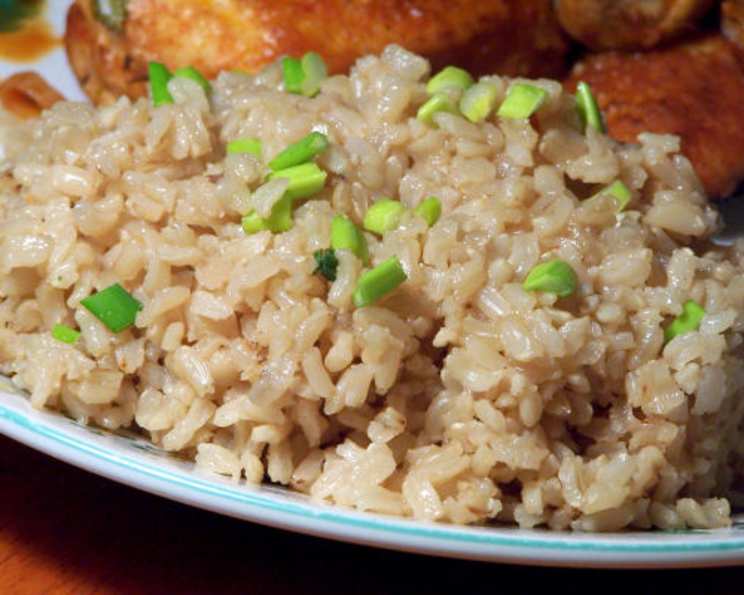
Garlicky Brown Rice: A Simple Side Dish with a Big Flavor Punch
My grandmother, bless her heart, had two signature dishes: pot roast that could melt glaciers and rice that could glue wallpaper. Okay, maybe the rice wasn’t that bad, but it was always a sticky, starchy affair. For years, I avoided making rice at home, convinced I was cursed. Then, I stumbled upon this recipe for Garlicky Brown Rice. It’s so simple, so flavorful, and unbelievably forgiving. No more rice anxiety! This is now my go-to side for everything from grilled chicken to stir-fries, and I can’t wait to share it with you.
Recipe Overview
- Prep Time: 5 minutes
- Cook Time: 50 minutes
- Total Time: 55 minutes
- Servings: 6
- Yield: Approximately 6 cups
- Dietary Type: Gluten-Free, Dairy-Free
Ingredients
- 2 tablespoons olive oil
- 2 cups short-grain brown rice, uncooked
- 6 garlic cloves, minced
- 1 1/2 cups water
- 2 (13 3/4 ounce) cans chicken broth
- 1/2 teaspoon salt
- 4 tablespoons green onions, thinly sliced
Equipment Needed
- Large skillet with a lid
Instructions
-
Heat the olive oil in a large skillet over medium-high heat. The oil should shimmer slightly, indicating it’s hot enough.
-
Add the short-grain brown rice to the skillet and sauté for 1 minute, stirring constantly to prevent burning. This toasting step helps to enhance the nutty flavor of the rice.
-
Add the minced garlic to the skillet and sauté for 2 minutes, continuing to stir frequently. Be careful not to burn the garlic, as it can become bitter. The goal is to lightly brown it and release its fragrant aroma.
-
Stir in the water, chicken broth, and salt. Ensure all the ingredients are well combined.
-
Bring the mixture to a boil over medium-high heat. Once boiling, immediately cover the skillet tightly with a lid.
-
Reduce the heat to medium-low (or the lowest setting that maintains a gentle simmer) and cook for 45 minutes, or until all the liquid is absorbed by the rice. It’s crucial to keep the lid on during this entire cooking process to trap the steam and ensure the rice cooks evenly.
-
After 45 minutes, remove the skillet from the heat and let it sit, covered, for 5-10 minutes. This allows the rice to fully absorb any remaining moisture and helps prevent it from sticking.
-
Remove the lid and spoon the rice into a serving bowl. Fluff the rice gently with a fork to separate the grains.
-
Top with the thinly sliced green onions before serving.
Expert Tips & Tricks
- Garlic is Key: Don’t skimp on the garlic! Six cloves might seem like a lot, but they provide a wonderful depth of flavor. Make sure the garlic is finely minced to avoid large, overpowering chunks.
- Broth Matters: Using good-quality chicken broth will significantly enhance the overall flavor of the rice. I prefer low-sodium broth so I can control the salt content.
- Keep it Covered: Resisting the urge to peek under the lid is essential. Lifting the lid releases steam, which can affect the cooking time and result in unevenly cooked rice.
- Resting is Important: The resting period after cooking allows the rice to steam and become perfectly tender. Don’t skip this step!
- Sauté Timing: Watch the garlic carefully. If it starts to brown too quickly, reduce the heat slightly. Burnt garlic is bitter and will ruin the flavor of the dish.
- Texture Control: For a slightly firmer texture, you can reduce the cooking time by a few minutes. For a softer texture, add a little more broth (about 1/4 cup) and cook for a few extra minutes.
- Flavor Boost: For an even richer flavor, try using homemade chicken broth. You can also add a bay leaf or a sprig of thyme to the skillet while the rice is cooking, removing it before serving.
Serving & Storage Suggestions
Serve this Garlicky Brown Rice as a side dish with grilled chicken, fish, roasted vegetables, or stir-fries. It’s also delicious as a base for grain bowls. The bright green onions add a pop of color and freshness, making it visually appealing.
Leftovers can be stored in an airtight container in the refrigerator for up to 3-4 days. To reheat, microwave individual portions with a splash of water or broth to prevent drying out. You can also reheat it in a skillet over low heat, stirring occasionally.
While technically safe to leave at room temperature for a few hours, it is best to refrigerate the rice as soon as possible to prevent bacterial growth. Freezing is not generally recommended as it can change the texture of the rice, making it mushy upon thawing. However, if you must freeze it, spread the cooked rice in a single layer on a baking sheet until frozen, then transfer it to a freezer bag. Reheat from frozen in the microwave with a little water.
Nutritional Information
Note: Nutritional information is an estimate and may vary based on specific ingredients and portion sizes.
| Nutrient | Amount per Serving | % Daily Value |
|---|---|---|
| Calories | 275 kcal | 14% |
| Total Fat | 8g | 10% |
| Saturated Fat | 1.5g | 8% |
| Cholesterol | 0mg | 0% |
| Sodium | 550mg | 24% |
| Total Carbohydrate | 45g | 16% |
| Dietary Fiber | 3g | 11% |
| Sugars | 1g | 2% |
| Protein | 8g | 16% |
Variations & Substitutions
- Vegetarian/Vegan: Substitute vegetable broth for the chicken broth.
- Spice It Up: Add a pinch of red pepper flakes along with the garlic for a touch of heat.
- Herbaceous: Incorporate fresh herbs like parsley, cilantro, or chives instead of, or in addition to, the green onions.
- Mushroom Medley: Sauté sliced mushrooms with the garlic for an earthy flavor.
- Lemon Zest: Add the zest of one lemon along with the garlic for a bright, citrusy twist.
- Different Rice: While this recipe is designed for short-grain brown rice, you can experiment with other varieties, such as long-grain brown rice or even white rice. Just adjust the cooking time accordingly. Note that long-grain brown rice may require slightly more liquid and a longer cooking time.
- Nutty Addition: Toast some slivered almonds or pine nuts in the skillet after the rice is cooked for added texture and flavor.
FAQs (Frequently Asked Questions)
Q: Can I use regular white rice instead of brown rice?
A: Yes, but you’ll need to adjust the cooking time and liquid. White rice typically requires less liquid and cooks faster than brown rice. Reduce the water and broth by about 1/2 cup and check for doneness after 15-20 minutes.
Q: My rice always sticks to the bottom of the skillet. How can I prevent this?
A: Ensure you’re using a heavy-bottomed skillet and that the heat is on low after bringing the mixture to a boil. The resting period after cooking is also important, as it allows the rice to fully absorb the remaining moisture.
Q: Can I make this recipe ahead of time?
A: Yes! You can cook the rice up to a day in advance and store it in the refrigerator. Reheat it gently in the microwave or skillet before serving.
Q: I don’t have green onions. What can I use instead?
A: Chives, parsley, or even a small amount of finely chopped red onion can be used as a substitute for green onions.
Q: Can I add other vegetables to this dish?
A: Absolutely! Feel free to stir in chopped bell peppers, peas, or carrots along with the garlic. Just make sure the vegetables are finely chopped and sautéed briefly before adding the rice.
Final Thoughts
This Garlicky Brown Rice is more than just a side dish; it’s a comforting, flavorful base for countless meals. Its simplicity belies its incredible taste, making it a perfect weeknight staple. Don’t be intimidated by cooking rice – this recipe is practically foolproof! Give it a try, experiment with different variations, and let me know what you think. Serve it alongside your favorite protein and vegetables for a complete and satisfying meal. Happy cooking!