
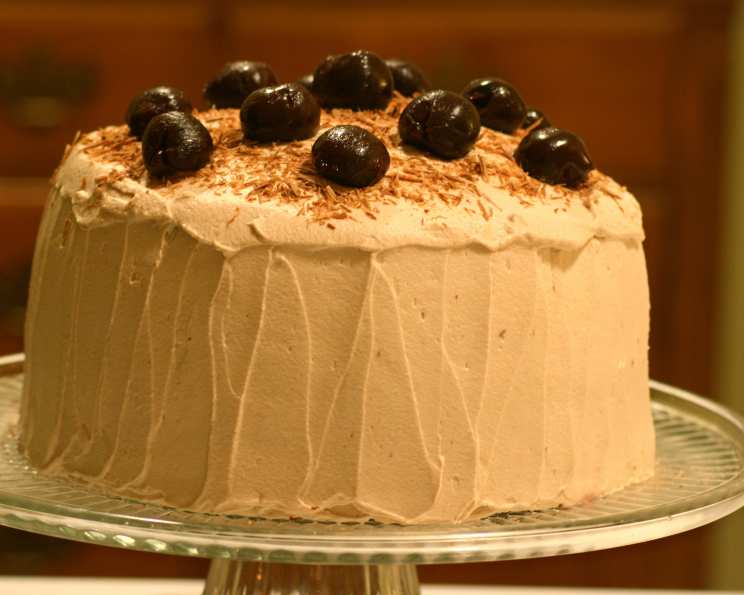
Black Forest Cake: A Decadent Slice of German Heritage
The aroma of Black Forest Cake always transports me back to my grandmother’s cozy kitchen. I remember standing on a stool, mesmerized as she carefully layered the chocolate cake with whipped cream and juicy cherries, the scent of kirsch filling the air. She’d let me sprinkle the chocolate shavings on top, a task I took with utmost seriousness. Each bite of that cake was a little piece of her love, a tradition I’m honored to continue.
Recipe Overview
- Prep Time: 45 minutes
- Cook Time: 35-40 minutes
- Total Time: 1 hour 15 minutes
- Servings: 12
- Yield: 1 Cake
- Dietary Type: Not Gluten-Free
Ingredients
- 1 2⁄3 cups cake flour
- 2⁄3 cup unsweetened cocoa powder
- 1 1⁄2 teaspoons baking soda
- 1 teaspoon salt
- 1⁄2 cup shortening
- 1 1⁄2 cups sugar
- 2 eggs
- 1 teaspoon vanilla extract
- 1 1⁄2 cups buttermilk
- 1⁄2 cup kirsch (cherry liqueur)
- 1 cup butter, softened
- 3 1⁄2 cups confectioners’ sugar
- 1 pinch salt
- 1 teaspoon very strong coffee, brewed
- 2 (14 ounce) cans sweet cherries in heavy syrup, drained
- 2 cups heavy whipping cream
- 1⁄2 teaspoon vanilla extract
- 1 tablespoon kirsch (cherry liqueur)
- 1 ounce semisweet baking chocolate
Equipment Needed
- Two 8-inch round cake pans
- Parchment paper
- Sifter
- Mixer (stand or hand-held)
- Medium mixing bowls
- Thin, sturdy string or dental floss
- Vegetable peeler
Instructions
-
Begin by preheating your oven to 350 degrees Fahrenheit (175 degrees Celsius). Prepare two 8-inch round cake pans by lining the bottoms with parchment paper circles. This ensures the cakes release cleanly.
-
In a medium bowl, sift together the cake flour, cocoa powder, baking soda, and salt. Sifting is crucial for creating a light and airy cake texture. Set this dry mixture aside.
-
In a large mixing bowl, cream together the shortening and sugar using a mixer until the mixture is light and fluffy. This process incorporates air, which is essential for a tender cake.
-
Beat in the eggs, one at a time, followed by the vanilla extract. Ensure each egg is fully incorporated before adding the next.
-
Gradually beat in the dry flour mixture, alternating with the buttermilk. Begin and end with the flour mixture. Add about 1/3 of the flour mixture, then 1/2 cup of buttermilk, repeating until all ingredients are combined. This alternating method prevents the gluten from developing too much, resulting in a more tender cake.
-
Divide the batter evenly between the prepared cake pans. Spread the batter to ensure it reaches all edges of the pans.
-
Bake at 350 degrees Fahrenheit (175 degrees Celsius) for 35 to 40 minutes, or until a toothpick inserted into the center of the cake comes out clean. A few moist crumbs are fine, but the toothpick should not be wet with batter.
-
Cool completely in the pans on a wire rack. Cooling completely prevents the cakes from crumbling when you attempt to slice them.
-
Once the cakes are completely cooled, carefully remove them from the pans and peel off the parchment paper.
-
To create the layers, using a thin but sturdy string (dental floss works well), wrap the string around one of the cakes at the halfway mark, horizontally. Tie the string once and pull slowly, cutting through the cake, forming two layers. Repeat this process on the other cake, resulting in four cake layers.
-
Sprinkle the cut side of each cake layer with kirsch. Don’t be shy – the kirsch adds a signature flavor to the cake.
-
For the filling, in a medium bowl, cream the softened butter until light and fluffy.
-
Gradually add the confectioners’ sugar, a pinch of salt, and the very strong coffee, beating until combined. If the frosting is too thick, add buttermilk as needed to achieve a smooth and spreadable consistency.
-
To assemble the cake, place the first layer of cake on a serving plate (cut side down works best for frosting). Spread with 1/3 of the buttercream filling.
-
Top with 1/3 of the drained sweet cherries.
-
Repeat this layering process with the remaining cake layers, filling, and cherries.
-
In a separate bowl, whip the heavy whipping cream until stiff peaks form. Be careful not to overwhip, or the cream will turn grainy.
-
Beat in 1/2 teaspoon of vanilla extract and 1 tablespoon of kirsch into the whipped cream.
-
Frost the top and sides of the cake with the whipped cream.
-
Finally, decorate the cake with chocolate shavings made using a vegetable peeler on the semisweet baking chocolate.
Expert Tips & Tricks
- For an even richer chocolate flavor, add a tablespoon of instant espresso powder to the dry ingredients.
- If you don’t have kirsch, you can substitute cherry juice or cherry syrup, although the flavor will be slightly different.
- To prevent the cake layers from drying out, wrap them tightly in plastic wrap and refrigerate them overnight after baking.
- For easier frosting, chill the cake layers for about 30 minutes before assembling.
- If you’re short on time, use store-bought chocolate cake layers.
- Use a turntable to evenly apply the whipped cream frosting.
- If the buttercream is too sweet, add a pinch of salt or a teaspoon of lemon juice to balance the flavors.
Serving & Storage Suggestions
Serve the Black Forest Cake chilled or at room temperature. For an elegant presentation, garnish each slice with a fresh cherry. Leftovers should be stored in an airtight container in the refrigerator for up to 3 days. The cake can also be frozen for up to 2 months. Thaw it in the refrigerator overnight before serving. It’s best enjoyed with a cup of strong coffee or a glass of dessert wine.
Nutritional Information
| Nutrient | Amount per Serving | % Daily Value |
|---|---|---|
| Calories | 753 kcal | N/A |
| Total Fat | 41 g | 63% |
| Saturated Fat | 22 g | 111% |
| Cholesterol | 127 mg | 42% |
| Sodium | 563 mg | 23% |
| Total Carbohydrate | 96 g | 31% |
| Dietary Fiber | 4 g | 14% |
| Sugars | 73 g | N/A |
| Protein | 6 g | 12% |
Variations & Substitutions
- Non-Alcoholic Version: Replace the kirsch with cherry juice or cherry syrup for a kid-friendly version.
- Gluten-Free: Use a gluten-free cake flour blend and ensure all other ingredients are gluten-free.
- Vegan: Substitute the eggs with applesauce or flax eggs, use plant-based butter and milk, and opt for vegan chocolate shavings.
- Chocolate Ganache: Instead of whipped cream, cover the cake with a decadent chocolate ganache.
- Seasonal Fruit: Substitute the cherries with other seasonal fruits like raspberries, strawberries, or blackberries.
FAQs (Frequently Asked Questions)
Q: Can I make the cake ahead of time?
A: Yes, you can bake the cake layers a day in advance and store them tightly wrapped in the refrigerator. The buttercream and whipped cream can also be made ahead of time, but assemble the cake just before serving to prevent the whipped cream from softening.
Q: What if I don’t have cake flour?
A: You can make your own cake flour by measuring out 1 cup of all-purpose flour, removing 2 tablespoons, and replacing it with 2 tablespoons of cornstarch.
Q: How can I prevent the cake from drying out?
A: Brush the cake layers with a simple syrup made of equal parts sugar and water, boiled until the sugar dissolves. This will help keep the cake moist.
Q: Can I use fresh cherries instead of canned?
A: Yes, you can use fresh cherries, but make sure to pit them and cook them down slightly with sugar and a bit of kirsch before using them in the filling.
Q: How do I make chocolate shavings?
A: Use a vegetable peeler to shave the long side of a block of semi-sweet chocolate. Make sure the chocolate is at room temperature for best results.
Final Thoughts
Now that you’re armed with this detailed recipe, I encourage you to embark on your own Black Forest Cake adventure. Whether you’re celebrating a special occasion or simply craving a decadent treat, this cake is sure to impress. Don’t be afraid to experiment with variations and make it your own. And most importantly, share it with loved ones and savor every delicious bite!