
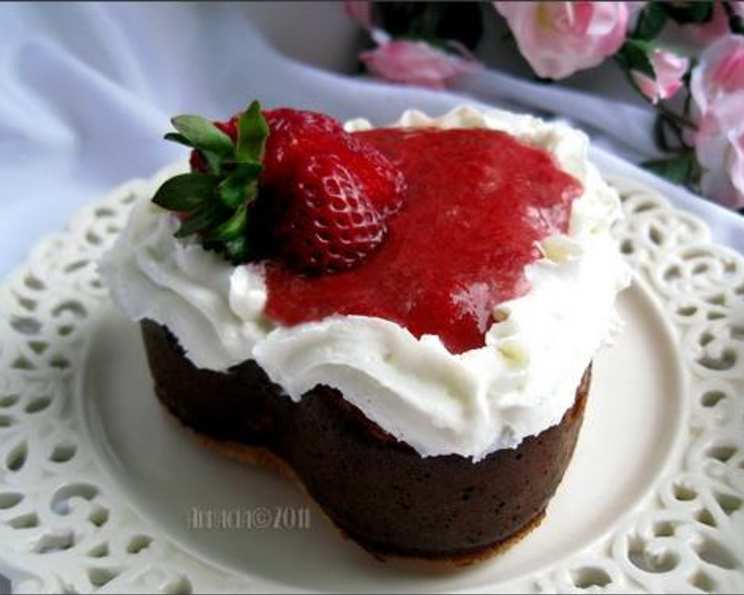
Oma’s Enduring German Cheesecake
The first time I tasted German cheesecake, or Käsekuchen as my Oma called it, I was transported. It wasn’t the cloyingly sweet, dense cheesecake I knew from American diners. This was lighter, almost ethereal, with a subtle tang that danced on my tongue. I remember sitting at her kitchen table, the scent of vanilla and warm baking still lingering in the air, watching her carefully dust the top with powdered sugar. She’d smile, her eyes crinkling at the corners, and say, “Eat, mein Schatz, it will warm your heart.” And she was right. It did.
Recipe Overview
- Prep Time: 20 minutes
- Cook Time: 1 hour 15 minutes
- Total Time: 1 hour 35 minutes
- Servings: 8
- Yield: 1 cheesecake
- Dietary Type: Not Gluten-Free
Ingredients
For the Crust:
- 1/3 cup butter
- 1/3 cup sugar
- 1 egg
- 1 1/4 cups flour
For the Filling:
- 3 eggs
- 24 ounces cream cheese (3 eight-ounce packages), softened to room temperature
- 3/4 cup sugar
- 2 tablespoons flour
- 1 teaspoon vanilla extract
- 2 tablespoons milk
Equipment Needed
- 9-inch springform pan
- Mixing bowls
- Electric mixer (stand or hand-held)
- Measuring cups and spoons
- Rubber spatula
Instructions
-
Preheat your oven to 450°F (232°C).
-
Prepare the Crust: In a mixing bowl, cream together the butter, sugar, and egg until light and fluffy. Gradually add the flour and mix until a dough forms.
-
Press the Crust: Spread the crust mixture evenly across the bottom of the 9-inch springform pan. Don’t worry about pressing it up the sides.
-
Pre-bake the Crust: Bake the crust in the preheated oven for 5 minutes. Remove from the oven and let it cool slightly.
-
Prepare the Filling: While the crust is cooling, prepare the filling. In a large mixing bowl, cream the softened cream cheese until smooth and lump-free. This is crucial for a creamy cheesecake, so be patient and ensure the cream cheese is truly at room temperature.
-
Add Sugar and Vanilla: Gradually add the sugar to the cream cheese, mixing slowly until well combined. Stir in the vanilla extract.
-
Incorporate Eggs: Add the eggs one at a time, mixing well after each addition. Avoid overmixing at this stage, as it can incorporate too much air and cause the cheesecake to puff up and then deflate.
-
Add Flour and Milk: Add the milk and flour to the filling. Mix until just combined. Again, be careful not to overmix.
-
Pour Filling into Crust: Pour the cream cheese filling evenly over the pre-baked crust in the springform pan.
-
Bake the Cheesecake: Bake the cheesecake at 450°F (232°C) for 10 minutes. Then, reduce the oven temperature to 250°F (121°C) and continue baking for an additional 60 minutes, or until the center is just set. The center should still have a slight jiggle.
-
Cool the Cheesecake: Turn off the oven and crack the oven door slightly. Allow the cheesecake to cool in the oven for 1 hour. This slow cooling process helps to prevent cracking.
-
Chill the Cheesecake: Remove the cheesecake from the oven and let it cool to room temperature on a wire rack. Once cooled, refrigerate for at least 4 hours, or preferably overnight, before serving. This allows the cheesecake to fully set and develop its flavor.
-
Release and Serve: To serve, run a thin knife around the edge of the cheesecake to loosen it from the springform pan. Release the sides of the pan. Serve cold, plain or with your favorite toppings.
Expert Tips & Tricks
- Room Temperature Cream Cheese is Key: Using softened cream cheese is non-negotiable. It ensures a smooth, lump-free filling.
- Don’t Overmix: Overmixing the filling after adding the eggs can lead to a cracked cheesecake. Mix only until the ingredients are just combined.
- Bain-Marie (Water Bath): For an even creamier cheesecake, consider baking it in a water bath. Wrap the springform pan tightly in aluminum foil to prevent water from seeping in, and place it in a larger pan filled with about an inch of hot water. This provides gentle, even heat and helps to prevent cracking.
- Preventing Cracks: While this recipe is designed to minimize cracking, every oven is different. If your cheesecake consistently cracks, try reducing the initial baking temperature slightly or placing a pan of water on the rack below the cheesecake.
- Leftover Crust: If you have leftover crust dough, you can freeze it for later use or bake it into small cookies.
- Mixer Technique: As the original recipe notes, mixing ingredients in the order listed does promote a creamier final texture.
Serving & Storage Suggestions
Serve the cheesecake cold, either plain or with your favorite toppings. Fresh berries, whipped cream, fruit compote, or a dusting of powdered sugar are all excellent choices.
Store leftover cheesecake in an airtight container in the refrigerator for up to 5 days. For longer storage, you can freeze the cheesecake. Wrap it tightly in plastic wrap and then in aluminum foil. Frozen cheesecake can be stored for up to 2 months. Thaw overnight in the refrigerator before serving. Note that the texture may be slightly altered after freezing.
Nutritional Information
Here’s an approximate nutritional breakdown per serving:
| Nutrient | Amount per Serving | % Daily Value |
|---|---|---|
| Calories | 425 kcal | 21% |
| Total Fat | 28g | 43% |
| Saturated Fat | 17g | 85% |
| Cholesterol | 175mg | 58% |
| Sodium | 250mg | 11% |
| Total Carbohydrate | 30g | 10% |
| Dietary Fiber | 0g | 0% |
| Sugars | 20g | N/A |
| Protein | 8g | 16% |
Please note that these values are estimates and can vary based on specific ingredients and portion sizes.
Variations & Substitutions
- Lemon Cheesecake: Add the zest of one lemon to the filling for a bright, citrusy flavor.
- Chocolate Chip Cheesecake: Stir in 1/2 cup of mini chocolate chips to the filling before baking.
- Berry Swirl Cheesecake: Gently swirl in your favorite berry preserves into the filling before baking.
- Gluten-Free Crust: Substitute the all-purpose flour in the crust with a gluten-free flour blend. You may need to add a bit more liquid to bring the dough together.
- Extract Variations: Experiment with different extracts, such as almond, rum, or coffee, to customize the flavor of the cheesecake.
FAQs (Frequently Asked Questions)
Q: Why is my cheesecake cracking?
A: Cracking can be caused by baking at too high a temperature, overmixing the filling, or rapid temperature changes. This recipe aims to minimize cracking with a lower baking temperature and a slow cooling process.
Q: Can I use low-fat cream cheese?
A: While you can, the texture and flavor will be affected. Full-fat cream cheese is recommended for the best results.
Q: How do I know when the cheesecake is done?
A: The center of the cheesecake should still have a slight jiggle when it’s done. It will continue to set as it cools.
Q: Can I freeze this cheesecake?
A: Yes, you can freeze the cheesecake. Wrap it tightly in plastic wrap and then in aluminum foil. Thaw overnight in the refrigerator before serving.
Q: Why is it important for the cream cheese to be at room temperature?
A: Softened cream cheese blends smoothly into the other ingredients, preventing lumps and ensuring a creamy texture.
Final Thoughts
This German cheesecake recipe is more than just a dessert; it’s a connection to family, tradition, and the simple pleasures of life. It’s a reminder that sometimes, the most comforting and satisfying dishes are the ones passed down through generations. I encourage you to try this recipe and share it with your loved ones. Experiment with different flavors and toppings to make it your own. And most importantly, enjoy the process of creating something delicious that will warm your heart, just like Oma’s Käsekuchen always warmed mine. Guten Appetit!