
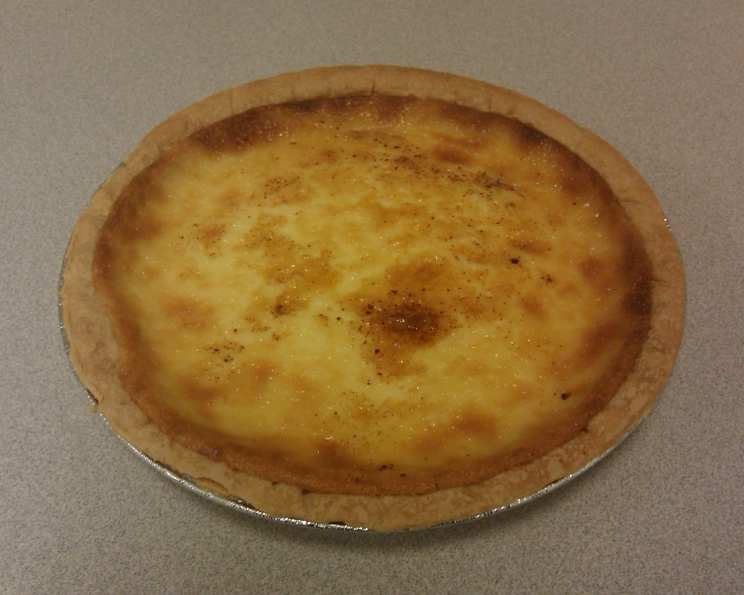
Rediscovering Grandma’s Kitchen: Gerschuh’s Old Fashioned Sugar Cream Pie
The aroma alone transports me back to Sunday afternoons at my grandmother’s. A symphony of warm vanilla, sweet cream, and a hint of cinnamon filled her cozy kitchen, always culminating in the unveiling of her masterpiece: a sugar cream pie. It wasn’t just dessert; it was a symbol of her love, patience, and the comforting embrace of home. Each bite was a sweet, nostalgic journey, and now, I’m eager to share this cherished recipe that evokes those beautiful memories.
Recipe Overview
- Prep Time: 15 minutes
- Cook Time: 1 hour – 1 hour 15 minutes (depending on oven)
- Total Time: 1 hour 15 minutes – 1 hour 30 minutes
- Servings: 6
- Yield: 1 pie
- Dietary Type: Not Gluten-Free
Ingredients
- 1 cup sugar
- 5 tablespoons flour
- 1 dash salt
- 2 cups whipping cream
- 1 cup half-and-half
- 2 egg yolks
- 1 teaspoon vanilla
- 1 9-inch unbaked pie shell (store-bought or homemade)
- 2 tablespoons butter, cold and chopped
- ½ teaspoon ground cinnamon
Equipment Needed
- Mixing bowl
- Whisk
- Measuring cups and spoons
- 9-inch pie plate
- Oven
Instructions
-
Preheat your oven to 350°F (175°C). This precise temperature is crucial for the delicate custard to set properly without scorching.
-
In a mixing bowl, thoroughly combine the sugar and flour. This step ensures even distribution of the flour, which helps prevent lumps in the final pie filling.
-
Add the salt to the sugar and flour mixture, followed by the whipping cream. Whisk until well incorporated and the mixture is smooth.
-
In a separate bowl, whisk together the half-and-half and egg yolks. Gently stir this mixture into the sugar mixture, then add the vanilla. Be careful not to overmix.
-
Gently blend the entire mixture until just combined. Avoid vigorous beating, which can introduce too much air and affect the pie’s texture. You want a smooth, homogenous mixture.
-
Pour the mixture into your unbaked 9-inch pie shell. Ensure the filling is evenly distributed within the crust.
-
Evenly distribute the cold, chopped butter over the top of the pie filling. The cold butter creates little pockets of richness that melt into the custard as it bakes.
-
Sprinkle the ground cinnamon evenly over the top of the pie. Cinnamon adds a warm, aromatic touch that complements the creamy sweetness.
-
Bake the pie until the filling is completely set when the pie is gently jiggled. The key here is patience. Start checking for doneness after about an hour in a conventional oven.
-
Baking times will vary. In a convection oven, this might take approximately 1 hour and 15 minutes. In a standard home oven, begin checking the pie around the 1-hour mark. You want the filling to be set but with a slight jiggle in the very center.
-
The ultimate test is when “it bubbles through for 10 minutes.” This means you’ll see the filling gently bubbling at the surface for the last 10 minutes of baking, indicating it’s properly cooked. If the crust begins to brown too quickly, you can loosely tent the pie with aluminum foil.
Expert Tips & Tricks
- Use high-quality ingredients: The simple nature of this pie means the quality of your ingredients shines through. Opt for fresh, full-fat whipping cream and good vanilla extract for the best flavor.
- Cold Butter is Key: Don’t skip the step of chopping the butter and keeping it cold. The small bits of cold butter distributed across the top melt during baking, creating a delightful, slightly browned surface and enriching the custard.
- Prevent a Soggy Crust: Blind baking your pie crust for about 10 minutes before adding the filling can help prevent a soggy bottom.
- Oven Variations: Every oven is different. Use the baking times as a guide, but always rely on visual cues – the set of the filling and the bubbling – to determine when the pie is done.
- Cooling is Crucial: Allow the pie to cool completely on a wire rack before slicing and serving. This allows the filling to fully set and prevents it from being runny.
- Troubleshooting: If the top is browning too quickly, create a foil ring to protect the crust edges. If the pie cracks, don’t worry! It will still taste delicious.
Serving & Storage Suggestions
This Old Fashioned Sugar Cream Pie is best served slightly chilled or at room temperature. A dollop of freshly whipped cream or a scoop of vanilla ice cream enhances the experience.
- Storage: Store leftover pie in the refrigerator, covered, for up to 3 days.
- Room Temperature: It’s generally not recommended to leave the pie at room temperature for more than 2 hours due to the dairy content.
- Freezing: While you can technically freeze this pie, the texture may change slightly upon thawing. If you choose to freeze it, wrap it tightly in plastic wrap and then foil. Thaw it in the refrigerator overnight.
- Reheating: Gently reheat slices in a low oven (around 250°F or 120°C) for about 10-15 minutes, or until slightly warmed through.
Nutritional Information
| Nutrient | Amount per Serving | % Daily Value |
|---|---|---|
| Calories | 683 kcal | N/A |
| Calories from Fat | 442 g | 65% |
| Total Fat | 49.2 g | 75% |
| Saturated Fat | 26.6 g | 132% |
| Cholesterol | 196.7 mg | 65% |
| Sodium | 258.3 mg | 10% |
| Total Carbohydrate | 56.4 g | 18% |
| Dietary Fiber | 1.4 g | 5% |
| Sugars | 33.6 g | N/A |
| Protein | 6.2 g | 12% |
Note: Nutritional information is an estimate and can vary based on specific ingredients and portion sizes.
Variations & Substitutions
- Crust Alternatives: For a gluten-free version, use a gluten-free pie crust recipe or a store-bought gluten-free crust.
- Dairy-Free Option: While not traditional, you could experiment with using full-fat coconut cream in place of the whipping cream and half-and-half. Keep in mind this will alter the flavor.
- Spice Variations: Add a pinch of nutmeg or cardamom to the filling for a warmer, more complex flavor profile.
- Seasonal Twists: In the fall, consider adding a tablespoon of pumpkin puree to the filling for a subtle pumpkin spice flavor.
- Extract Additions: You could add a 1/4 teaspoon of almond extract with the vanilla.
FAQs (Frequently Asked Questions)
Q: Why is my sugar cream pie runny?
A: This is usually caused by underbaking. Ensure the filling is set with only a slight jiggle in the center before removing it from the oven. Also, be sure to let it cool completely, as it continues to set as it cools.
Q: Can I use a pre-made pie crust?
A: Absolutely! Using a store-bought crust is a great time-saver. Just make sure it’s a 9-inch crust and that you follow the baking instructions carefully.
Q: How do I prevent the crust from burning?
A: If the crust starts to brown too quickly, loosely tent it with aluminum foil during the last portion of baking. You can also buy or make crust shields for this purpose.
Q: Can I add other flavors to this pie?
A: Yes, you can! Consider adding a touch of almond extract or a pinch of nutmeg for a flavor twist. Just be mindful of how the additions affect the overall balance of the pie.
Q: How long does the pie need to cool before serving?
A: It’s best to let the pie cool completely for at least 2-3 hours. This allows the filling to fully set, making it easier to slice and serve.
Final Thoughts
This Gerschuh’s Old Fashioned Sugar Cream Pie is more than just a dessert; it’s a piece of history and a taste of pure comfort. With simple ingredients and straightforward steps, it’s a recipe that’s accessible to bakers of all levels. I encourage you to try this recipe, bring a little bit of nostalgia into your kitchen, and create your own sweet memories. Don’t hesitate to experiment with variations, share your creations, and most importantly, savor every delicious bite!