
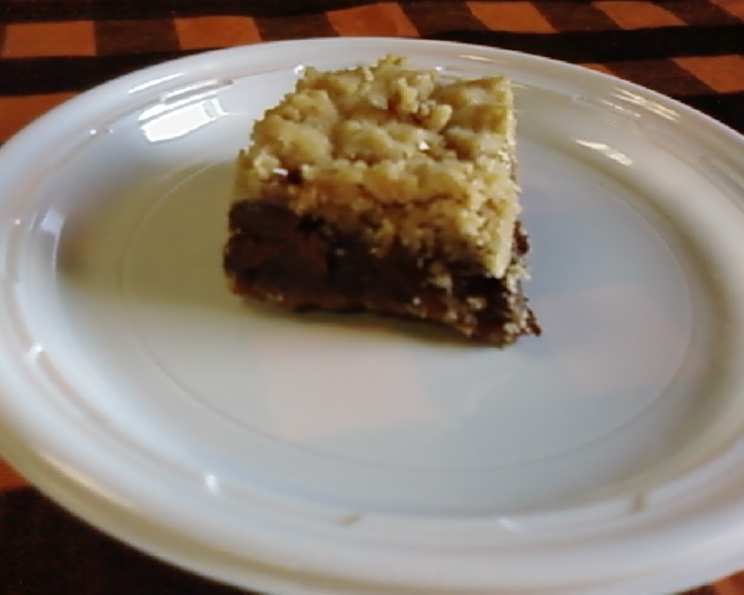
Gina’s Oatmeal Caramelitas: A Slice of Sweet Nostalgia
The aroma alone transports me back to countless potlucks, school bake sales, and summer picnics. Buttery oats, molten chocolate, and gooey caramel all vying for attention in each irresistible bite—Gina’s Oatmeal Caramelitas were always the star. I remember sneaking extra squares from the dessert table as a kid, always making sure to grab one with plenty of nuts. Now, decades later, the taste still evokes warmth, comfort, and a flood of happy memories. This isn’t just a recipe; it’s a cherished tradition.
Recipe Overview
- Prep Time: 20 minutes
- Cook Time: 35 minutes
- Total Time: 55 minutes
- Yields: 1 9 x 13 inch pan
- Serves: 24
- Dietary Type: Vegetarian
Ingredients
- 2 cups flour
- 2 cups quick-cooking oats
- 1 1/2 cups brown sugar, firmly packed
- 1 teaspoon baking soda
- 1/2 teaspoon salt
- 1 1/2 cups butter, melted (3 sticks)
- 2 cups chocolate chips
- 1 cup nuts, chopped (peanuts, walnuts, or pecans are great!) (optional)
- 1 1/2 cups caramel ice cream topping
- 3 tablespoons flour
Equipment Needed
- 9 x 13 inch baking dish
- Mixing bowls
- Measuring cups and spoons
- Spatula or wooden spoon
Instructions
-
Preheat your oven to 350 degrees F (175 degrees C).
-
Lightly grease a 9 x 13-inch baking dish with butter or cooking spray to prevent sticking.
-
In a large mixing bowl, combine the flour, quick-cooking oats, brown sugar, baking soda, and salt. Mix well with a fork or whisk to ensure the baking soda is evenly distributed.
-
Pour the melted butter into the dry ingredients. Mix with a spatula or wooden spoon until well combined. The mixture should form coarse crumbs.
-
Press half of the crumb mixture evenly into the prepared baking dish. Use the bottom of a measuring cup or your hands to firmly pack it down to create a solid base.
-
Bake the crust in the preheated oven for 15 minutes. This par-baking helps prevent the crust from becoming soggy later on.
-
Remove the baking dish from the oven. Sprinkle the chocolate chips evenly over the baked crust.
-
If using, sprinkle the chopped nuts over the chocolate chips. Press them lightly into the chocolate to help them adhere.
-
In a separate bowl, mix together the caramel ice cream topping and the remaining 3 tablespoons of flour. The flour helps to thicken the caramel slightly and prevent it from running too much during baking.
-
Drizzle the caramel mixture evenly over the chocolate chips and nuts. Try to distribute it as evenly as possible so every bite has that delicious caramel flavor.
-
Sprinkle the remaining crumb mixture over the caramel topping. Gently press it down slightly to help it adhere to the caramel.
-
Bake for an additional 20-30 minutes, or until the topping is golden brown and the caramel is bubbly. Keep a close eye on it towards the end of the baking time to prevent burning.
-
Remove from the oven and let the Caramelitas cool completely in the baking dish. This is crucial for easy cutting, as the caramel needs time to set.
-
Once completely cooled, chill in the refrigerator for at least 2 hours (or even overnight) for easier slicing.
-
Cut into squares and serve.
Expert Tips & Tricks
- Melt the butter carefully: Avoid overheating the butter, as this can cause it to separate. Microwave in short bursts (15-20 seconds) or melt it in a saucepan over low heat.
- Don’t overbake: Overbaking will result in dry, hard Caramelitas. Check for doneness by looking for a golden-brown color on top and a slightly set caramel layer.
- Use high-quality chocolate chips: The quality of the chocolate chips will significantly impact the overall flavor of the bars. Semi-sweet or dark chocolate chips work best.
- For a chewier texture: Substitute some of the all-purpose flour with whole wheat pastry flour.
- If the topping starts to brown too quickly: Tent the baking dish with aluminum foil to prevent burning.
- Make-ahead tip: Prepare the crumb mixture ahead of time and store it in an airtight container in the refrigerator.
Serving & Storage Suggestions
Gina’s Oatmeal Caramelitas are best served chilled or at room temperature. They’re delicious on their own, but also pair well with a scoop of vanilla ice cream or a dollop of whipped cream.
- Storage: Store leftover Caramelitas in an airtight container at room temperature for up to 3 days, in the refrigerator for up to a week, or in the freezer for up to 2 months.
- Reheating: Reheat individual squares in the microwave for a few seconds if desired, but they are generally best enjoyed cold or at room temperature.
- Freezing: For best results, wrap the Caramelitas tightly in plastic wrap and then place them in a freezer-safe bag or container.
Nutritional Information
Here’s an approximate nutritional breakdown per serving:
| Nutrient | Amount per Serving | % Daily Value |
|---|---|---|
| Calories | 339.7 kcal | N/A |
| Calories from Fat | 146 g | N/A |
| Total Fat | 16.3 g | 25% |
| Saturated Fat | 9.9 g | 49% |
| Cholesterol | 30.7 mg | 10% |
| Sodium | 261.6 mg | 10% |
| Total Carbohydrate | 49 g | 16% |
| Dietary Fiber | 2 g | 7% |
| Sugars | 21 g | N/A |
| Protein | 3.3 g | 6% |
Please note that these values are estimates and may vary depending on the specific ingredients used.
Variations & Substitutions
- Gluten-Free Caramelitas: Use a gluten-free all-purpose flour blend in place of the regular flour. Be sure to choose a blend that contains xanthan gum for binding.
- Vegan Caramelitas: Substitute the butter with a vegan butter alternative. Ensure the chocolate chips and caramel topping are also vegan-friendly.
- Nut-Free Caramelitas: Omit the nuts entirely or replace them with seeds, such as sunflower seeds or pumpkin seeds.
- Different Chocolate: Experiment with different types of chocolate chips, such as milk chocolate, white chocolate, or even peanut butter chips.
- Spiced Caramelitas: Add a pinch of cinnamon, nutmeg, or ginger to the crumb mixture for a warm, spiced flavor.
- Salted Caramelitas: Sprinkle a pinch of sea salt on top of the Caramelitas after baking to enhance the sweetness of the caramel.
FAQs (Frequently Asked Questions)
Q: Can I use regular oats instead of quick-cooking oats?
A: While you can, the texture will be different. Quick-cooking oats create a more tender and cohesive crumb. If using regular oats, pulse them a few times in a food processor to break them down slightly.
Q: My caramel is too runny. What did I do wrong?
A: Ensure you are using caramel ice cream topping, not caramel sauce. Also, make sure you are mixing the caramel topping with the 3 tablespoons of flour, as this helps to thicken it.
Q: How do I prevent the chocolate chips from burning?
A: Ensure that the oven temperature is accurate. If your oven tends to run hot, consider reducing the temperature by 25 degrees F (15 degrees C). You can also tent the baking dish with foil during the last few minutes of baking.
Q: Can I use a different size baking dish?
A: Yes, but the baking time may need to be adjusted. If using a smaller baking dish, the Caramelitas will be thicker and may require a longer baking time. If using a larger baking dish, they will be thinner and may require a shorter baking time.
Q: Why do I need to chill the Caramelitas before cutting?
A: Chilling allows the caramel to set properly, making it much easier to cut into clean squares. If you try to cut them while they are still warm, the caramel will be very messy and the bars will fall apart.
Final Thoughts
Gina’s Oatmeal Caramelitas are more than just a dessert; they’re a taste of home, a memory made tangible. Whether you’re baking them for a potluck, a bake sale, or simply to enjoy with your family, I hope this recipe brings you as much joy as it has brought me over the years. Don’t be afraid to experiment with variations and make them your own. And most importantly, share them with someone you love! I’d love to hear how your Caramelitas turn out, so please feel free to leave a comment with your feedback or any creative twists you’ve added. Happy baking!