
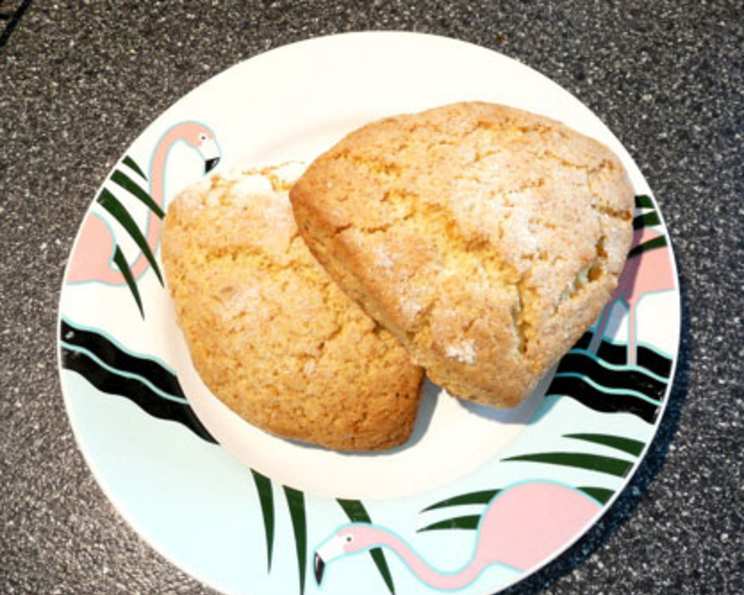
Ginger Orange Marmalade Scones: A Burst of Sunshine in Every Bite
I still remember the first time I tasted a truly exceptional scone. It was at a tiny, sun-drenched bakery in the Cotswolds, and the aroma of freshly baked goods hung heavy in the air. The scone, still warm from the oven, was studded with jewel-like pieces of candied ginger and had a subtle citrus fragrance that danced on my palate. That single bite ignited a lifelong passion for perfecting the art of the scone, and these Ginger Orange Marmalade Scones are my humble tribute to that magical moment. The warmth of the ginger paired with the tangy sweetness of the orange marmalade takes me right back to that quaint bakery with every bite.
Recipe Overview
- Prep Time: 8 minutes
- Cook Time: 10 minutes
- Total Time: 18 minutes
- Yields: 8 scones
- Serves: 8
- Dietary Type: Vegetarian
Ingredients
- 2 cups flour
- ¼ cup sugar
- 1 tablespoon baking powder
- ½ teaspoon salt
- ½ cup butter, chilled and cut into pieces
- ½ teaspoon ginger (or more for a more gingery taste)
- ¼ cup orange marmalade (chunky kind with bits of orange peel)
- 1 egg
- ¼ cup milk
- Sugar (for sprinkling)
Equipment Needed
- Large mixing bowl
- Fork or pastry cutter
- Rolling surface
- Knife or pastry cutter
- Baking sheet
- Parchment paper
Instructions
-
Preheat your oven to 400°F (200°C). Line a baking sheet with parchment paper. This prevents the scones from sticking and makes cleanup a breeze.
-
In a large mixing bowl, whisk together the flour, sugar, baking powder, salt, and ginger. Ensure all dry ingredients are evenly distributed for a consistent flavor and rise.
-
In a separate bowl, lightly beat the egg and mix with the orange marmalade. Add this mixture to the dry ingredients.
-
Add the chilled and cubed butter to the flour mixture. Use a fork or pastry cutter to blend the butter into the dry ingredients until the mixture resembles coarse crumbs. The colder the butter, the flakier your scones will be. Work quickly to prevent the butter from melting.
-
Gradually add the milk, mixing until the dough just comes together. Be careful not to overmix, as this will result in tough scones. Add more milk, a tablespoon at a time, if needed. The dough should be slightly sticky but not wet. The consistency should be such that you can gently roll it out.
-
Lightly flour a clean surface. Place the dough onto the floured board and gently bring it together into a cohesive mass.
-
Divide the dough in half. This makes it easier to work with and ensures even baking.
-
Press down on each half until a circle is formed, about ¾ inch thick. Repeat with the other half.
-
Using a knife or pastry cutter, cut each circle into 4 wedges (scone shapes).
-
Place the scone wedges onto the prepared parchment-lined baking sheet, leaving a little space between each scone.
-
Sprinkle a little sugar on top of each scone for a touch of sweetness and a lovely golden crust.
-
Bake for 10 minutes, or until the scones are golden brown. Keep a close eye on them during the last few minutes of baking to prevent burning.
-
Remove from the oven and let cool slightly on the baking sheet before transferring them to a wire rack to cool completely. This prevents the bottoms from becoming soggy.
Expert Tips & Tricks
- Cold Butter is Key: The secret to flaky scones is using very cold butter. You can even chill the flour and mixing bowl for 15 minutes before starting for extra insurance.
- Don’t Overmix: Overmixing develops the gluten in the flour, resulting in tough scones. Mix until just combined.
- Handle Gently: Treat the dough with care. Avoid kneading or pressing too hard.
- Adjust Ginger to Taste: If you like a stronger ginger flavor, increase the amount of ginger in the recipe. Freshly grated ginger can also be used for a more intense flavor.
- Make Ahead: The dry ingredients can be mixed ahead of time and stored in an airtight container. Add the wet ingredients just before baking.
- Freezing Scones: Baked scones can be frozen for up to 2 months. Thaw them completely before reheating in a warm oven. Unbaked scones can also be frozen. Place cut scones on a baking sheet and freeze until solid. Then, transfer to a freezer bag. Bake directly from frozen, adding a few extra minutes to the baking time.
- Consider using the zest of an orange for a boosted orange flavor!
Serving & Storage Suggestions
Serve these Ginger Orange Marmalade Scones warm with a dollop of clotted cream, a spoonful of extra orange marmalade, or a pat of butter. They are perfect for breakfast, brunch, or afternoon tea.
Store leftover scones in an airtight container at room temperature for up to 2 days or in the refrigerator for up to 5 days. To reheat, wrap them in foil and warm them in a preheated oven at 350°F (175°C) for 5-7 minutes, or until heated through. For a quick reheat, microwave for 15-20 seconds.
Nutritional Information
| Nutrient | Amount per Serving | % Daily Value |
|---|---|---|
| Calories | 279 kcal | N/A |
| Total Fat | 12.7 g | 19% |
| Saturated Fat | 7.7 g | 38% |
| Cholesterol | 54.8 mg | 18% |
| Sodium | 401.7 mg | 16% |
| Total Carbohydrate | 37.6 g | 12% |
| Dietary Fiber | 0.9 g | 3% |
| Sugars | 12.4 g | N/A |
| Protein | 4.4 g | 8% |
Variations & Substitutions
- Lemon Variation: Substitute lemon marmalade for orange marmalade for a zingy twist. Add lemon zest to the dough for an even more pronounced lemon flavor.
- Dried Fruit Scones: Add ½ cup of dried cranberries or raisins to the dough for extra texture and sweetness.
- Gluten-Free Scones: Use a gluten-free flour blend designed for baking. You may need to add a bit more liquid to achieve the desired consistency.
- Dairy-Free Scones: Use a dairy-free butter substitute and non-dairy milk, such as almond or soy milk.
- Spiced Scones: Add a pinch of ground cloves or nutmeg to the dry ingredients for a warm, comforting flavor.
- Try mixing the zest from an orange into the dough!
FAQs (Frequently Asked Questions)
Q: Why are my scones flat and dense?
A: This is usually caused by overmixing the dough or using warm butter. Be sure to use cold butter and mix until just combined.
Q: Can I use self-rising flour instead of all-purpose flour and baking powder?
A: Yes, you can. Omit the baking powder and salt from the recipe.
Q: How do I get a golden-brown top on my scones?
A: Brushing the tops of the scones with a little milk or cream before baking helps them brown beautifully. A sprinkle of sugar also contributes to a golden crust.
Q: Can I make these scones without marmalade?
A: Yes, you can substitute the marmalade with other fruit preserves or jams, or omit it altogether for a plain scone. However, the ginger and orange flavor profile will be different.
Q: How do I prevent my scones from drying out?
A: Avoid overbaking the scones. They should be golden brown on top but still slightly soft inside. Store them in an airtight container to prevent them from drying out.
Final Thoughts
These Ginger Orange Marmalade Scones are a delightful treat that are sure to brighten your day. The subtle warmth of ginger, combined with the tangy sweetness of orange marmalade, creates a flavor combination that is both comforting and invigorating. Don’t be intimidated by the idea of baking – this recipe is simple enough for beginner bakers and rewarding enough for seasoned pros. So, preheat your oven, gather your ingredients, and prepare to experience the joy of homemade scones. I encourage you to try this recipe and let me know what you think! Perhaps pair these scones with a hot cup of Earl Grey tea for a truly delightful experience. Happy baking!