
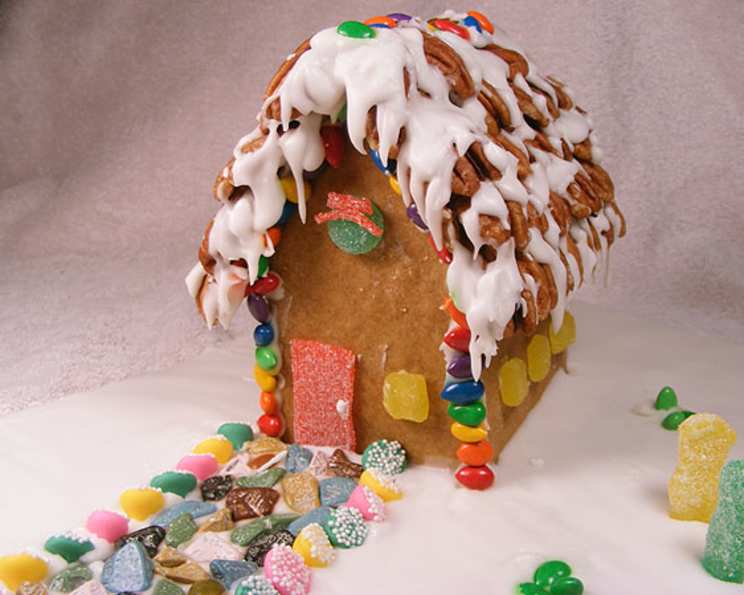
Building Memories: Mini Gingerbread Houses
The scent of gingerbread always takes me back to my childhood Christmases. I remember being utterly mesmerized by the gingerbread house my grandmother would create each year – a sugary wonderland that seemed almost too magical to eat. The anticipation of finally being allowed to nibble on a gumdrop or a candy cane shingle was almost unbearable! Now, as a chef and a mother, I cherish the opportunity to pass on that tradition, and these mini gingerbread houses are the perfect, manageable project to share with little ones (or simply enjoy on your own!). The slightly spicy, warm aroma fills the kitchen and creates that cozy holiday feeling that makes this time of year so special.
Recipe Overview
- Prep Time: 40 minutes
- Cook Time: 8 minutes
- Total Time: 48 minutes
- Yields: 2 small houses
- Dietary Type: Vegetarian (can be adapted to dairy-free with suitable butter substitute)
Ingredients
For the Gingerbread House:
- 50g butter, cubed
- 100g packed brown sugar
- 1/4 cup golden syrup
- 1/4 cup treacle, plus 1 tablespoon treacle
- 2 large egg yolks
- 1 1/2 cups plain flour (plus more until the dough holds its shape)
- 1 tablespoon ground ginger
- 1/2 teaspoon baking soda
For the White Icing for Piping:
- 2 egg whites
- 1 cup icing sugar, sifted (plus more until the icing holds its shape)
Equipment Needed
- Baking tray
- Baking paper or Teflon liner
- Cardboard for templates
- Rolling pin
- Cooling rack
- Icing bag or tough plastic bag
Instructions
-
Preheat your oven to 180°C (170°C fan bake), positioning the rack just below the middle. Line a baking tray with baking paper or a Teflon liner. This will prevent the gingerbread from sticking and ensure even baking.
-
Create your gingerbread house templates. Cut three shapes from cardboard. Each piece will be used twice to cut the 6 gingerbread shapes for one house. Cut an 8 x 10 cm rectangle (for the roof) and a 6 x 8 cm rectangle (for the side walls). To make the peaked end-wall shape, draw a 10 x 6 cm rectangle, then make a mark 4 cm from one end on the two long sides, and another mark in the middle of the short side nearest the other two marks. Join this mark to the other two, then cut out the triangle shape.
-
In a saucepan, combine the butter, brown sugar, golden syrup, 1/4 cup treacle, and 1 tablespoon treacle. Warm the mixture over low heat, stirring until the butter is melted and the sugar is dissolved. Ensure the mixture is smooth and well combined for a consistent dough.
-
Remove the saucepan from the heat and stir in the egg yolks, one at a time. Whisk well to incorporate the egg yolks completely, ensuring a smooth batter.
-
In a separate bowl, sift together the plain flour, ground ginger, and baking soda. This ensures that the dry ingredients are evenly distributed and prevents lumps in your dough.
-
Gradually add the sifted dry ingredients to the wet ingredients, mixing until a dough forms. Knead the dough on a lightly floured surface until it is smooth and pliable, adding a little more flour if necessary to achieve the right consistency. It should hold its shape without being too sticky.
-
Divide the dough into four even pieces and wrap each piece in plastic wrap. Let the dough rest for at least 15 minutes. This allows the gluten to relax, making the dough easier to roll out.
-
To make one house, roll out one piece of dough about 3 mm thick on a lightly floured board. Ensure the dough is large enough to cut two of each of the cardboard shapes. Re-roll dough scraps if necessary to maximize the yield.
-
Place the cardboard templates on the rolled-out dough and carefully cut around them using a sharp knife. Transfer the cut shapes to the prepared baking tray, leaving a little space between each shape.
-
Bake the gingerbread pieces for about 7 minutes, or until they are evenly browned. Keep a close eye on them to prevent burning, as oven temperatures can vary.
-
While the gingerbread pieces are still warm, carefully lift them onto a cooling rack to cool completely. This prevents them from warping or sticking to the tray.
-
Prepare the white icing for piping. In a clean, dry bowl, whisk the egg whites until they are foamy. Gradually beat in the sifted icing sugar, about one cup at a time, until the icing holds its shape when piped from an icing bag. Add more icing sugar if necessary to achieve a stiff consistency.
-
Transfer the icing to an icing bag fitted with a small round tip (or use a tough plastic bag with a small hole cut in one corner).
-
Now comes the fun part: decorating! Pipe the icing onto the walls and roof pieces, creating details like shingles, doors, and windows. Leave the icing plain for a minimalist look, or decorate with sweets, sprinkles, and other edible decorations as desired.
-
To assemble the houses, use more of the icing to “glue” the walls together on a cardboard base. Hold the walls in place until the icing starts to set, ensuring a secure bond.
-
Once the walls are firm, position the roof pieces on top, using more icing to attach them securely. Leave the assembled houses to set completely before handling.
-
Enjoy your adorable mini gingerbread houses!
Expert Tips & Tricks
-
Template Precision: Accurate templates are key to a successful gingerbread house. Use a ruler and ensure your cuts are clean.
-
Dough Consistency: If your dough is too sticky, gradually add more flour until it becomes manageable. If it’s too dry, add a tiny bit of water or milk.
-
Preventing Warping: To prevent warping during baking, you can dock the gingerbread pieces with a fork before baking. This helps to release trapped air.
-
Icing Consistency: The consistency of your royal icing is crucial. It should be stiff enough to hold its shape but pliable enough to pipe easily. Test it by piping a small line – it should hold its shape without spreading.
-
Make-Ahead Option: The gingerbread pieces can be baked a day or two in advance and stored in an airtight container. This allows you to focus on decorating and assembling the houses on another day.
Serving & Storage Suggestions
These mini gingerbread houses make delightful edible decorations for your holiday table or charming homemade gifts. Serve them as a festive dessert or enjoy them with a cup of hot cocoa.
To store, keep the assembled gingerbread houses in a cool, dry place, away from direct sunlight. They will last for several days at room temperature. Avoid storing them in the refrigerator, as the humidity can cause the icing to soften.
Nutritional Information
(Approximate values per serving – one mini gingerbread house)
| Nutrient | Amount per Serving | % Daily Value |
|---|---|---|
| Calories | 648 kcal | N/A |
| Total Fat | 13g | N/A |
| Saturated Fat | 7g | N/A |
| Cholesterol | 132mg | N/A |
| Sodium | 295mg | N/A |
| Total Carbohydrate | 127g | N/A |
| Dietary Fiber | 1.5g | N/A |
| Sugars | 74g | N/A |
| Protein | 8g | N/A |
Variations & Substitutions
-
Gluten-Free: Use a gluten-free flour blend in place of the plain flour. You may need to adjust the amount of liquid to achieve the right dough consistency.
-
Dairy-Free: Substitute the butter with a dairy-free margarine or shortening. Ensure that any decorations you use are also dairy-free.
-
Vegan: Replace the butter with a vegan butter substitute and use a vegan meringue powder for the icing instead of egg whites. You could also use aquafaba (chickpea brine) whipped with icing sugar.
-
Spice Variations: Experiment with different spices, such as cinnamon, cloves, or nutmeg, to customize the flavor of your gingerbread.
FAQs (Frequently Asked Questions)
Q: Can I use pre-made gingerbread dough?
A: Yes, you can use pre-made gingerbread dough to save time. Just make sure it is firm enough to hold its shape when baked.
Q: How can I prevent the gingerbread from spreading during baking?
A: Chilling the cut gingerbread shapes in the refrigerator for 15-20 minutes before baking can help to prevent spreading.
Q: My icing is too runny. What should I do?
A: Gradually add more sifted icing sugar, a tablespoon at a time, until the icing reaches the desired consistency.
Q: Can I use royal icing instead of the white icing recipe provided?
A: Absolutely! Royal icing is a great option for gingerbread houses, as it dries hard and provides a strong bond.
Q: How do I get the icing to stick to the gingerbread?
A: Make sure the gingerbread is completely cool before applying the icing. Also, use a generous amount of icing and hold the pieces together until the icing starts to set.
Final Thoughts
Building these mini gingerbread houses is about more than just baking; it’s about creating memories and sharing joy. Don’t be afraid to get creative with your decorations and let your imagination run wild. Whether you’re making them with children, friends, or simply for yourself, I hope this recipe brings a touch of holiday magic to your kitchen. I’d love to hear about your gingerbread house creations – please share your photos and feedback! Why not serve these adorable houses alongside a warm mug of spiced apple cider for the ultimate festive treat? Happy baking!