
Glazed Cinnamon Rolls: An Unforgettable Treat
The scent of cinnamon has always been a portal to warmth and comfort for me. As a child, I remember my grandmother’s kitchen filled with the intoxicating aroma of freshly baked cinnamon rolls on Sunday mornings. The anticipation of that first warm, gooey bite, the sweet glaze melting on my tongue, is a sensory memory I cherish. This recipe, while a labor of love, captures that essence perfectly, resulting in cinnamon rolls that are impossibly light, airy, and guaranteed to evoke similar cherished moments.
Recipe Overview
- Prep Time: 2 hours
- Cook Time: 30 minutes
- Total Time: 5 hours 30 minutes
- Servings: 12
- Yield: 12 cinnamon rolls
- Dietary Type: Not specified
Ingredients
Dough:
- ½ cup milk
- 8 tablespoons (1 stick) unsalted butter
- ½ cup warm water, 110 degrees F
- 1 (¼ ounce) envelope instant yeast
- ¼ cup sugar
- 1 large egg
- 2 large egg yolks
- 1 ½ teaspoons salt
- 4 – 4 ¼ cups unbleached all-purpose flour, plus additional for dusting
Filling:
- ¾ cup packed light brown sugar
- 3 tablespoons quality ground cinnamon (such as Penzeys, McCormick, or Schilling)
- ⅛ teaspoon salt
Icing:
- 8 ounces cream cheese, softened but still cool
- 2 tablespoons corn syrup
- 2 tablespoons heavy cream
- 1 cup confectioners’ sugar, sifted to remove any lumps
- 1 teaspoon pure vanilla extract
Equipment Needed
- Standing mixer with paddle and dough hook attachments
- Small saucepan
- Rolling pin
- 13×9 inch baking dish
- Instant-read thermometer
- Wire rack
Instructions
- Prepare the milk and butter: In a small saucepan, heat the milk and butter over low heat until the butter melts. Remove the pan from the heat and set aside to cool until lukewarm, about 100 degrees F. This ensures the yeast isn’t killed by excessive heat.
- Combine wet ingredients: In the bowl of a standing mixer fitted with the paddle attachment, combine the warm water, yeast, sugar, egg, and egg yolks. Mix at low speed until well combined.
- Add salt and milk mixture: Add the salt, warm milk mixture, and 2 cups of the flour to the mixer bowl. Mix at medium speed until thoroughly blended.
- Knead the dough: Switch to the dough hook attachment. Add another 2 cups of the flour and knead at medium speed, adding up to ¼ cup more flour, 1 tablespoon at a time if necessary. Continue kneading until the dough is smooth and freely clears the sides of the bowl, about 10 minutes. The dough should be slightly tacky but not sticky. I found I needed the additional ¼ cup of flour.
- First rise: Scrape the dough onto a lightly floured work surface. Shape the dough into a round, place it in a very lightly oiled bowl, and cover the bowl tightly with plastic wrap. Leave in a warm, draft-free spot until doubled in bulk, about 1 ½ to 2 hours. This rise is crucial for developing the airy texture of the rolls.
- Prepare the icing: While the dough is rising, prepare the icing. In the bowl of a standing mixer, combine the softened cream cheese, corn syrup, heavy cream, sifted confectioners’ sugar, and vanilla extract. Blend together at low speed until thoroughly combined. Increase the speed to high and mix until the icing is smooth and free of cream cheese lumps. Transfer the icing to a small bowl, cover with plastic wrap, and refrigerate until ready to use. Keeping the cream cheese cool ensures a thicker, more stable icing.
- Shape the dough: After the dough has doubled, gently press it down to release any air bubbles. Turn it out onto a lightly floured work surface. Using a rolling pin, shape the dough into a 16×12 inch rectangle, with the long side facing you.
- Prepare the filling: In a small bowl, mix together the packed light brown sugar, ground cinnamon, and salt.
- Assemble the rolls: Sprinkle the filling evenly over the dough rectangle, leaving a ½ inch border at the far edge. This border will help seal the roll.
- Roll the dough: Starting with the long edge closest to you, roll the dough tightly, using both hands to pinch the dough with your fingertips as you roll. This tight roll is key to creating the layers within each cinnamon roll.
- Seal the roll: Moisten the top border with a little water and seal the roll securely. Lightly dust the roll with flour and press on the ends if necessary to make a uniform 16-inch cylinder.
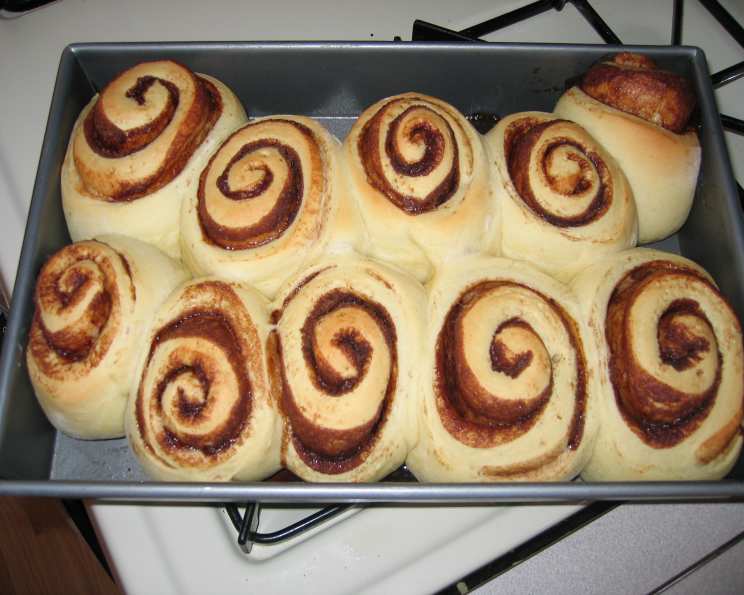
- Cut the rolls: Grease a 13×9 inch baking dish or spray with cooking spray. Cut the roll into 12 equal pieces using plain dental floss or a sharp knife. Dental floss provides a clean cut without squishing the rolls.
- Second rise: Place the rolls cut side up, evenly spaced in the prepared baking dish. Cover loosely with plastic wrap and place in a warm, draft-free spot until doubled in bulk, about 1 ½ – 2 hours. This second rise allows the rolls to become even lighter and fluffier.
- Bake the rolls: Preheat oven to 350 degrees F and adjust oven rack to the middle position. Bake the rolls until golden brown and an instant-read thermometer inserted into the center of one roll reads 185 to 188 degrees F, about 25-30 minutes. Using an instant-read thermometer ensures the rolls are cooked through without being overbaked and dry.
- Cool and ice: Invert the rolls onto a wire rack and cool for 10 minutes. Then, turn the rolls upright on a large serving plate and use a rubber spatula to spread the chilled icing generously over them.
Expert Tips & Tricks
- Temperature is key: Pay close attention to the temperature of the milk and water when activating the yeast. Too hot, and you’ll kill the yeast; too cold, and it won’t activate properly.
- Don’t over-knead: Over-kneading can result in tough rolls. Knead until the dough is smooth and elastic, but not overly firm.
- Warm spot: Find a truly warm spot for rising. An oven that’s been slightly warmed and then turned off is ideal.
- Chill the Icing: Chilling the icing prior to spreading helps prevent it from melting and becoming too runny on the warm rolls.
Serving & Storage Suggestions
Serve the glazed cinnamon rolls warm, ideally within a few hours of baking for the best texture and flavor. If not eating right away, cover the rolls and frost as you serve them to maintain freshness. The icing should be kept refrigerated.
Leftover rolls can be stored in an airtight container at room temperature for up to 2 days, or in the refrigerator for up to 4 days. To reheat, microwave individual rolls for 15-20 seconds, or warm them in a low oven (300 degrees F) for 5-10 minutes.
Nutritional Information
| Nutrient | Amount per Serving | % Daily Value |
|---|---|---|
| Calories | 439 kcal | N/A |
| Total Fat | 17 g | 26% |
| Saturated Fat | 10 g | 51% |
| Cholesterol | 99 mg | 32% |
| Sodium | 392 mg | 16% |
| Total Carbohydrate | 65 g | 21% |
| Dietary Fiber | 2 g | 8% |
| Sugars | 28 g | N/A |
| Protein | 8 g | 14% |
Nutritional information is an estimate and may vary based on specific ingredients and preparation methods.
Variations & Substitutions
- Cream Cheese Alternative: If you’re not a fan of cream cheese icing, try a simple glaze made with powdered sugar, milk, and vanilla extract.
- Nutty Addition: Add chopped pecans or walnuts to the filling for extra texture and flavor.
- Orange Zest: A teaspoon of orange zest in the dough or icing can brighten the flavor.
- Spice it up: A pinch of ground nutmeg or cardamom in the filling can add a warm, comforting note.
FAQs (Frequently Asked Questions)
Q: Can I make the dough ahead of time?
A: Yes, you can prepare the dough through the first rise, then refrigerate it overnight. Let it come to room temperature for about 30 minutes before rolling and filling.
Q: Can I freeze the cinnamon rolls?
A: Absolutely! Bake the rolls, let them cool completely, and freeze them unfrosted. Thaw overnight in the refrigerator and frost before serving.
Q: My dough isn’t rising. What went wrong?
A: Make sure your yeast is fresh and that the water isn’t too hot, which can kill the yeast. Also, ensure you’re placing the dough in a warm, draft-free location.
Q: Can I use a different type of flour?
A: While all-purpose flour is recommended for its gluten content, you can experiment with bread flour for a chewier texture.
Q: How do I prevent the bottoms of the rolls from burning?
A: Place a baking sheet on the rack below the baking dish to deflect some of the heat.
Final Thoughts
These glazed cinnamon rolls are more than just a recipe; they’re an invitation to create cherished memories and warm your kitchen with the comforting aroma of cinnamon and sweetness. Don’t be intimidated by the time commitment; the reward of biting into a perfectly light and airy, homemade cinnamon roll is truly worth every moment. I encourage you to try this recipe, put your own personal touch on it, and share the joy with family and friends. And, of course, I would love to hear your feedback and experiences creating this delightful treat! Enjoy!