
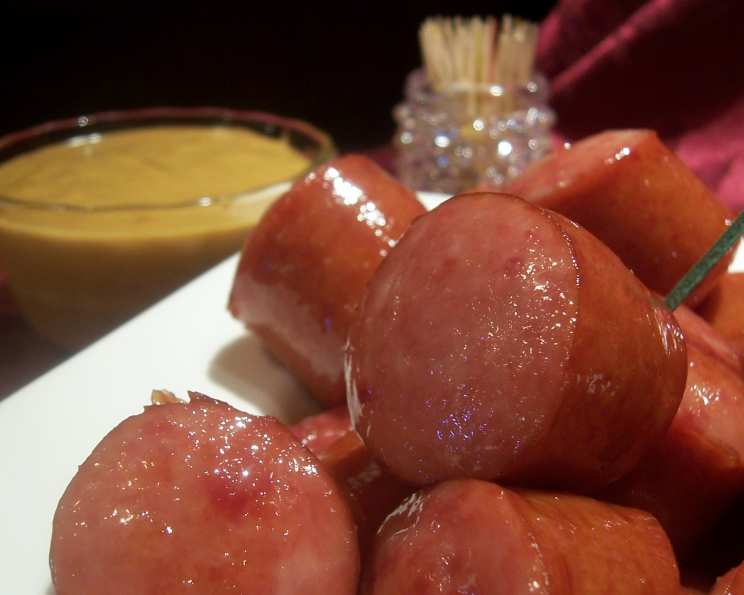
Glazed Kielbasa Bites: A Sweet and Savory Crowd-Pleaser
Every year, my Aunt Carol would host the biggest holiday gathering, a sprawling affair with twinkling lights and a table groaning under the weight of festive dishes. While the roast turkey and glazed ham were always impressive, it was her unassuming glazed kielbasa bites that I always made a beeline for. The sweet, slightly tangy glaze clinging to the savory sausage was an irresistible combination, and I remember sneaking more than my fair share. These little bites of heaven are a guaranteed hit, and now I’m sharing the magic with you.
Recipe Overview
- Prep Time: 5 minutes
- Cook Time: 15-20 minutes
- Total Time: 20-25 minutes
- Servings: Varies, about 24-36 bites
- Yield: Varies, about 24-36 bites
- Dietary Type: Not specified, but can be gluten-free if using gluten-free kielbasa
Ingredients
- 2 lbs kielbasa
- 12 ounces ginger ale (regular, not diet)
Equipment Needed
- Large skillet
- Knife
- Cutting board
- Toothpicks
- Serving platter
Instructions
- Begin by preparing the kielbasa. Using a sharp knife, cut the kielbasa into 2-inch slices. Try to keep the slices uniform in size for even cooking and a more appealing presentation.
- Place the sliced kielbasa in a large skillet. Ensure the skillet is large enough to accommodate all the sausage pieces in a single layer.
- Pour the 12 ounces of ginger ale over the kielbasa in the skillet. It’s crucial to use regular ginger ale, as the sugar content is essential for creating the glaze. Diet ginger ale will not work for this recipe.
- Bring the mixture to a boil over high heat. Once boiling, reduce the heat to medium. It’s important to maintain a gentle simmer to allow the ginger ale to reduce and caramelize properly.
- Do not cover the pan. Leaving the pan uncovered allows the liquid to evaporate and the ginger ale to concentrate, creating a luscious glaze.
- After approximately 15 to 20 minutes, the ginger ale will begin to reduce and thicken, starting to caramelize around the kielbasa pieces. This is where you need to pay close attention to prevent burning.
- Watch the skillet very carefully. The sugar in the ginger ale can burn quickly, so continuous monitoring is vital.
- At this point, when the ginger ale has reduced significantly and is starting to thicken, keep stirring the kielbasa frequently to ensure each piece is evenly coated with the developing glaze.
- Continue stirring until the kielbasa pieces are beautifully glazed and coated in a sticky, caramelized sauce. Be patient, and don’t rush this step; it’s crucial for achieving the desired flavor and texture.
- Remove from heat and transfer the glazed kielbasa bites to a serving platter.
- Insert toothpicks into each piece for easy serving. These bites are delightfully sticky and the toothpicks will prevent messy fingers.
- Serve warm and enjoy!
Expert Tips & Tricks
- Selecting Your Kielbasa: The quality of the kielbasa directly impacts the final flavor. Opt for a high-quality smoked kielbasa for the best results. You can also experiment with different flavors, such as garlic or spicy kielbasa, to add a unique twist.
- Achieving the Perfect Glaze: The key to a perfect glaze is patience and vigilance. Don’t crank up the heat to speed up the process. Slow and steady wins the race, allowing the ginger ale to reduce and caramelize without burning.
- Preventing Burning: Keep a close eye on the skillet and stir frequently during the final stages of cooking. If the glaze starts to darken too quickly, reduce the heat slightly. A burnt glaze will taste bitter and ruin the dish.
- Adding a Touch of Spice: For a bit of heat, add a pinch of red pepper flakes to the skillet along with the ginger ale. The subtle spice will complement the sweetness of the glaze beautifully.
- Enhancing the Flavor Profile: A splash of apple cider vinegar or a squeeze of lemon juice added towards the end of cooking can brighten the glaze and add a pleasant tang.
- Make-Ahead Tip: You can prepare the kielbasa slices ahead of time and store them in the refrigerator until ready to cook. This will save you time when you’re ready to assemble the dish.
- Glaze Consistency: If the glaze becomes too thick too quickly, add a tablespoon or two of water to thin it out. Conversely, if the glaze is too thin, continue cooking until it reaches the desired consistency.
Serving & Storage Suggestions
Serve the glazed kielbasa bites warm on a platter, garnished with fresh parsley or chives for visual appeal. They are best enjoyed immediately, while the glaze is still warm and sticky.
- Room Temperature: While tempting, it’s best not to leave them at room temperature for more than two hours due to food safety concerns.
- Refrigeration: Leftover glazed kielbasa bites can be stored in an airtight container in the refrigerator for up to 3 days.
- Reheating: To reheat, gently warm the bites in a skillet over low heat, stirring occasionally, until heated through. You can also microwave them in short intervals, but be careful not to overheat them, as the glaze can become sticky and hard.
- Freezing: While freezing is possible, it’s not ideal as the texture of the kielbasa and the glaze may change. If you do freeze them, store them in an airtight container for up to 1 month. Thaw them in the refrigerator overnight before reheating.
Nutritional Information
| Nutrient | Amount per Serving (estimated) | % Daily Value |
|---|---|---|
| Calories | 200-250 kcal | 10-13% |
| Total Fat | 15-20g | 23-31% |
| Saturated Fat | 7-9g | 35-45% |
| Cholesterol | 40-50mg | 13-17% |
| Sodium | 600-700mg | 25-29% |
| Total Carbohydrate | 5-7g | 2-3% |
| Dietary Fiber | 0g | 0% |
| Sugars | 4-6g | N/A |
| Protein | 8-10g | 16-20% |
Note: Nutritional information is an estimate and may vary based on the specific ingredients used.
Variations & Substitutions
- Gluten-Free: Ensure you use gluten-free kielbasa to make this appetizer suitable for those with gluten sensitivities.
- Different Soda: While ginger ale is classic, you could experiment with other sodas like Dr. Pepper or root beer for a different flavor profile. Be mindful of the sugar content in the alternative soda.
- Honey Glaze: Substitute the ginger ale with equal parts honey and soy sauce for an Asian-inspired glaze. Add a dash of sesame oil for extra flavor.
- Spicy Glaze: Incorporate a tablespoon of sriracha or a pinch of cayenne pepper into the ginger ale mixture for a fiery kick.
- Maple Glaze: Replace the ginger ale with maple syrup for a rich and decadent glaze. A touch of Dijon mustard can balance the sweetness.
FAQs (Frequently Asked Questions)
Q: Can I use diet ginger ale for this recipe?
A: No, diet ginger ale will not work. The sugar in regular ginger ale is essential for caramelizing and creating the sticky glaze.
Q: How do I prevent the glaze from burning?
A: Watch the skillet carefully and stir frequently, especially during the final stages of cooking. Reduce the heat if the glaze starts to darken too quickly.
Q: Can I make this ahead of time?
A: Yes, you can prepare the kielbasa slices ahead of time and store them in the refrigerator. The fully cooked dish is best served fresh, but leftovers can be reheated.
Q: Can I use a different type of sausage?
A: While kielbasa is traditional, you can experiment with other smoked sausages. Just be sure to adjust the cooking time accordingly.
Q: What can I serve this with?
A: Glazed kielbasa bites are delicious on their own as an appetizer. They also pair well with mustard, pickles, or a simple cheese platter.
Final Thoughts
Glazed kielbasa bites are a simple yet incredibly satisfying appetizer that’s sure to be a hit at any gathering. The sweet and savory combination is irresistible, and the ease of preparation makes this recipe a winner. Don’t be afraid to experiment with different flavors and variations to create your own unique version. So go ahead, give it a try, and let me know what you think! And if you happen to serve them at your next holiday gathering, be prepared for your guests to ask for the recipe!