
Glazed Lemon Loaf: A Burst of Sunshine in Every Slice
The scent of lemon baking always takes me back to my grandmother’s kitchen. Sunlight streaming through the window, dust motes dancing in the air, and the comforting aroma of citrus and warmth. She always had a lemon loaf ready, a simple pleasure that she shared generously with anyone who stopped by. The first bite, that tangy sweetness hitting your tongue – pure joy. This recipe is my homage to her, a way to keep those happy memories alive, one slice at a time.
Recipe Overview
- Prep Time: 15 minutes
- Cook Time: 55 minutes
- Total Time: 1 hour 10 minutes
- Servings: 12
- Yield: 1 loaf
- Dietary Type: Vegetarian
Ingredients
- 1⁄4 cup butter, softened
- 3⁄4 cup sugar
- 2 eggs
- 2 teaspoons grated lemon rind (zest of about 2 lemons)
- 2 cups flour
- 2 1⁄2 teaspoons baking powder
- 1 teaspoon salt
- 3⁄4 cup milk
- 3 tablespoons lemon juice
- 1⁄3 cup powdered sugar
Equipment Needed
- 9×5 inch loaf pan
- Mixing bowls
- Electric mixer (handheld or stand mixer)
- Measuring cups and spoons
- Grater or zester
- Whisk or fork
- Cooling rack
Instructions
-
Preheat your oven to 350°F (175°C). Prepare your 9×5 inch loaf pan by greasing it generously. You can use butter, shortening, or cooking spray. Ensure you coat all the corners and sides to prevent sticking. A light dusting of flour after greasing is also a great preventative measure.
-
In a large mixing bowl, cream together the softened butter and sugar until the mixture is light and fluffy. This step is crucial for creating a tender crumb. Use an electric mixer for best results, beating for 3-5 minutes until the mixture visibly lightens in color.
-
Add the eggs, one at a time, beating well after each addition. This ensures that each egg is fully incorporated into the butter-sugar mixture, contributing to the loaf’s overall structure and richness. After both eggs are incorporated, add the lemon peel (zest) and beat well to distribute the lemon flavor throughout the batter.
-
In a separate bowl, combine the flour, baking powder, and salt. Whisk these dry ingredients together thoroughly. This step ensures even distribution of the baking powder and salt, which is essential for proper leavening and flavor balance.
-
Gradually add the flour mixture to the creamed mixture, alternating with the milk. Begin and end with the flour mixture. Add about 1/3 of the flour mixture, then 1/2 of the milk, then another 1/3 of the flour, the remaining milk, and finally the last of the flour. Beat well after each addition until just combined. Be careful not to overmix the batter, as this can lead to a tough loaf.
-
Spoon the batter into the prepared loaf pan, spreading it evenly. Ensure the batter reaches all corners of the pan. Gently tap the pan on the counter a few times to release any trapped air bubbles.
-
Bake at 350°F (175°C) for approximately 55 minutes, or until a fork or toothpick inserted into the center of the loaf comes out clean. Start checking for doneness around 50 minutes. If the top of the loaf starts to brown too quickly, you can loosely tent it with aluminum foil.
-
While the bread is baking, prepare the glaze. In a small bowl, combine the powdered sugar and lemon juice. Stir until the sugar dissolves completely and the glaze is smooth. The glaze should be pourable but not too thin. Add a few drops of lemon juice or a sprinkle of powdered sugar to adjust the consistency as needed.
-
Shortly before removing the bread from the oven, ensure the glaze is ready. As soon as the bread is removed from the oven, pour the glaze over the top of the bread while it’s still hot and in the pan. The heat will help the glaze melt and seep into the loaf, creating a delicious, sticky coating.
-
Let the bread stand in the pan for 20 minutes before turning it out onto a wire rack to cool completely before slicing. This allows the glaze to set slightly and the bread to firm up, making it easier to slice.
Expert Tips & Tricks
- For a more intense lemon flavor, add a teaspoon of lemon extract to the batter.
- To prevent the top of the loaf from browning too quickly, tent it loosely with aluminum foil during the last 15-20 minutes of baking.
- Make sure your butter is truly softened, not melted, for the best creaming results.
- If you don’t have lemon juice, you can substitute with lime juice, although it will alter the flavor slightly.
- To make this loaf ahead, bake it a day in advance, wrap it tightly in plastic wrap, and store it at room temperature. Glaze it just before serving for the freshest flavor.
Serving & Storage Suggestions
Serve the glazed lemon loaf sliced and at room temperature. It’s delicious on its own, or you can pair it with a dollop of whipped cream, a scoop of vanilla ice cream, or fresh berries. It’s also a perfect accompaniment to a cup of tea or coffee.
Store leftover lemon loaf in an airtight container at room temperature for up to 3 days. For longer storage, wrap it tightly in plastic wrap and freeze for up to 2 months. To thaw, let it sit at room temperature for several hours or overnight.
Nutritional Information
| Nutrient | Amount per Serving | % Daily Value |
|---|---|---|
| Calories | 194.2 kcal | N/A |
| Calories from Fat | 48 kcal | 25% |
| Total Fat | 5.4 g | 8% |
| Saturated Fat | 3.1 g | 15% |
| Cholesterol | 43.3 mg | 14% |
| Sodium | 323.2 mg | 13% |
| Total Carbohydrate | 33 g | 11% |
| Dietary Fiber | 0.6 g | 2% |
| Sugars | 15.9 g | 63% |
| Protein | 3.8 g | 7% |
Note: Nutritional information is an estimate and may vary based on specific ingredients and preparation methods.
Variations & Substitutions
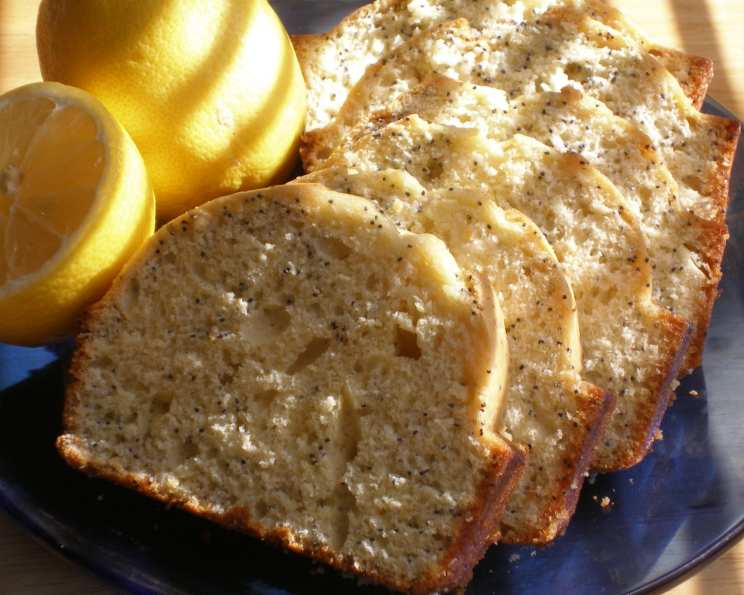
- Lemon Poppy Seed Loaf: Add 2 tablespoons of poppy seeds to the batter along with the dry ingredients.
- Orange Glazed Loaf: Substitute orange zest and orange juice for the lemon zest and juice.
- Gluten-Free Lemon Loaf: Use a gluten-free all-purpose flour blend in place of regular flour. You may need to add a binder like xanthan gum (check your blend’s instructions).
- Dairy-Free Lemon Loaf: Substitute the butter with a plant-based butter alternative and the milk with almond milk, soy milk, or oat milk.
- Iced Lemon Loaf: Instead of a glaze, make a simple icing with powdered sugar and water, adding a touch of lemon extract.
FAQs (Frequently Asked Questions)
Q: Can I use lemon juice from a bottle instead of fresh lemon juice?
A: While fresh lemon juice is preferred for its brighter flavor, bottled lemon juice can be used in a pinch. Use the same amount as the recipe calls for.
Q: My loaf is browning too quickly on top. What should I do?
A: Loosely tent the loaf with aluminum foil during the last 15-20 minutes of baking to prevent it from browning too much.
Q: Can I freeze this lemon loaf?
A: Yes, you can freeze the lemon loaf. Wrap it tightly in plastic wrap and then in foil before freezing for up to 2 months. Thaw at room temperature.
Q: Can I make this recipe in muffin tins instead of a loaf pan?
A: Yes, you can bake this batter in muffin tins. Reduce the baking time to about 18-22 minutes, or until a toothpick inserted into the center comes out clean.
Q: The glaze is too thick/thin. How do I fix it?
A: If the glaze is too thick, add a tiny bit more lemon juice (a teaspoon at a time) until it reaches the desired consistency. If it’s too thin, add a little more powdered sugar, a tablespoon at a time.
Final Thoughts
This Glazed Lemon Loaf is more than just a recipe; it’s an invitation to create moments of joy and connection. The bright, tangy flavor is sure to brighten any day, and the simple preparation makes it a perfect treat for bakers of all skill levels. So, preheat your oven, gather your ingredients, and let the aroma of lemon fill your home. I hope you enjoy this loaf as much as my family and I do. Share your creations and let me know what you think!