
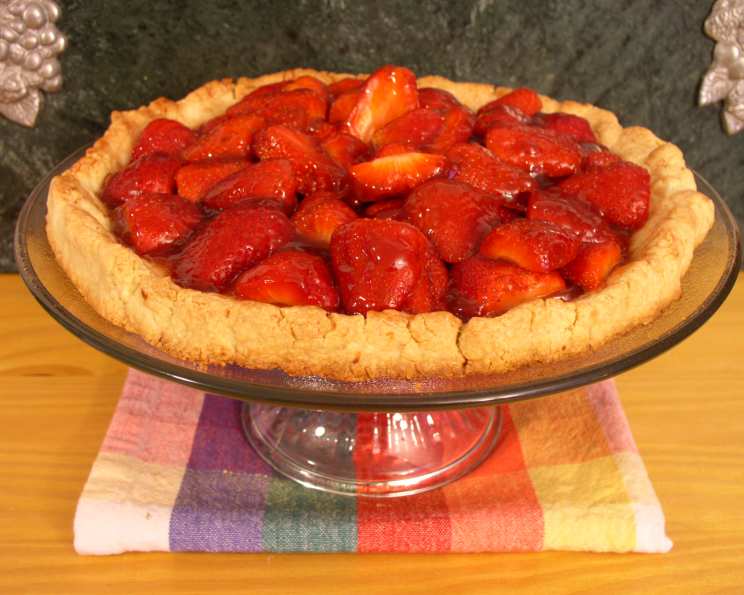
Glazed Strawberry Tart: A Burst of Summer Sunshine
There’s something magical about biting into a perfect strawberry tart. For me, it instantly transports me back to summers spent in my grandmother’s garden, the air thick with the scent of blooming roses and sun-ripened berries. She always had a patch overflowing with strawberries, and this tart, with its flaky crust, sweet jam, and jewel-like glaze, was her signature dessert. It wasn’t just a treat; it was a symbol of warmth, family, and the simple joys of the season. Every slice was a sweet, nostalgic memory.
Recipe Overview
- Prep Time: 25 minutes
- Cook Time: 25 minutes
- Total Time: 2 hours (including chilling)
- Servings: 8
- Yield: 1 tart
- Dietary Type: Vegetarian
Ingredients
- For the Crust:
- 1 1/3 cups all-purpose flour
- 1/2 cup finely ground almonds
- 1/3 cup sugar
- 1 teaspoon grated lemon rind
- 1/4 teaspoon salt
- 6 tablespoons cold butter, cut into pieces
- 2 eggs
- 1 teaspoon vanilla
- For the Filling:
- 3/4 cup seedless raspberry jam or 3/4 cup strawberry jam
- 1 teaspoon lemon juice
- 2 pints strawberries, hulled and sliced
- Sweetened whipped cream (optional)
Equipment Needed
- Large bowl
- Pastry blender or 2 knives
- Small bowl
- Plastic wrap
- Baking sheet
- Fork
- Wire rack
- Small saucepan
Instructions
- In a large bowl, stir together the flour, ground almonds, sugar, lemon peel, and salt. This ensures the dry ingredients are evenly distributed for a consistent crust.
- Using a pastry blender or two knives, cut the cold butter into the flour mixture. Continue until the mixture resembles coarse crumbs, about the size of peas. The smaller the butter pieces, the flakier your crust will be.
- In a small bowl, whisk together the eggs and vanilla.
- Stir the egg mixture into the flour mixture until a dough forms. Avoid overmixing, as this can develop the gluten in the flour and result in a tough crust.
- Shape the dough into a disk. This helps it chill evenly.
- Wrap the dough in plastic wrap and chill in the refrigerator for at least 1 hour, or preferably overnight. This allows the gluten to relax, making the dough easier to roll out and preventing it from shrinking during baking.
- Preheat your oven to 350 degrees Fahrenheit (175 degrees Celsius). Ensuring accurate oven temperature is crucial for even baking. Use an oven thermometer to verify.
- Grease and flour a baking sheet. This prevents the tart crust from sticking. You can also use parchment paper for easier cleanup.
- Place the chilled dough on the prepared baking sheet. Pat it into a 10-inch circle, forming a high edge. Aim for an even thickness to prevent uneven baking.
- Pierce the bottom of the dough all over with a fork. This step, known as “docking,” prevents the crust from puffing up during baking.
- Bake the tart crust until it is lightly browned, about 25 minutes. Keep a close eye on it to avoid burning, as ovens can vary.
- Place the baking sheet on a wire rack and cool for 10 minutes. This allows the crust to set slightly before transferring.
- Transfer the tart shell to the wire rack to cool completely. Make sure the crust is entirely cool before adding the filling, otherwise the jam will melt.
- While the crust cools, melt the jam with the lemon juice in a small saucepan over low heat until it is spreadable. The lemon juice adds a touch of brightness to the jam, complementing the sweetness of the strawberries.
- Spread 1/2 cup of the melted jam mixture over the bottom of the cooled tart shell. This creates a moisture barrier and adds another layer of flavor.
- Arrange the sliced strawberries on top of the jam, cut sides down. This creates a visually appealing presentation and helps the strawberries adhere to the jam.
- Brush the strawberries with the remaining jam mixture. This gives the tart a beautiful glaze and enhances the flavor of the berries.
- Serve the glazed strawberry tart with sweetened whipped cream, if desired. A dollop of freshly whipped cream adds a delightful richness and textural contrast.
Expert Tips & Tricks
- Achieve the Perfect Crust: For an extra flaky crust, use very cold butter and work quickly to prevent the butter from melting. You can even chill your flour and bowl before starting.
- Prevent Soggy Bottom: Brushing the crust with a thin layer of melted white chocolate after baking and before adding the jam can help prevent a soggy bottom, especially if you’re not serving the tart immediately.
- Berry Selection: Use the ripest, most flavorful strawberries you can find. Look for berries that are uniformly red and have a bright green cap.
- Jam Adjustment: If your jam is too thick, add a little water, a teaspoon at a time, until it reaches a spreadable consistency.
- Make-Ahead Tip: The tart crust can be baked a day or two in advance and stored in an airtight container at room temperature. Assemble the tart just before serving for the best freshness.
Serving & Storage Suggestions
Serve the glazed strawberry tart chilled or at room temperature. For an elegant presentation, garnish with fresh mint leaves or a dusting of powdered sugar. Leftovers can be stored in an airtight container in the refrigerator for up to 3 days. The crust may soften over time, but the tart will still be delicious. It is not recommended to freeze this tart, as the strawberries may become mushy upon thawing.
Nutritional Information
| Nutrient | Amount per Serving | % Daily Value |
|---|---|---|
| Calories | 368 kcal | N/A |
| Calories from Fat | 134 g | 37% |
| Total Fat | 14.9 g | 22% |
| Saturated Fat | 6.3 g | 31% |
| Cholesterol | 75.8 mg | 25% |
| Sodium | 191.7 mg | 7% |
| Total Carbohydrate | 53.7 g | 17% |
| Dietary Fiber | 3.7 g | 14% |
| Sugars | 27.7 g | N/A |
| Protein | 6.4 g | 12% |
Note: Nutritional information is an estimate and may vary based on specific ingredients and preparation methods.
Variations & Substitutions
- Gluten-Free Crust: Substitute the all-purpose flour with a gluten-free flour blend. Add an extra tablespoon of ground almonds for a richer flavor.
- Different Berries: Feel free to use a mix of berries, such as blueberries, raspberries, or blackberries, for a colorful and flavorful twist.
- Vegan Option: Replace the butter with a vegan butter alternative and the eggs with flax eggs (1 tablespoon ground flaxseed mixed with 3 tablespoons water per egg).
- Citrus Zest: Experiment with different citrus zests, such as orange or lime, for a unique flavor profile.
- Almond Extract: Add a few drops of almond extract to the jam mixture for a subtle almond flavor that complements the strawberries.
FAQs (Frequently Asked Questions)
Q: Can I use frozen strawberries?
A: While fresh strawberries are ideal, you can use frozen strawberries in a pinch. Be sure to thaw them completely and drain off any excess liquid before arranging them on the tart.
Q: My crust shrunk while baking. What did I do wrong?
A: Overworking the dough can cause it to shrink. Be sure to mix the dough just until it comes together, and allow it to chill properly before baking.
Q: Can I make this tart without almonds?
A: Yes, you can omit the ground almonds from the crust. Replace them with an equal amount of all-purpose flour. The crust will be slightly less tender.
Q: How do I prevent the jam from becoming too sticky?
A: Adding a small amount of lemon juice to the jam helps balance the sweetness and prevents it from becoming overly sticky.
Q: The edges of my crust are browning too quickly. What can I do?
A: You can tent the edges of the crust with foil during the last few minutes of baking to prevent them from burning.
Final Thoughts
This Glazed Strawberry Tart is more than just a dessert; it’s an invitation to savor the flavors of summer. With its delicate crust, luscious jam, and burst of fresh strawberries, it’s a treat that’s sure to impress. Don’t be intimidated by the steps – this recipe is surprisingly simple to master, and the results are well worth the effort. So, gather your ingredients, preheat your oven, and get ready to create a little sunshine in your kitchen. And when you do, I’d love to hear about your experience. What variations did you try? What memories did it evoke? Happy baking!