
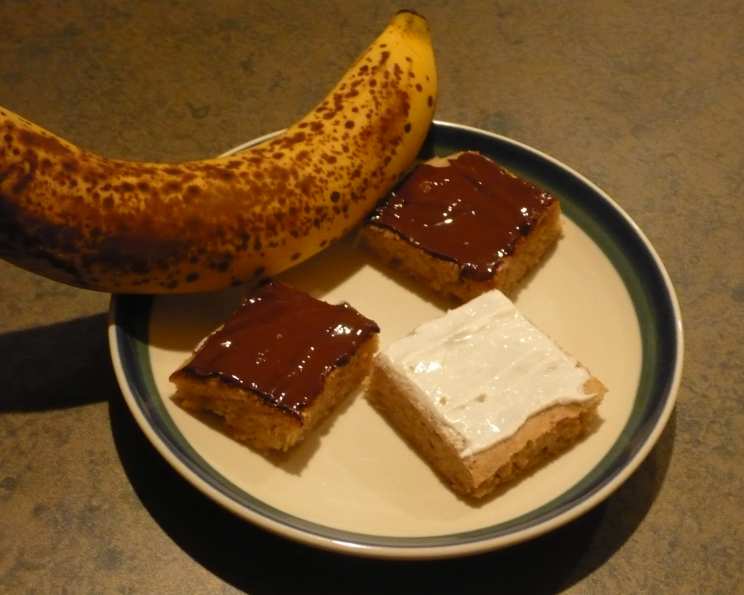
Gluten-Free Banana Bars: A Taste of Home
The aroma of ripe bananas baking always transports me back to my grandmother’s kitchen. She had this magical ability to transform overripe fruit into the most comforting treats. While her original recipe wasn’t gluten-free, these bars are an homage to her. Every bite of these gluten-free banana bars brings back those cherished memories of warmth, love, and the simple joy of a homemade treat. They’re the perfect blend of familiar comfort and modern dietary needs, a slice of nostalgia reimagined for today.
Recipe Overview
- Prep Time: 15 minutes
- Cook Time: 25-30 minutes
- Total Time: 45 minutes
- Yields: 12 bars
- Serves: 12
- Dietary Type: Gluten-Free
Ingredients
- 3/4 cup rice flour
- 1/4 cup potato starch, plus 2 tablespoons potato starch
- 2 tablespoons tapioca flour
- 1/4 teaspoon xanthan gum
- 2 teaspoons baking powder
- 1/4 teaspoon salt
- 1 cup mashed ripe banana (2 bananas)
- 3/4 cup brown sugar
- 1/3 cup white sugar
- 1/4 cup buttermilk
- 1 egg
- 1 tablespoon vegetable oil
- 2 teaspoons vanilla
- 1/2 cup chopped walnuts (optional)
Drizzle Topping
- 1/4 cup icing sugar
- 2 teaspoons milk or 2 teaspoons juice
Equipment Needed
- 9-inch square baking pan
- Mixing bowls
- Whisk
- Electric mixer (optional, but recommended)
- Measuring cups and spoons
Instructions
- Preheat your oven to 350 degrees Fahrenheit (175 degrees Celsius). Position a rack in the center of the oven. This ensures even baking.
- Grease a 9-inch square pan thoroughly with shortening or coat it with vegetable oil spray. This will prevent the bars from sticking and make them easier to remove.
- In a small bowl, whisk together the rice flour, 1/4 cup potato starch, tapioca flour, xanthan gum, baking powder, and salt. Whisking is essential to ensure even distribution of the baking powder and xanthan gum, which are crucial for the texture of gluten-free baked goods. Set aside the dry ingredients.
- In the bowl of your electric mixer, or a large bowl if mixing by hand, beat together the mashed ripe banana and both the brown sugar and white sugar until well blended. The mixture should be slightly lightened and creamy.
- Add the buttermilk, egg, vegetable oil, and vanilla to the banana-sugar mixture. Beat well until everything is thoroughly combined. Ensure the egg is fully incorporated for a smooth batter.
- Gradually stir in the dry ingredients into the wet ingredients until just blended. It’s crucial not to overmix the batter at this stage. Overmixing can develop the gluten in regular flour, leading to a tough texture, but in this gluten free application it can still cause a less tender result. Mix until there are no large streaks of flour remaining.
- Fold in the chopped walnuts, if using. Gently incorporate them into the batter.
- Spoon the batter evenly into the prepared baking pan. Spread it out to the edges to ensure uniform baking.
- Bake for 25-30 minutes, or until a wooden skewer or cake tester inserted into the center comes out clean. Check for doneness starting at 25 minutes, as oven temperatures can vary. The bars should be golden brown and spring back lightly when touched.
- Remove the pan from the oven and let the cake cool in the pan. Allowing it to cool in the pan helps it set properly and prevents it from crumbling when cut.
- While the cake is cooling, prepare the drizzle topping. In a small bowl, stir together the icing sugar and milk (or juice) until the mixture is just thick enough to drizzle well. Add the liquid a little at a time to achieve the desired consistency.
- Once the cake has cooled slightly, drizzle the topping in a zigzag pattern over the surface.
- When the cake is completely cold, cut it into 12 bars. Use a sharp knife for clean cuts.
Expert Tips & Tricks
- Use Very Ripe Bananas: The riper the bananas, the sweeter and moister the bars will be. Bananas with brown spots are perfect.
- Measure Flour Accurately: Gluten-free flour blends can be tricky. Use a kitchen scale for the most accurate measurements, or use the spoon-and-level method.
- Don’t Overmix: Overmixing can result in a tough texture. Mix until just combined.
- For Extra Flavor: Toast the walnuts before adding them to the batter for a richer, nuttier flavor.
- Spice It Up: Add a pinch of cinnamon or nutmeg to the batter for a warm, comforting flavor.
- Prevent Soggy Bars: Allow the banana bars to fully cool before drizzling the topping. This prevents the topping from soaking into the cake and creating a soggy texture.
- Make-Ahead Tip: You can bake the bars a day ahead of time and store them, tightly covered, at room temperature. Add the drizzle just before serving.
Serving & Storage Suggestions
These gluten-free banana bars are delicious served at room temperature or slightly warmed. They pair perfectly with a cup of coffee, tea, or a glass of cold milk. Store leftover bars in an airtight container at room temperature for up to 3 days, in the refrigerator for up to a week, or freeze for up to 2 months. To reheat, microwave individual bars for a few seconds until warmed through, or thaw them at room temperature. When freezing wrap individually for easy removal and defrosting.
Nutritional Information
Please note that nutritional information is an estimate and may vary based on specific ingredients and portion sizes.
| Nutrient | Amount per Serving | % Daily Value |
|---|---|---|
| Calories | 170 kcal | 9% |
| Total Fat | 6g | 8% |
| Saturated Fat | 1g | 5% |
| Cholesterol | 16mg | 5% |
| Sodium | 128mg | 6% |
| Total Carbohydrate | 37g | 14% |
| Dietary Fiber | 1g | 4% |
| Sugars | 23g | |
| Protein | 2g | 4% |
Variations & Substitutions
- Dairy-Free: Substitute the buttermilk with a plant-based milk like almond milk or soy milk mixed with 1 teaspoon of lemon juice or apple cider vinegar.
- Nut-Free: Omit the walnuts or substitute them with sunflower seeds or chocolate chips.
- Chocolate Chip Banana Bars: Add 1/2 cup of chocolate chips to the batter for a chocolatey twist.
- Spice it up: Add 1/2 teaspoon of cinnamon or nutmeg to the dry ingredients.
- Add a Cream Cheese Frosting: For a richer treat, top with a simple cream cheese frosting instead of the icing sugar drizzle.
- Use a Different Gluten-Free Flour Blend: While this recipe is specifically tailored for rice flour, potato starch, and tapioca flour, you can experiment with other gluten-free all-purpose flour blends. Be aware that results may vary.
FAQs (Frequently Asked Questions)
Q: Can I use frozen bananas for this recipe?
A: Yes, you can use frozen bananas. Just make sure to thaw them completely and drain any excess liquid before mashing.
Q: What can I use if I don’t have buttermilk?
A: You can make a buttermilk substitute by adding 1 teaspoon of lemon juice or white vinegar to 1/4 cup of milk. Let it sit for 5 minutes before using.
Q: How do I know when the banana bars are done?
A: Insert a wooden skewer or cake tester into the center of the bars. If it comes out clean or with a few moist crumbs, the bars are done.
Q: Can I freeze these banana bars?
A: Yes, these bars freeze well. Wrap them individually in plastic wrap and then place them in a freezer-safe bag or container. They can be frozen for up to 2 months.
Q: My banana bars are dry. What did I do wrong?
A: Overbaking is the most common cause of dry banana bars. Make sure to check for doneness frequently and remove the bars from the oven as soon as they are done. Also, ensure you are using ripe bananas, as they add moisture to the bars.
Final Thoughts
These gluten-free banana bars are more than just a recipe; they’re a hug in every bite. I encourage you to give them a try and experience the simple joy of a homemade treat. Feel free to experiment with variations and make them your own. And most importantly, share them with loved ones and spread the warmth! Bon appétit!