
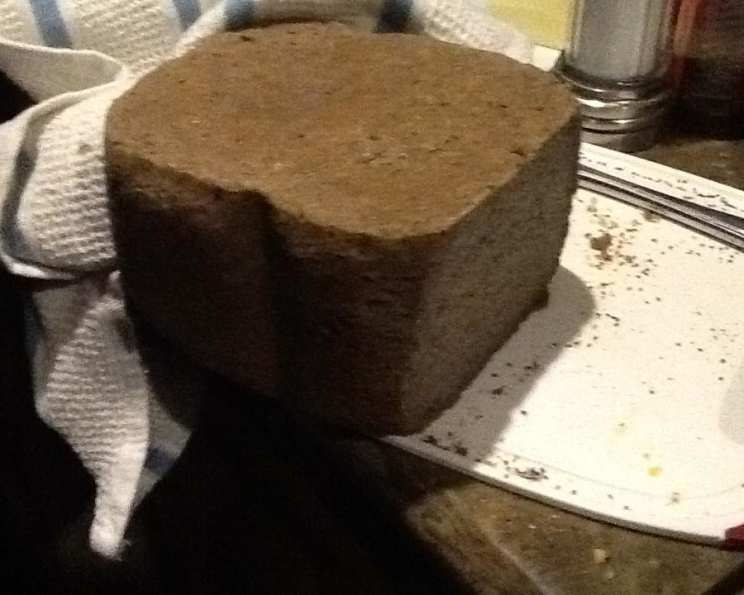
Gluten-Free Buckwheat Bread (Machine): A Hearty Loaf for Everyone
The aroma of freshly baked bread is one of life’s simple joys, a scent that instantly transports me back to my grandmother’s kitchen. She wasn’t much for fancy desserts, but her daily bread, warm from the oven, was legendary. While her recipe relied on traditional wheat flour, I’ve always been fascinated by exploring alternative grains. This gluten-free buckwheat bread, crafted effortlessly in a bread machine, captures that same comforting essence with a unique, earthy flavor, making it accessible to everyone, regardless of dietary restrictions. It’s a surprisingly easy way to create a loaf that’s both delicious and satisfying.
Recipe Overview
- Prep Time: 5 minutes
- Cook Time: 4 hours
- Total Time: 4 hours 5 minutes
- Yields: 1 loaf
- Dietary Type: Gluten-Free
Ingredients
- 3 eggs
- 3 tablespoons softened butter
- 1 1/2 cups milk
- 1 teaspoon soy lecithin (GF Dough Enhancer)
- 1/2 cup buckwheat flour
- 1/2 cup tapioca flour
- 1 1/2 cups brown rice flour
- 1/2 cup potato starch
- 1 tablespoon xanthan gum
- 1 teaspoon sea salt
- 1 tablespoon active dry yeast
Equipment Needed
- Bread machine
Instructions
- Begin by adding the ingredients to your bread machine in the exact order recommended by the manufacturer’s instructions for your particular model. This is crucial for achieving the right consistency and rise. Different bread machines have different requirements for ingredient order, so consult your manual.
- Select the basic cycle on your bread machine. This cycle typically includes kneading, rising, and baking phases, designed for standard bread recipes.
- Keep a close eye on the dough during the kneading phase. If you notice that the flour is sticking to the sides of the bread pan and not being fully incorporated into the dough, carefully scrape down the sides with a spatula. This ensures that all ingredients are evenly distributed, which is essential for a well-structured loaf.
- Allow the bread machine to complete its entire cycle. This will take approximately 4 hours, but this can vary depending on your machine. The bread machine will handle all the work, from kneading to the final bake.
- Once the cycle is complete, carefully remove the bread pan from the machine, using oven mitts or pot holders as it will be hot.
- Invert the pan to release the bread. If the bread sticks, gently loosen it with a spatula or knife, being careful not to damage the loaf.
- Place the freshly baked buckwheat bread on a wire rack to cool completely before slicing. This prevents the bread from becoming soggy and allows the internal structure to set properly.
Expert Tips & Tricks
- Ingredient Temperature: Using room temperature eggs and softened butter ensures that the ingredients incorporate evenly, leading to a smoother dough and better texture.
- Hydration is Key: Gluten-free doughs can be quite thirsty. If your dough appears too dry after the initial mixing, add a tablespoon of milk at a time until it reaches the desired consistency. It should be slightly sticky but not overly wet.
- The Dough Enhancer Difference: Soy lecithin can be omitted, but its addition will contribute to a softer, less crumbly texture in your gluten-free bread. This is particularly helpful with buckwheat flour, which can sometimes result in a denser loaf.
- Yeast Activation: For optimal results, ensure that your active dry yeast is fresh. You can test its viability by mixing it with a little warm water and sugar; if it foams within 5-10 minutes, it’s good to go.
- Cooling Completely is Crucial: Resist the temptation to slice into the bread while it’s still warm. Allowing it to cool completely (at least an hour) allows the starches to set and prevents the bread from becoming gummy.
- Troubleshooting a Dense Loaf: If your bread consistently comes out dense, try increasing the amount of yeast slightly or adding a teaspoon of honey or molasses to the dough to provide the yeast with extra food.
Serving & Storage Suggestions
This gluten-free buckwheat bread is incredibly versatile. Enjoy it warm, slathered with butter or your favorite spread. It makes fantastic toast for breakfast, a hearty base for sandwiches, or a delicious accompaniment to soups and salads.
- Serving: Serve slices fresh or toasted. Pair with savory toppings like avocado, smoked salmon, or a simple egg salad. It is also delicious with sweet toppings like honey, jam, or nut butter.
- Storage: Store the cooled bread in an airtight container at room temperature for up to 2 days. For longer storage, slice the bread and freeze it in a freezer-safe bag. This will keep it fresh for up to 2 months.
- Reheating: To reheat frozen slices, toast them directly from frozen. For a larger portion, thaw the bread in the refrigerator and then warm it in a low oven (300°F/150°C) for 10-15 minutes.
Nutritional Information
Please note that these values are approximate and can vary depending on the specific ingredients used.
| Nutrient | Amount per Serving | % Daily Value |
|---|---|---|
| Calories | 214 kcal | 11% |
| Total Fat | 7.2 g | 11% |
| Saturated Fat | 3.7 g | 18% |
| Cholesterol | 77.7 mg | 26% |
| Sodium | 303.6 mg | 13% |
| Total Carbohydrate | 31.3 g | 10% |
| Dietary Fiber | 2.4 g | 10% |
| Sugars | 0.8 g | 3% |
| Protein | 6.6 g | 13% |
Variations & Substitutions
- Dairy-Free: Substitute the milk with your favorite non-dairy milk alternative, such as almond, soy, or oat milk. Ensure the milk is unsweetened for the best results.
- Sweetener Boost: Add a tablespoon of honey or maple syrup for a slightly sweeter flavor.
- Herbaceous Twist: Incorporate 1-2 tablespoons of finely chopped fresh herbs, such as rosemary, thyme, or dill, for a savory variation.
- Seed Sensations: Add 1/4 cup of mixed seeds, like sunflower, pumpkin, or flax seeds, to the dough for added texture and nutritional value.
- Nutty Delight: Replace some of the brown rice flour with almond flour for a richer, nuttier flavor. Start with 1/4 cup and adjust to your preference.
FAQs (Frequently Asked Questions)
Q: Can I make this recipe without a bread machine?
A: While this recipe is specifically designed for a bread machine, you can adapt it for baking in a conventional oven. However, the kneading and rising times will need to be adjusted, and you’ll need to monitor the dough closely. Look for general gluten-free bread recipes for comparison.
Q: Why is my gluten-free bread so crumbly?
A: Gluten-free flours lack the elasticity of wheat flour, which can result in a crumbly texture. The addition of xanthan gum and soy lecithin helps to bind the ingredients and improve the structure of the bread.
Q: Can I use a different type of gluten-free flour?
A: While you can experiment with different gluten-free flours, it’s important to maintain the correct ratio of flours to starches for the best results. Different flours have different absorbencies, so you may need to adjust the liquid accordingly.
Q: How do I know when the bread is fully baked in the bread machine?
A: Most bread machines have a pre-set timer, but you can also check the internal temperature of the bread with a thermometer. It should reach at least 200°F (93°C).
Q: My bread is sinking in the middle. What did I do wrong?
A: This can be caused by over-proofing or too much liquid in the dough. Make sure you’re using the correct amount of yeast and that the dough is not overly sticky. Reduce the liquid slightly next time if this continues.
Final Thoughts
This gluten-free buckwheat bread recipe is a testament to the fact that delicious, comforting bread can be enjoyed by everyone, regardless of dietary restrictions. The earthy flavor of buckwheat, combined with the ease of a bread machine, makes this loaf a delightful addition to any kitchen. Don’t hesitate to experiment with variations and substitutions to create your own signature loaf. So, dust off your bread machine, gather your ingredients, and embark on a journey to create a wholesome and satisfying bread that will fill your home with warmth and delicious aromas. Share your creations and feedback – happy baking!