
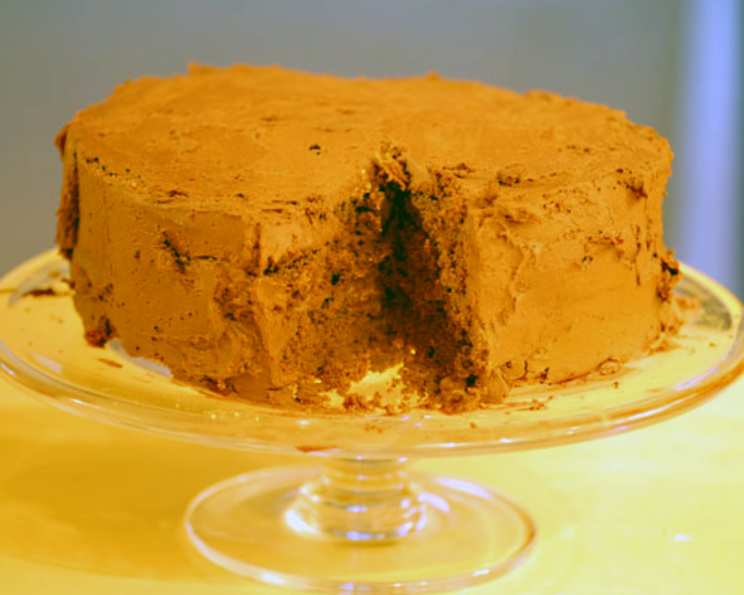
Decadent Gluten-Free Chocolate Cake with Dreamy Chocolate Frosting
There’s something so inherently comforting about chocolate cake, isn’t there? For me, the scent alone instantly transports me back to my grandmother’s kitchen. She always had a chocolate cake baking – usually a simple, unfrosted affair. But on birthdays? Out came the frosting – a rich, dark, intensely chocolate frosting that made even the simplest cake feel like a celebration. This gluten-free version captures that same magic, that same feeling of warmth and pure, unadulterated joy. And that frosting? Well, let’s just say it disappears quickly in my house.
Recipe Overview
- Prep Time: 20 minutes
- Cook Time: 35-40 minutes
- Total Time: 1 hour
- Servings: 12
- Yield: 1 cake
- Dietary Type: Gluten-Free, Dairy-Free (Vegan)
Ingredients
-
For the Cake:
- 3/4 cup coconut flour, sifted
- 1/4 cup vegan cocoa powder, such as Dagoba
- 1 teaspoon Celtic sea salt
- 1 teaspoon baking soda
- 10 eggs
- 1 cup grapeseed oil
- 1 1/2 cups agave nectar
- 1 tablespoon vanilla extract
- 1/4 teaspoon orange zest
-
For the Frosting:
- 1 cup semisweet vegan chocolate chips, such as Chocodrops Dagoba
- 1/2 cup grapeseed oil
- 2 tablespoons agave nectar
- 1 tablespoon vanilla extract
- 1 pinch Celtic sea salt
Equipment Needed
- Two 9-inch round cake pans
- Small bowl
- Large bowl
- Electric hand mixer
- Small saucepan
- Freezer
Instructions
-
Prepare the Dry Ingredients: In a small bowl, thoroughly combine the sifted coconut flour, vegan cocoa powder, Celtic sea salt, and baking soda. Sifting the coconut flour is crucial to avoid any clumps in your final cake batter.
-
Combine the Wet Ingredients: In a large bowl, using an electric hand mixer, blend together the eggs, grapeseed oil, agave nectar, vanilla extract, and orange zest. Ensure all ingredients are well incorporated for a smooth and consistent batter.
-
Combine Wet and Dry: Gradually add the dry ingredients from the small bowl into the large bowl with the wet ingredients. Continue to blend with the electric hand mixer until just combined. Be careful not to overmix, as this can result in a tougher cake.
-
Prepare the Pans: Lightly oil two 9-inch round cake pans with grapeseed oil and dust them with coconut flour. This will prevent the cake from sticking to the pans and ensure easy removal after baking.
-
Pour and Bake: Pour the cake batter evenly into the prepared pans. Bake at 325 degrees Fahrenheit for 35-40 minutes.
-
Check for Doneness: To check if the cake is done, insert a toothpick into the center. If the toothpick comes out clean or with just a few moist crumbs, the cake is ready. If it comes out with wet batter, bake for a few more minutes and check again.
-
Cool Completely: Remove the cakes from the oven and allow them to cool completely in the pans before removing them. Cooling them upside down can help prevent the cake from sinking in the middle.
-
Prepare the Frosting: In a small saucepan over very low heat, melt the vegan chocolate chips and grapeseed oil, stirring frequently to prevent burning.
-
Add Flavor: Once the chocolate is completely melted and smooth, stir in the agave nectar, vanilla extract, and a pinch of Celtic sea salt. The salt helps to enhance the chocolate flavor.
-
Cool the Frosting: Place the saucepan with the frosting in the freezer for 15 minutes to cool down. This step is crucial for achieving the desired fluffy texture.
-
Whip the Frosting: Remove the frosting from the freezer and whip it with a hand blender until it is thick and fluffy. Be careful not to over-whip, as it can become grainy.
-
Frost the Cake: Once the cake layers are completely cool, generously frost the top of one layer, then carefully place the second layer on top. Frost the top and sides of the cake with the remaining frosting.
Expert Tips & Tricks
- Sifting is Key: Don’t skip sifting the coconut flour! It makes a world of difference in the final texture of the cake, preventing lumps and creating a lighter, more delicate crumb.
- Room Temperature Eggs: Using eggs that are at room temperature will help them incorporate more easily into the batter, resulting in a smoother and more even cake.
- Gentle Mixing: Overmixing gluten-free batters can lead to a tough cake. Mix until just combined, and don’t worry about a few small lumps.
- Even Baking: If your oven tends to bake unevenly, rotate the cake pans halfway through the baking time to ensure even browning.
- Frosting Consistency: The frosting can be a bit tricky. If it seems too thin, add a tablespoon of powdered sugar (or a gluten-free alternative) at a time until it reaches the desired consistency. If it becomes too thick, add a teaspoon of oil until it thins.
Serving & Storage Suggestions
This gluten-free chocolate cake is best served at room temperature. You can dust it with a little cocoa powder for an extra touch of elegance. Leftovers can be stored in an airtight container at room temperature for up to 2 days, or in the refrigerator for up to 5 days. For longer storage, you can freeze the cake for up to 2 months. Thaw it in the refrigerator overnight before serving. The frosting also freezes well in a separate airtight container.
Nutritional Information
| Nutrient | Amount per Serving | % Daily Value |
|---|---|---|
| Calories | 308.4 kcal | N/A |
| Calories from Fat | 282 g | 92% |
| Total Fat | 31.4 g | 48% |
| Saturated Fat | 3.9 g | 19% |
| Cholesterol | 176.2 mg | 58% |
| Sodium | 405.6 mg | 16% |
| Total Carbohydrate | 0.6 g | 0% |
| Dietary Fiber | 0 g | 0% |
| Sugars | 0.6 g | 2% |
| Protein | 5.2 g | 10% |
Note: Nutritional information is an estimate and may vary based on specific ingredients and serving sizes.
Variations & Substitutions
- Coconut Oil: You can substitute melted coconut oil for grapeseed oil in both the cake and the frosting for a subtle coconut flavor.
- Maple Syrup: While agave nectar provides a nice sweetness, maple syrup is a great alternative, especially if you prefer a less processed sweetener.
- Espresso Powder: Add a teaspoon of espresso powder to the frosting to intensify the chocolate flavor.
- Nuts: If you’re not nut-free, chopped walnuts or pecans would be a delicious addition to the frosting or as a topping for the cake.
- Spice it up: Add 1/2 teaspoon of chili powder to the batter for a Mexican chocolate version.
- Extracts: Play around with different extracts in the batter like almond or peppermint.
FAQs (Frequently Asked Questions)
Q: Can I use a different gluten-free flour blend instead of coconut flour?
A: While you can experiment with other gluten-free flour blends, coconut flour has unique properties that contribute to the cake’s texture. Be aware that you may need to adjust the liquid ingredients accordingly.
Q: Why is my frosting grainy?
A: Over-whipping the frosting can cause it to become grainy. Be sure to whip it just until it’s thick and fluffy. Also, make sure that your chocolate chips are fully melted and smooth before adding the other ingredients.
Q: Can I make this cake ahead of time?
A: Absolutely! The cake layers can be baked a day or two in advance and stored at room temperature, wrapped tightly in plastic wrap. You can also make the frosting ahead of time and store it in the refrigerator.
Q: What’s the best way to thaw frozen cake?
A: The best way to thaw frozen cake is to transfer it to the refrigerator overnight. This will prevent it from becoming soggy.
Q: Can I double the recipe to make a larger cake?
A: Yes, you can easily double the recipe to make a larger cake. Just be sure to use larger cake pans or bake it in a sheet pan. You may need to increase the baking time slightly.
Final Thoughts
So there you have it: a gluten-free chocolate cake that’s so rich, moist, and utterly irresistible, you won’t even miss the gluten. Whether you’re celebrating a special occasion or simply craving a decadent treat, this cake is sure to satisfy. Give it a try, and don’t be afraid to experiment with variations to make it your own. I’d love to hear your feedback and see your creations. Perhaps you’ll pair it with a scoop of dairy-free vanilla ice cream or a strong cup of coffee? However you choose to enjoy it, I hope it brings you as much joy as it brings me. Happy baking!