
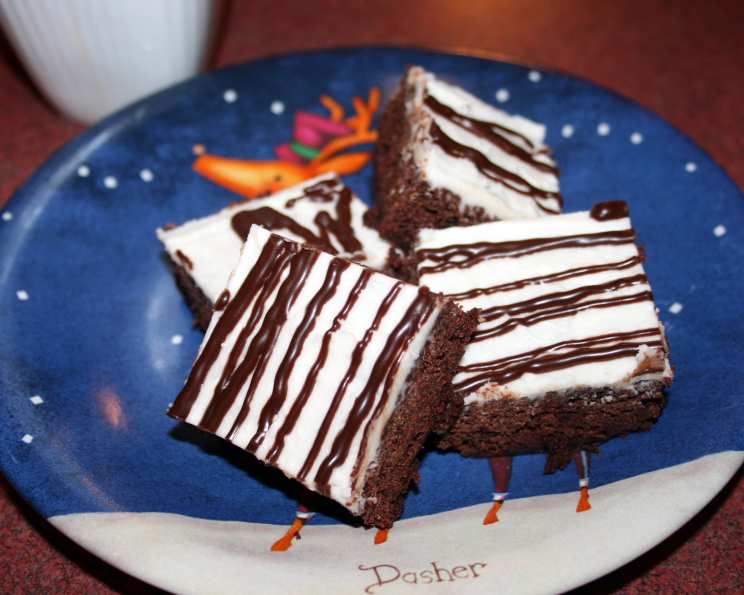
Gluten-Free Chocolate Mint Brownies: A Microwave Miracle
I’ll never forget the time my little sister, Lily, decided to bake brownies for her school bake sale. Unfortunately, Lily has Celiac disease. The oven was occupied, time was short, and a full-blown gluten-free baking project seemed daunting. We needed a Hail Mary – and that’s when we discovered the magic of microwave brownies. A few minutes later, a batch of fudgy, gluten-free chocolate brownies, smelling of peppermint, were ready, turning near disaster into a triumph, and earning Lily rave reviews at the bake sale. These brownies are proof that deliciousness doesn’t always require hours in the kitchen, or even an oven!
Recipe Overview
- Prep Time: 10 minutes
- Cook Time: 6 minutes
- Total Time: 16 minutes
- Yields: 25 squares
- Dietary Type: Gluten-Free
Ingredients
- 2 eggs
- 1 cup granulated sugar
- ½ teaspoon salt
- 1 teaspoon vanilla extract
- ½ cup melted butter or ½ cup canola oil
- ¾ cup sifted rice flour
- ½ cup sifted cocoa
- ½ cup chopped walnuts
Peppermint Icing
- 2 tablespoons butter
- 1 cup icing sugar
- 1 tablespoon half-and-half cream
- ⅛ teaspoon peppermint extract
Glaze
- 2 tablespoons butter
- ¼ – ⅓ cup chocolate chips
Equipment Needed
- 10 x 10 inch glass baking pan
- Microwave oven
- Mixing bowls
- Wooden spoon
- Measuring cups and spoons
- Sifter (optional, but recommended)
Instructions
- In a mixing bowl, beat together the eggs, sugar, vanilla extract, and salt for one minute until well combined.
- Add the melted butter or canola oil. It is important to use fully melted butter for the best texture.
- Stir the wet ingredients well with a wooden spoon (not a mixer) ensuring that the sugar is well mixed with the butter or oil. The wooden spoon helps prevent overmixing, which can make gluten-free brownies tough.
- Stir in the sifted rice flour, cocoa, and walnuts. Sifting the flour and cocoa helps to avoid clumps and ensures a more even texture in the finished brownies. Be sure to stir until just combined.
- Lightly spray or grease a 10 by 10-inch glass baking pan. Glass is recommended for microwave baking.
- Pour the brownie batter into the prepared pan and spread evenly.
- Microwave on High for 5-6 minutes. Cooking times may vary slightly depending on the wattage of your microwave.
- Check for doneness: The top of the brownie should look dry and spring back slightly when touched.
- If using a 1000-watt microwave, it’s recommended to bake on medium-high power for 5-6 minutes to prevent overcooking. Keep a close eye on the brownies during cooking, as microwaves can vary.
- Let the brownies cool completely before icing.
Peppermint Icing
- In a small bowl, stir together the butter, icing sugar, half-and-half cream, and peppermint extract until smooth. Add more half-and-half, a tiny bit at a time, if needed to reach spreading consistency.
- Spread the peppermint icing evenly over the cooled brownies.
Glaze
- In a glass measuring cup, melt the butter and chocolate chips in the microwave for about 1 minute on medium power. Stir after 30 seconds to prevent burning.
- Drizzle the melted chocolate glaze over the peppermint icing layer.
- Chill the brownies in the refrigerator for at least 30 minutes to allow the icing and glaze to set.
- Once chilled, slice into approximately 25 squares.
Expert Tips & Tricks
- Don’t overmix the batter: Overmixing gluten-free batter can result in tough brownies. Mix until just combined.
- Use high-quality cocoa: The quality of your cocoa powder will significantly impact the flavor of the brownies. Opt for a Dutch-processed cocoa for a richer, smoother chocolate taste.
- Control the peppermint: Start with a very small amount of peppermint extract in the icing. Peppermint extract can be overpowering, so add it gradually to taste.
- Adjust sweetness: If you prefer less sweet brownies, reduce the amount of granulated sugar by 1/4 cup.
- For fudgier brownies: Slightly undercook the brownies, as they will continue to set as they cool.
Serving & Storage Suggestions
These brownies are best served chilled, allowing the icing and glaze to firm up. Cut them into small squares for easy serving. Store leftover brownies in an airtight container in the refrigerator for up to 5 days. They can also be frozen for up to 2 months; thaw completely before serving. Serve with a scoop of vanilla ice cream, a dollop of whipped cream, or a cup of hot chocolate for an extra decadent treat.
Nutritional Information
| Nutrient | Amount per Serving | % Daily Value |
|---|---|---|
| Calories | 152.8 kcal | N/A |
| Calories from Fat | 74 kcal | N/A |
| Total Fat | 8.2 g | 12% |
| Saturated Fat | 4.1 g | 20% |
| Cholesterol | 31.8 mg | 10% |
| Sodium | 91.9 mg | 3% |
| Total Carbohydrate | 19 g | 6% |
| Dietary Fiber | 0.7 g | 2% |
| Sugars | 13.7 g | N/A |
| Protein | 1.6 g | 3% |
Note: Nutritional information is an estimate and may vary based on specific ingredients and portion sizes.
Variations & Substitutions
- Nut-Free: Omit the walnuts or substitute with gluten-free chocolate chips or sunflower seeds.
- Dairy-Free: Use dairy-free butter and half-and-half alternatives in the icing and glaze.
- Different Extracts: Experiment with other extracts in the icing, such as almond or orange extract.
- Chocolate Chips in the Batter: Add gluten-free chocolate chips to the brownie batter for extra chocolate flavor.
- Espresso Powder: Add a teaspoon of espresso powder to the brownie batter to enhance the chocolate flavor.
FAQs (Frequently Asked Questions)
Q: Can I use a different type of gluten-free flour?
A: While rice flour is recommended for this recipe, you can try using a gluten-free all-purpose flour blend. Keep in mind that the texture might vary slightly.
Q: Can I bake these in the oven instead of the microwave?
A: This recipe is specifically designed for microwave baking. Baking in the oven would require adjustments to the baking time and temperature.
Q: How do I know when the brownies are done?
A: The top should look dry and spring back slightly when touched. Be careful not to overbake, as they will become dry.
Q: Can I make these ahead of time?
A: Yes, these brownies can be made a day or two in advance. Store them in an airtight container in the refrigerator.
Q: What if I don’t have half-and-half cream?
A: You can substitute with milk or a dairy-free alternative. Add it gradually until you reach the desired consistency for the icing.
Final Thoughts
These Gluten-Free Chocolate Mint Brownies are a testament to the fact that delicious treats can be both quick and accessible, even with dietary restrictions. Whether you’re a seasoned baker or a kitchen novice, I encourage you to give this recipe a try. The combination of rich chocolate, refreshing mint, and a fudgy texture is simply irresistible. Share them with friends and family, or enjoy them as a well-deserved personal indulgence. And, if you happen to discover any new variations, be sure to share your creations! Happy baking!