
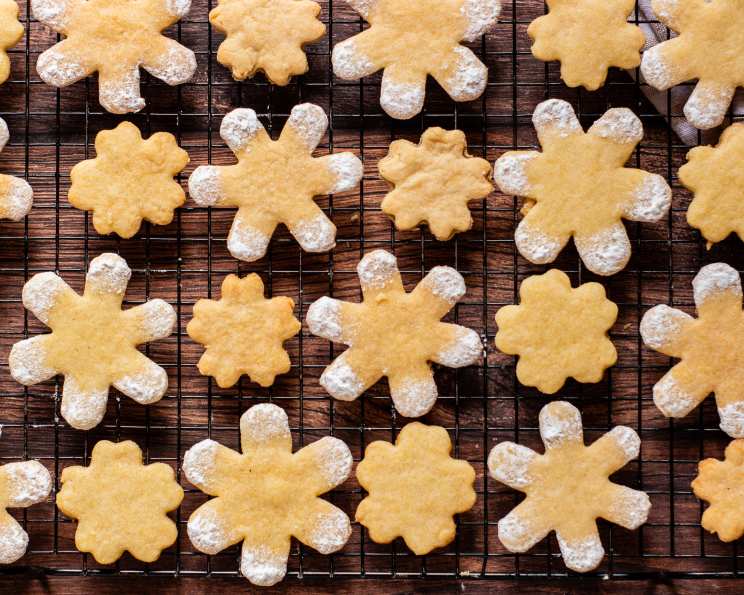
Gluten-Free Dutch Sugar Cookies: A Taste of Nostalgia
The scent of warm sugar cookies baking in the oven instantly transports me back to childhood. I remember eagerly anticipating the arrival of the holidays, not just for the presents, but for the annual cookie-baking marathon with my grandmother. We’d spend hours rolling, cutting, and decorating dozens of cookies, each one a tiny masterpiece of sugary delight. After being diagnosed with Celiac disease many years later, I thought those memories were relegated to the past, destined to be enjoyed only in my mind. But with a little experimentation, I recreated those flavors and textures in a gluten-free version, bringing back those cherished memories with every delicious bite. These cookies capture the essence of those special times and now I can share them with a whole new generation of cookie lovers.
Recipe Overview
- Prep Time: 30 minutes
- Cook Time: 13 minutes
- Total Time: 43 minutes
- Yields: 36-40 cookies
- Serves: 36-40
- Dietary Type: Gluten-Free
Ingredients
- 1 cup rice flour
- ½ cup tapioca flour
- 1 cup cornstarch
- 1 teaspoon baking powder
- 2 ½ teaspoons xanthan gum
- 1 teaspoon salt
- 1 cup sugar
- 1 cup Butter Flavor Crisco
- 1 egg (or ¼ cup liquid egg substitute)
- 2 teaspoons vanilla
- ¼ cup potato starch, for kneading
- Colored sugars or frosting for decoration
Equipment Needed
- Mixer
- Cookie sheets
- Rolling pin
- Plastic wrap
- Cookie cutters
- Small bowl
- Whisk
Instructions
-
Preheat your oven to 350 degrees Fahrenheit (175 degrees Celsius). Ensure you have two ungreased cookie sheets ready to go.
-
In a small bowl, whisk together the rice flour, tapioca flour, cornstarch, baking powder, xanthan gum, and salt. This ensures even distribution of the leavening and binding agents in your gluten-free flour blend. Set this dry mixture aside.
-
In the bowl of your mixer, cream together the sugar and Butter Flavor Crisco. Beat until the mixture is light and fluffy. This step is crucial for achieving a tender cookie.
-
Beat in the egg (or liquid egg substitute) and vanilla until well combined. Make sure the egg is fully incorporated into the sugar and Crisco mixture.
-
Gradually add the dry ingredients to the wet ingredients, mixing just enough to combine. Be careful not to overmix, as this can develop the gluten (even though there isn’t any!) in the flours and result in a tougher cookie. The dough will form a soft ball.
-
With your hands, knead in enough of the potato starch to make the dough easy to handle and roll out. Start with a tablespoon at a time and add more until the dough loses its stickiness. Be careful not to add too much, or the cookies will be dry.
-
Divide the dough in half. Place one portion on a sheet of plastic wrap and cover it with another sheet. Roll the dough out to about 1/8 inch thickness. Rolling between plastic wrap prevents the dough from sticking and eliminates the need for extra flour, which can make the cookies tough.
-
Cut the dough into desired shapes using cookie cutters. Carefully transfer the cut-out cookies to the prepared cookie sheets, leaving a little space between each cookie.
-
Decorate with colored sugars before baking, or use frosting to decorate after baking. Pre-baking decoration melts into the cookie and creates a festive look, while post-baking frosting allows for more intricate designs.
-
With this dough, you can use all the scraps! Just scrape them together, re-knead gently, and roll out again. They will not get tough, so there’s no need to waste any dough.
-
Bake for approximately 13 minutes. The cookies are done when the edges are lightly golden brown. Keep a close eye on them, as baking times can vary depending on your oven.
-
Cool the cookies very slightly on the cookie sheets before carefully transferring them to a wire rack to cool completely. This prevents them from breaking while they are still warm and delicate.
Expert Tips & Tricks
- Room Temperature Ingredients: Ensure that your Crisco and egg are at room temperature. This helps them to emulsify properly, resulting in a smoother dough and a more tender cookie.
- Chilling the Dough: If you find the dough too soft to handle, wrap it in plastic wrap and chill it in the refrigerator for 30 minutes before rolling. This will firm it up and make it easier to work with.
- Even Baking: For even baking, rotate the cookie sheets halfway through the baking time. This ensures that all the cookies are exposed to the same amount of heat.
- Preventing Spreading: If your cookies are spreading too much during baking, try chilling the dough for a longer period of time or using a slightly cooler oven temperature.
- Cookie Cutters: Dip your cookie cutters in potato starch before each cut to prevent the dough from sticking.
- For extra flavour: Add a little lemon or orange zest to the dough.
Serving & Storage Suggestions
Serve these Gluten-Free Dutch Sugar Cookies with a glass of cold milk, a cup of hot coffee, or a scoop of vanilla ice cream. Their delicate sweetness pairs well with a variety of beverages and desserts.
Store the cooled cookies in an airtight container at room temperature for up to a week. For longer storage, you can freeze the cookies for up to two months. Thaw them at room temperature before serving. You can also freeze the unbaked dough. Wrap it tightly in plastic wrap and store it in the freezer for up to two months. Thaw it in the refrigerator overnight before rolling and baking.
Nutritional Information
Nutritional information is an estimate only.
| Nutrient | Amount per Serving | % Daily Value |
|---|---|---|
| Calories | 109 kcal | N/A |
| Calories from Fat | 53 kcal | N/A |
| Total Fat | 5.9 g | 9% |
| Saturated Fat | 2.4 g | 11% |
| Cholesterol | 8.4 mg | 2% |
| Sodium | 77.7 mg | 3% |
| Total Carbohydrate | 13.3 g | 4% |
| Dietary Fiber | 0.2 g | 0% |
| Sugars | 5.6 g | N/A |
| Protein | 0.5 g | 1% |
Variations & Substitutions
- Dairy-Free: Substitute the Butter Flavor Crisco with a dairy-free shortening. Ensure your egg substitute is also dairy-free.
- Egg-Free: Use a flax egg or applesauce as an egg substitute. Combine 1 tablespoon of ground flaxseed with 3 tablespoons of water and let it sit for 5 minutes to thicken, or use ¼ cup applesauce.
- Flavor Variations: Add different extracts to the dough, such as almond, lemon, or orange.
- Spiced Cookies: Add a pinch of cinnamon, nutmeg, or ginger to the dry ingredients for a warm, spiced flavor.
- Chocolate Chip Cookies: Add ½ cup of mini chocolate chips to the dough for a chocolatey twist.
FAQs (Frequently Asked Questions)
Q: Can I use a different gluten-free flour blend?
A: While this recipe is specifically formulated for the listed flours, you can experiment with other gluten-free blends. However, you may need to adjust the amount of liquid or potato starch to achieve the desired dough consistency.
Q: My dough is too sticky. What should I do?
A: Gradually add more potato starch, one tablespoon at a time, until the dough is easy to handle. Be careful not to add too much, as this can make the cookies dry. Chilling the dough can also help reduce stickiness.
Q: Can I freeze the cookie dough?
A: Yes, you can freeze the cookie dough. Wrap it tightly in plastic wrap and store it in the freezer for up to two months. Thaw it in the refrigerator overnight before rolling and baking.
Q: My cookies are spreading too much during baking. What am I doing wrong?
A: This could be due to several factors, including using too much sugar, not chilling the dough enough, or baking at too high a temperature. Try reducing the amount of sugar, chilling the dough for a longer period of time, or lowering the oven temperature slightly.
Q: How do I prevent the cookies from browning too quickly?
A: If the cookies are browning too quickly, lower the oven temperature by 25 degrees Fahrenheit and bake them for a longer period of time. You can also tent the cookie sheet with aluminum foil to prevent excessive browning.
Final Thoughts
These Gluten-Free Dutch Sugar Cookies are a delightful treat that everyone can enjoy. The combination of crisp edges and soft centers, along with the nostalgic flavor, makes them irresistible. I encourage you to try this recipe and experience the joy of baking these cookies for yourself. Feel free to experiment with different decorations, flavors, and variations to create your own signature sugar cookie. Share your creations with friends and family and let them enjoy the taste of homemade goodness. Happy baking!