
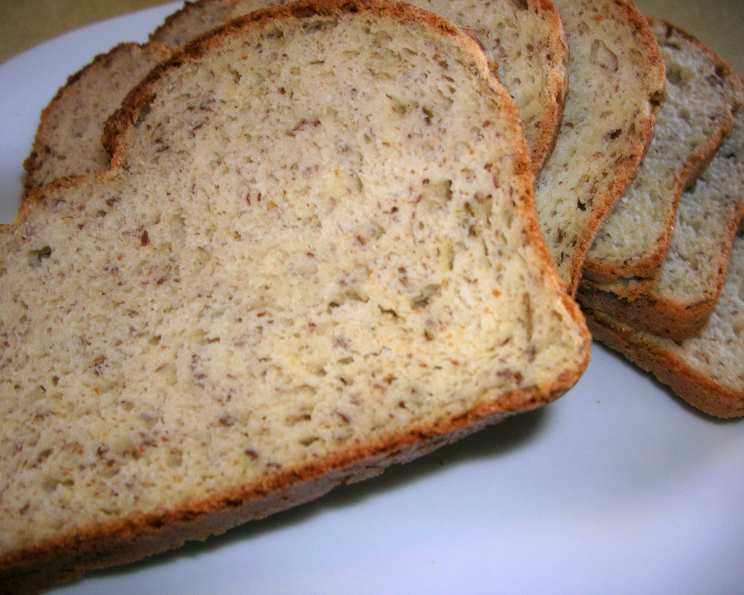
Gluten-Free Flax Bread: A Hearty and Nutritious Loaf
The aroma of freshly baked bread has always been synonymous with home to me. As a child, my grandmother, a woman of few words but boundless love, would always be in the kitchen, her hands dusted with flour, coaxing life into simple ingredients. One of my fondest memories is the smell of her flax bread baking in the oven, its nutty fragrance filling the entire house. Although her recipe was not gluten-free, this recipe honors her spirit of wholesome baking while catering to modern dietary needs.
Recipe Overview
- Prep Time: 1 hour 20 minutes
- Cook Time: 40 minutes
- Total Time: 2 hours
- Servings: 12-18
- Yield: 1 loaf
- Dietary Type: Gluten-Free, can be made Vegan
Ingredients
- 1 1⁄4 cups gluten-free flour blend (ensure it’s a blend suitable for bread)
- 1⁄4 cup garfava flour
- 1⁄2 cup potato starch
- 1⁄4 cup cornstarch
- 1⁄4 cup flax seed meal
- 2 1⁄2 teaspoons xanthan gum
- 2 teaspoons active dry yeast
- 1 teaspoon salt
- 2 eggs
- 2 egg whites
- 1 cup water (or 1 cup milk)
- 2 tablespoons vegetable oil
- 2 tablespoons honey
- 2 teaspoons vinegar
Equipment Needed
- 9×5 inch loaf pan
- Mixing bowl or stand mixer
- Measuring cups and spoons
- Spatula
Instructions
- In a large mixing bowl or the bowl of a stand mixer, combine the gluten-free flour blend, garfava flour, potato starch, cornstarch, flax seed meal, xanthan gum, active dry yeast, and salt. Whisk these dry ingredients together thoroughly to ensure even distribution. This step is crucial for the bread’s texture and rise.
- In a separate bowl, combine the wet ingredients: eggs, egg whites, water (or milk), vegetable oil, honey, and vinegar. Whisk until well combined. The vinegar helps activate the yeast and contributes to the bread’s rise and texture.
- Pour the wet ingredients into the bowl with the dry ingredients. Using a stand mixer fitted with the paddle attachment (or using a hand mixer), mix on medium speed.
- Be sure to scrape down the sides of the bowl periodically to ensure all ingredients are fully incorporated.
- Continue mixing on medium speed for 4-5 minutes. This extended mixing time is vital for developing the gluten-free flour structure, resulting in a fluffier bread. The batter will be quite wet and sticky.
- Pour the batter into a greased 9×5 inch loaf pan. Ensure the pan is well-greased to prevent sticking.
- Cover the pan loosely with plastic wrap and place it in a warm place to rise. A turned-off oven (preheated briefly and then turned off) provides an ideal environment.
- Let the dough rise until it reaches the top of the pan. This may take approximately 80 minutes, but the exact time will depend on the warmth of your environment. Be patient and allow the dough to fully rise for the best results.
- Once the dough has risen to the top of the pan, bake in a preheated oven at 350°F (175°C) for about 40 minutes.
- To check for doneness, insert a wooden skewer or toothpick into the center of the loaf. If it comes out clean or with just a few moist crumbs, the bread is done. If it comes out with wet batter, bake for a few more minutes and check again.
- Remove the loaf from the oven and let it cool in the pan for about 10 minutes. Then, carefully remove the bread from the pan and place it on a wire rack to cool completely before slicing. This prevents the bread from becoming soggy.
Expert Tips & Tricks
- For a richer flavor, try using a high-quality olive oil instead of vegetable oil.
- If your kitchen is cold, you can speed up the rising process by placing the dough in a slightly warmed oven with a bowl of hot water. The steam will create a warm, humid environment that encourages rising.
- If you find that your bread is browning too quickly, you can tent it with foil during the last 15 minutes of baking.
- Experiment with adding seeds or nuts to the dough for added texture and flavor. Sunflower seeds, pumpkin seeds, or chopped walnuts would all be delicious additions.
Serving & Storage Suggestions
This gluten-free flax bread is delicious served warm or at room temperature. It’s fantastic toasted and topped with avocado, nut butter, or your favorite jam. It also makes excellent sandwiches.
To store, wrap the cooled bread tightly in plastic wrap or place it in an airtight container. It will keep at room temperature for 2-3 days, in the refrigerator for up to a week, or in the freezer for up to 2 months. To reheat, you can toast slices or wrap the loaf in foil and warm it in a low oven (300°F/150°C) for about 15-20 minutes.
Nutritional Information
(Estimated per serving, based on 16 servings)
| Nutrient | Amount per Serving | % Daily Value |
|---|---|---|
| Calories | 94.2 kcal | N/A |
| Calories from Fat | 37 g | 39% |
| Total Fat | 4.1 g | 6% |
| Saturated Fat | 0.7 g | 3% |
| Cholesterol | 31 mg | 10% |
| Sodium | 220.4 mg | 9% |
| Total Carbohydrate | 11.9 g | 3% |
| Dietary Fiber | 1.2 g | 4% |
| Sugars | 3.2 g | 12% |
| Protein | 2.8 g | 5% |
Variations & Substitutions
- Vegan Option: To make this bread vegan, replace the eggs and egg whites with a flax egg replacer (1 tablespoon flaxseed meal mixed with 3 tablespoons water per egg, let sit for 5 minutes to thicken). You can also substitute the honey with maple syrup or agave nectar.
- Dairy-Free Option: Use water or any plant-based milk (almond, soy, oat) in place of cow’s milk.
- Spice it up: Add a teaspoon of cinnamon or pumpkin pie spice to the dry ingredients for a warm, comforting flavor.
- Add seeds: Include 1/4 cup of your favorite seeds, like sunflower, pumpkin, or sesame seeds, for extra crunch and nutrition.
FAQs (Frequently Asked Questions)
Q: Can I use a different gluten-free flour blend?
A: Yes, but be aware that different blends may yield slightly different results. Ensure the blend you choose is specifically designed for baking bread.
Q: Can I use instant yeast instead of active dry yeast?
A: Yes, you can substitute instant yeast. You can add it directly to the dry ingredients without proofing it first.
Q: Why is my bread so dense?
A: Over-mixing or under-rising can lead to a dense loaf. Make sure to follow the mixing instructions carefully and allow the dough to rise fully.
Q: Can I freeze this bread?
A: Yes, this bread freezes well. Wrap it tightly in plastic wrap and then in foil or place it in a freezer-safe bag.
Q: What if I don’t have garfava flour?
A: Garfava flour adds a unique flavor and texture, but you can substitute it with an equal amount of gluten-free all-purpose flour.
Final Thoughts
This gluten-free flax bread is more than just a recipe; it’s an invitation to create something wholesome and nourishing in your own kitchen. I encourage you to try this recipe, experiment with your favorite variations, and share the warmth and goodness of homemade bread with those you love. And like the positive reviews that inspired me long ago, I hope it inspires you to new culinary heights!