
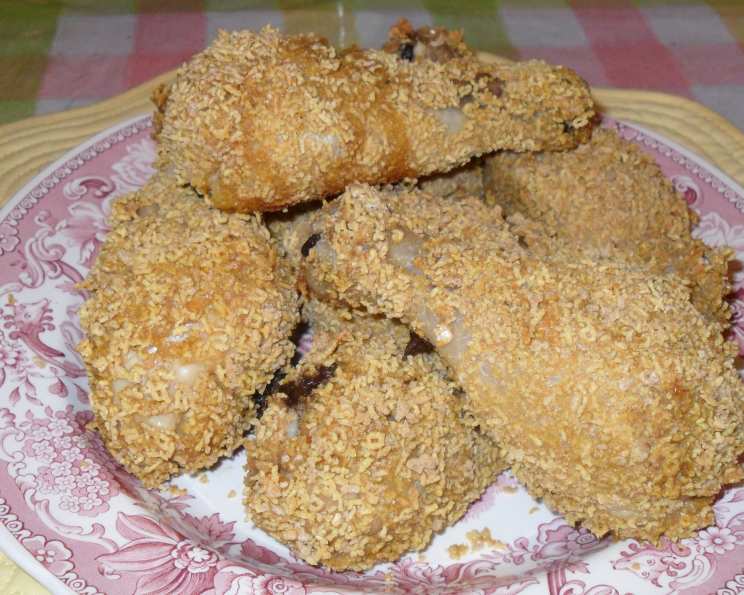
The Ultimate Gluten-Free Fried Chicken: Crispy, Golden, and Irresistibly Delicious
I remember the first time I bit into truly great fried chicken. It was at a roadside diner in Nashville, Tennessee. The crackling skin gave way to juicy, tender meat, and the seasoning was pure magic. For years after being diagnosed with gluten intolerance, I mourned the loss of that perfect, comforting bite. So, I embarked on a mission to recreate that experience, gluten-free style, and I’m thrilled to share this recipe – a testament to the fact that delicious fried chicken can absolutely be enjoyed without gluten!
Recipe Overview
- Prep Time: 30 minutes
- Cook Time: 30 minutes
- Total Time: 1 hour
- Servings: 2
- Yields: 2 chicken breasts
- Dietary Type: Gluten-Free
Ingredients
- 2 chicken breasts
- ½ cup gluten-free flour
- ½ teaspoon salt
- ⅛ teaspoon pepper
- 1 egg
- 1 tablespoon olive oil
- 1 cup gluten-free Rice Chex
- ¼ cup olive oil
- ¼ cup vegetable oil
Equipment Needed
- 2 Bowls
- Gallon-sized Ziploc bag
- Rolling pin
- Skillet
- Plate lined with paper towels
- Baking pan (optional for baking)
Instructions
- Begin by rinsing and cutting the chicken breasts into approximately 2-inch strips. This ensures even cooking and a better breading-to-chicken ratio.
- In a medium-sized bowl, thoroughly combine the gluten-free flour, salt, and pepper. This creates the base for your flavorful coating.
- In a separate bowl, whisk together the egg with 1 tablespoon of olive oil. The oil helps to create a smoother, more cohesive egg wash.
- Next, prepare the crispy coating. Place the gluten-free Rice Chex into a gallon-sized Ziploc bag. Seal the bag tightly and use a rolling pin to crush the cereal into fine crumbs. Leave the crushed cereal in the bag for easy breading.
- Prepare your frying setup. In a skillet, combine ¼ cup of olive oil and ¼ cup of vegetable oil. The combination provides a good balance of flavor and heat tolerance. Heat the oil over medium-high heat. You’ll want it hot enough to sizzle gently when a tiny piece of breading is dropped in, but not so hot that it burns the coating before the chicken is cooked through.
- Now, it’s time to bread the chicken. Pat the chicken breast strips dry with paper towels. This helps the flour mixture adhere properly. Dredge each strip in the flour mixture, ensuring it’s fully coated.
- Dip the floured chicken into the egg mixture, again making sure it’s completely covered.
- Finally, transfer the egg-washed chicken to the Ziploc bag filled with crushed Rice Chex. Seal the bag and shake vigorously to coat the chicken evenly with the cereal crumbs. Press gently to ensure the crumbs adhere well.
- Place the breaded chicken strips on a plate lined with paper towels. Cover loosely and refrigerate for at least 30 minutes. This allows the coating to set and helps it stay crispy during frying. Longer refrigeration (up to a few hours) is perfectly fine, too.
- Carefully place the breaded chicken strips into the preheated oil in the skillet. Fry for approximately 5-7 minutes per side, or until golden brown and cooked through. The internal temperature of the chicken should reach 165°F (74°C). Work in batches to avoid overcrowding the skillet, which can lower the oil temperature and result in soggy chicken.
- Remove the fried chicken from the skillet and place it on a clean plate lined with paper towels to drain excess oil.
Baking Alternative:
- Preheat your oven to 350°F (175°C).
- Spray a baking pan generously with canola oil or your preferred cooking spray.
- Place the breaded chicken strips on the prepared baking pan.
- Bake for 30 minutes total, flipping the chicken halfway through. Cook for 20 minutes on one side, then turn and cook for an additional 10 minutes to ensure even browning and crispiness.
- Remove from the oven and let cool slightly before serving.
Expert Tips & Tricks
- Double Breading: For an extra-crispy coating, repeat the breading process – flour, egg, then Rice Chex – before refrigerating.
- Oil Temperature is Key: Maintaining the correct oil temperature is crucial for achieving crispy, non-greasy fried chicken. Use a thermometer to ensure the oil stays around 325-350°F (160-175°C).
- Spice It Up: Add a pinch of cayenne pepper or a dash of your favorite hot sauce to the flour mixture for a little extra kick. Smoked paprika is another delicious addition.
- Buttermilk Substitute: If you tolerate dairy and want a richer flavor, soak the chicken in buttermilk (or a mixture of milk and lemon juice) for 30 minutes before breading. This tenderizes the chicken and adds a subtle tang.
- Don’t Overcrowd the Pan: Cooking the chicken in batches prevents the oil temperature from dropping too much, ensuring a crispy result.
Serving & Storage Suggestions
Serve your gluten-free fried chicken hot, straight from the skillet or oven, for the best flavor and crispness. It pairs perfectly with classic Southern sides like mashed potatoes, coleslaw, green beans, or cornbread. For a lighter meal, try serving it with a fresh salad or roasted vegetables.
Leftover fried chicken can be stored in an airtight container in the refrigerator for up to 3 days. To reheat, bake in a preheated oven at 350°F (175°C) for about 10-15 minutes, or until heated through. You can also reheat it in an air fryer for a similar result. Microwaving is not recommended, as it can make the chicken soggy.
Nutritional Information
| Nutrient | Amount per Serving | % Daily Value |
|---|---|---|
| Calories | 866 kcal | N/A |
| Calories from Fat | 692 kcal | 80% |
| Total Fat | 77 g | 118% |
| Saturated Fat | 12.9 g | 64% |
| Cholesterol | 185.8 mg | 61% |
| Sodium | 807.2 mg | 33% |
| Total Carbohydrate | 9.5 g | 3% |
| Dietary Fiber | 0.1 g | 0% |
| Sugars | 0.9 g | 3% |
| Protein | 34.1 g | 68% |
Note: Nutritional information is an estimate and may vary depending on specific ingredients and cooking methods.
Variations & Substitutions
- Crust Variations: Experiment with different gluten-free cereals for the crust. Corn flakes, quinoa flakes, or even crushed gluten-free crackers can be used.
- Spice Blends: Create your own custom spice blend for the flour mixture. Garlic powder, onion powder, paprika, and herbs like thyme or oregano can add unique flavors.
- Dairy-Free Option: Ensure all ingredients are dairy-free. Use a plant-based milk alternative (like almond milk or soy milk) in place of buttermilk, if using, and check the labels of all other ingredients.
- Chicken Thighs: Substitute boneless, skinless chicken thighs for chicken breasts. Thighs are often more flavorful and stay more moist during cooking.
- Air Fryer Option: Reduce the oil even further by using an air fryer. Spray the breaded chicken with oil and air fry at 375°F (190°C) for 15-20 minutes, flipping halfway through, until golden brown and cooked through.
FAQs (Frequently Asked Questions)
Q: Can I make this recipe ahead of time?
A: Yes, you can bread the chicken and refrigerate it for up to 24 hours before frying or baking. This allows the flavors to meld and the coating to adhere even better.
Q: What’s the best way to keep the fried chicken crispy?
A: Place the fried chicken on a wire rack while it cools. This allows air to circulate and prevents the bottom from becoming soggy.
Q: Can I use a different type of oil for frying?
A: Yes, you can use other oils with a high smoke point, such as canola oil, peanut oil, or avocado oil.
Q: Is it necessary to refrigerate the breaded chicken before frying?
A: While not strictly necessary, refrigerating the breaded chicken for at least 30 minutes helps the coating set and stay crispy during frying.
Q: Can I freeze leftover fried chicken?
A: Yes, you can freeze leftover fried chicken. Let it cool completely, then wrap it tightly in plastic wrap and place it in a freezer bag. It can be stored in the freezer for up to 2 months. Reheat in the oven for best results.
Final Thoughts
So there you have it: a golden, crispy, and utterly satisfying gluten-free fried chicken recipe that will rival even your fondest memories. Don’t be afraid to experiment with different spice blends and crust variations to create your own signature version. Gather your ingredients, preheat your oven or skillet, and get ready to experience the joy of perfectly cooked fried chicken, completely gluten-free. I encourage you to try this recipe and share your feedback – and don’t forget to pair it with your favorite comforting sides for a truly unforgettable meal!