
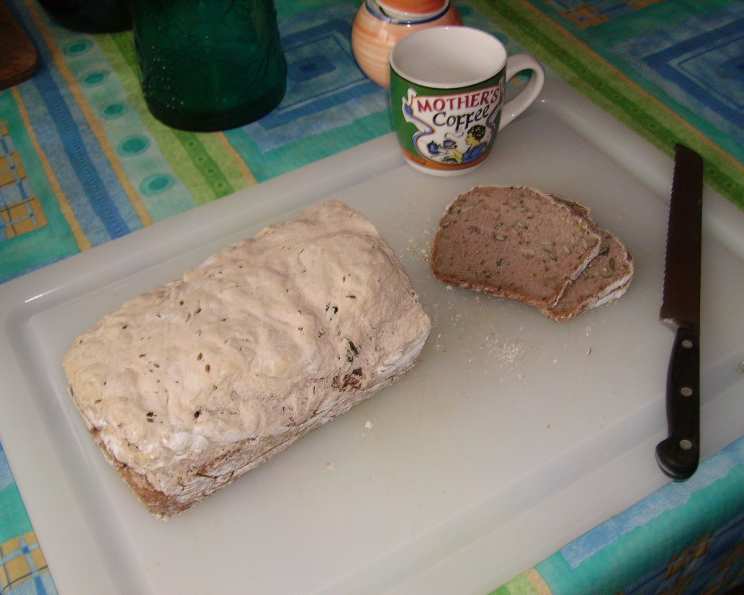
Gluten-Free High-Protein Bean Bread: A Hearty and Delicious Delight
The scent of freshly baked bread is one of life’s greatest comforts. I remember one particularly challenging week in culinary school when I was experimenting with gluten-free baking. After countless failed attempts, I was on the verge of giving up. Then, I stumbled upon the idea of incorporating beans for moisture and protein. The result? A surprisingly delicious, hearty loaf that not only boosted my confidence but also became a staple in my gluten-free repertoire. The nutty aroma, the satisfying crumb, and the knowledge that I was nourishing myself with wholesome ingredients – it was the perfect pick-me-up and a testament to the power of simple, healthy baking.
Recipe Overview
- Prep Time: 1 hour 40 minutes (includes resting time)
- Cook Time: 30-40 minutes
- Total Time: 2 hours 10-20 minutes
- Servings: 1
- Yields: 1 loaf
- Dietary Type: Gluten-Free, Dairy-Free (if using lactose-free whey protein)
Ingredients
- 2 ½ cups gluten-free bread mix (not self-raising)
- ½ lb cooked and drained kidney beans
- 1 cup lukewarm water
- 2 tablespoons active dry yeast
- 1 teaspoon honey
- 1 teaspoon salt
- 3 tablespoons olive oil
- ½ teaspoon baking soda
- ½ scoop whey protein (or ½ scoop soy protein)
- ¼ cup sunflower seeds
- ¼ cup flax seeds
- ⅛ cup sesame seeds
Equipment Needed
- Mixer with dough hooks
- Wire whisk
- Food processor or blender
- Measuring cups and spoons
- 4 x 9 inch loaf pan
- Foil
- Towel
- Wire rack
Instructions
- In a mixer bowl, combine the gluten-free bread mix, salt, and baking soda using a wire whisk. This ensures even distribution of the leavening agents.
- Create a well in the center of the dry ingredients. Add the yeast and honey into the well. Slowly stir in a small amount of the lukewarm water just enough to dissolve the yeast. Be patient; the yeast needs a little encouragement to get going.
- Let the yeast mixture rest while you prepare the bean puree. This allows the yeast to activate.
- Place the cooked kidney beans, olive oil, protein powder (whey or soy), and ½ cup of the lukewarm water into a food processor or blender. Process until the beans are completely pureed. Add a little more water if needed to achieve a smooth and creamy consistency. The consistency should be similar to a thick soup.
- Pour the bean puree and seeds (sunflower, flax, and sesame) into the mixer bowl with the flour and activated yeast.
- Mix the ingredients together quickly using the mixer with dough hooks. The dough should have a batter-like consistency – too wet to knead by hand, but not so runny that it’s easily pourable. It will be sticky to the touch.
- Knead the dough/batter for 10 minutes using the dough hooks on the mixer. Scrape down the sides of the bowl and the hooks as needed to ensure everything is evenly incorporated. This is crucial for developing the structure of the gluten-free bread.
- Cover the bowl with foil and then a towel. Let the dough rise in a warm place for 1 hour. The warmth helps the yeast work its magic.
- Punch the dough down gently (it should have roughly doubled in size). Let it rise again for another 30 minutes. This second rise contributes to a lighter and more airy texture.
- Pour the batter into a well-greased 4 x 9 inch loaf pan. Smooth the top with a wet spoon.
- Let the batter rise for a final 30 minutes in the loaf pan.
- Preheat your oven to 350°F (175°C).
- Bake the bread for approximately 30-40 minutes.
- After 30 minutes, test for doneness by inserting a toothpick into the center of the bread. If the toothpick comes out clean, the bread is ready. If not, continue baking for another 5-10 minutes, checking again.
- Remove the bread from the pan immediately after baking and let it cool completely on a wire rack before slicing. This prevents the bottom from becoming soggy.
Expert Tips & Tricks
- The Importance of Kneading: Gluten-free doughs often benefit from extended mixing to develop structure. Don’t skimp on the 10 minutes of kneading with the dough hooks.
- Temperature Matters: Make sure the water you use for activating the yeast and pureeing the beans is lukewarm, not hot. Hot water can kill the yeast.
- Pan Preparation: Greasing the loaf pan thoroughly is essential to prevent the bread from sticking. You can also line the pan with parchment paper for extra insurance.
- Doneness Test: Ovens vary, so use the toothpick test as a guide. If the top of the bread is browning too quickly, tent it loosely with foil during the last 10-15 minutes of baking.
Serving & Storage Suggestions
This hearty gluten-free bean bread is delicious served warm or at room temperature. It pairs well with soups, salads, or as a base for sandwiches. To store, wrap the cooled bread tightly in plastic wrap or place it in an airtight container. It will keep at room temperature for 2-3 days, in the refrigerator for up to a week, or in the freezer for up to 2 months. To reheat, wrap a slice or the entire loaf in foil and warm in a 350°F (175°C) oven for 10-15 minutes, or microwave individual slices for a few seconds.
Nutritional Information
Please note that the following is an estimate. Actual values may vary based on specific ingredients and portion sizes.
| Nutrient | Amount per Serving | % Daily Value |
|---|---|---|
| Calories | ~250 kcal | ~13% |
| Total Fat | ~10g | ~15% |
| Saturated Fat | ~1g | ~5% |
| Cholesterol | 0mg | 0% |
| Sodium | ~350mg | ~15% |
| Total Carbohydrate | ~30g | ~10% |
| Dietary Fiber | ~5g | ~20% |
| Sugars | ~2g | – |
| Protein | ~15g | ~30% |
Variations & Substitutions
- Different Beans: Experiment with other types of cooked beans, such as black beans or pinto beans, for a different flavor profile.
- Seed Variations: Try using a mix of seeds or substituting different seeds altogether, such as pumpkin seeds or chia seeds.
- Herbs & Spices: Add dried herbs like rosemary or thyme to the dough for a savory twist.
- Sweet Bread: For a slightly sweeter bread, increase the amount of honey or add a tablespoon of maple syrup.
- Protein Powder: If you don’t have whey or soy protein, you can try using another type of protein powder, such as pea protein.
FAQs (Frequently Asked Questions)
Q: Can I use a different gluten-free flour blend?
A: Yes, you can, but results may vary depending on the blend’s composition. Look for a blend designed for bread making and adjust the liquid accordingly.
Q: Why is kneading important for gluten-free bread?
A: Unlike wheat-based breads, gluten-free breads don’t develop gluten. Kneading helps to create structure by incorporating air and distributing ingredients evenly.
Q: Can I make this bread without protein powder?
A: Yes, you can omit the protein powder, but the bread will have a lower protein content and may be slightly more dense.
Q: How do I know if my yeast is active?
A: When you add the lukewarm water and honey to the yeast, it should start to bubble and foam within a few minutes, indicating that it’s active.
Q: My bread is sinking in the middle. What did I do wrong?
A: This can happen if the dough is over-proofed or if the oven temperature is too low. Make sure to follow the rising times and oven temperature carefully.
Final Thoughts
This Gluten-Free High-Protein Bean Bread is more than just a recipe; it’s an invitation to explore the delicious possibilities of gluten-free baking. The combination of hearty beans, nutritious seeds, and satisfying texture makes it a bread that’s both good for you and incredibly enjoyable. Don’t be afraid to experiment with different variations and make it your own. And most importantly, share your creations and feedback with fellow bakers – the joy of baking is always best when shared! Serve this delightful bread with a warm bowl of lentil soup or alongside a vibrant green salad for a complete and nourishing meal. Happy baking!