
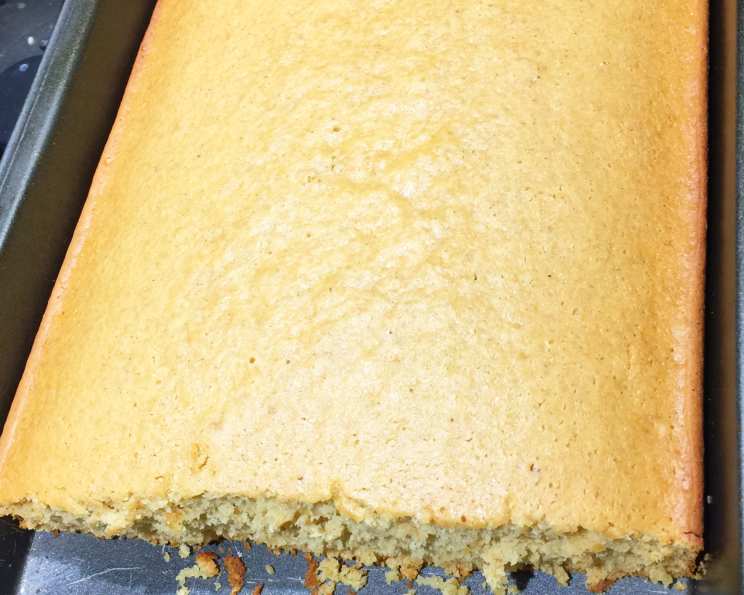
Gluten-Free Honey Cake: A Rosh Hashanah Tradition Reimagined
The scent of honey always takes me back to my grandmother’s kitchen. Every year, as Rosh Hashanah approached, the air would be thick with the sweet, comforting aroma of her honey cake. It wasn’t just a cake; it was a symbol of hope for a sweet new year, a warm embrace of family tradition, and a delicious promise of good things to come. Although my grandmother’s recipe was far from gluten-free, the memory of that moist, fragrant cake inspired me to create this version, ensuring everyone can enjoy this cherished holiday treat.
Recipe Overview
- Prep Time: 20 minutes
- Cook Time: 45-50 minutes
- Total Time: 1 hour 5-10 minutes
- Servings: 12
- Yield: 1 cake
- Dietary Type: Gluten-Free, Dairy
Ingredients
- ¾ cup turbinado sugar or ¾ cup white sugar
- 1 cup honey
- ¼ cup vegetable oil
- ¼ cup applesauce
- 4 eggs
- 2 teaspoons grated orange zest
- 1 cup orange juice
- 3 cups Pamela’s Ultimate Baking and Pancake Mix (Gluten-Free) (Note: If using a different GF flour mix, you may need to add additional baking powder and xanthan gum.)
- 1 ½ teaspoons baking powder
- ½ teaspoon baking soda
- ½ teaspoon salt
- 1 teaspoon ground cinnamon
- ½ teaspoon ground nutmeg
Equipment Needed
- 9-inch round cake pan (or 9×13-inch square pan)
- Parchment paper
- Baking spray
- Mixing bowls
- Electric mixer or whisk
- Cooling rack
- Measuring cups and spoons
Instructions
-
Preheat your oven to 350 degrees F (175 degrees C). Make sure your oven rack is positioned in the center for even baking.
-
Prepare your cake pan. Cut a circle of parchment paper to fit the bottom of a 9-inch round cake pan. Place the parchment circle in the bottom of the pan, and then lightly spray the inside of the pan (including the parchment) with baking spray. This ensures easy release after baking. If using a 9×13 pan, line the bottom with parchment, leaving an overhang on the sides to lift the cake out easily.
-
In a medium mixing bowl, whisk together the dry ingredients: Pamela’s Ultimate Baking and Pancake Mix, baking powder, baking soda, nutmeg, cinnamon, and salt. Set this mixture aside. Whisk well to evenly distribute the leavening agents and spices.
-
Separate the eggs. Place the egg whites in one large bowl and the egg yolks in another.
-
Beat the egg whites until they form stiff peaks. This step is crucial for creating a light and airy texture in the cake. You can use an electric mixer or a whisk. If using a mixer, start on low speed and gradually increase to high. The peaks should stand up straight when the whisk is lifted.
-
In the bowl with the egg yolks, combine the wet ingredients: sugar, honey, oil, applesauce, and orange zest. Beat these ingredients together until they are well combined and slightly lightened in color. This incorporates air and creates a smoother batter.
-
Gradually add the flour mixture and orange juice to the wet ingredients. Using a whisk or hand beater on low speed, alternate adding the flour mixture and orange juice, beginning and ending with the flour. This prevents the batter from becoming overly wet and ensures that the flour is evenly distributed. Mix until just combined; be careful not to overmix.
-
Gently fold the egg whites into the batter. This is the most delicate step. Use a rubber spatula and gently fold the egg whites into the batter in two or three additions, being careful not to deflate the whites. Stir just until the ingredients are fully combined. Overmixing at this stage will result in a dense cake.
-
Pour the batter into the prepared pan. Spread the batter evenly in the pan.
-
Bake in the preheated oven for 45-50 minutes, or until a toothpick inserted into the cake’s center comes out with just a few crumbs on it. The baking time may vary depending on your oven, so start checking for doneness around 45 minutes.
-
Remove the cake from the oven and let it cool in the pan for at least 15 minutes before carefully removing it from the pan and placing it onto a cooling rack to cool completely. This prevents the cake from breaking apart.
Expert Tips & Tricks
- Room Temperature Ingredients: Ensure your eggs are at room temperature. This helps them emulsify better, leading to a smoother batter.
- Honey Variety: Experiment with different types of honey (clover, wildflower, buckwheat) to subtly alter the flavor profile of the cake.
- Orange Zest: Don’t skip the orange zest! It adds a bright citrusy note that complements the honey beautifully.
- Even Baking: If your oven has hot spots, rotate the cake halfway through baking to ensure even browning.
- Prevent Sticking: For guaranteed release, grease the parchment paper in addition to the pan.
- Check for Doneness: If the top of the cake is browning too quickly, tent it with foil during the last 15 minutes of baking.
Serving & Storage Suggestions
This gluten-free honey cake is delicious served slightly warm or at room temperature. A dusting of powdered sugar or a drizzle of honey can add a touch of elegance. It pairs beautifully with a scoop of vanilla ice cream or a dollop of whipped cream.
To store leftovers, wrap the cake tightly in plastic wrap or store it in an airtight container at room temperature for up to 3 days, in the refrigerator for up to a week, or in the freezer for up to 2 months. To reheat, warm slices in the microwave for a few seconds or in a low oven until heated through.
Nutritional Information
| Nutrient | Amount per Serving | % Daily Value |
|---|---|---|
| Calories | 275 kcal | 14% |
| Total Fat | 7g | 9% |
| Saturated Fat | 1g | 5% |
| Cholesterol | 71mg | 24% |
| Sodium | 221mg | 9% |
| Total Carbohydrate | 50g | 17% |
| Dietary Fiber | 1g | 4% |
| Sugars | 32g | 64% |
| Protein | 3g | 6% |
Note: Nutritional information is an estimate and may vary based on specific ingredients used.
Variations & Substitutions
- Spice it Up: Add a pinch of ground cloves or ginger for a warmer, spicier flavor.
- Nutty Twist: Incorporate chopped walnuts or pecans into the batter for added texture and flavor.
- Glaze: Create a simple orange glaze by whisking together powdered sugar and orange juice, and drizzle it over the cooled cake.
- Applesauce Variation: Try using different flavors of applesauce, like cinnamon or spiced apple, to add depth to the flavor.
- Oil Substitute: Melted coconut oil can be used as a substitute for vegetable oil, adding a subtle coconut flavor. Ensure it is melted and cooled slightly before adding to the batter.
FAQs (Frequently Asked Questions)
Q: Can I use a different gluten-free flour mix?
A: Yes, but be aware that gluten-free flour mixes vary widely. If you’re not using Pamela’s Ultimate Baking and Pancake Mix, you may need to adjust the amount of baking powder and add xanthan gum to improve the texture. Look for a blend that contains rice flour, tapioca starch, and potato starch for best results.
Q: How do I prevent the cake from sticking to the pan?
A: The combination of parchment paper and baking spray should prevent sticking. Make sure to spray the parchment paper as well. Allowing the cake to cool in the pan for a short period before removing it also helps.
Q: Can I make this cake ahead of time?
A: Absolutely! In fact, many people find that honey cake tastes even better after a day or two, as the flavors have had time to meld. Store it tightly wrapped at room temperature.
Q: What if my cake is dry?
A: Overbaking is the most common cause of dry cake. Be sure to check for doneness using a toothpick and avoid overbaking. Also, ensure that your oven temperature is accurate. Adding an extra tablespoon or two of applesauce to the batter can also help keep it moist.
Q: Can I freeze this cake?
A: Yes, honey cake freezes well. Wrap it tightly in plastic wrap and then in aluminum foil, or store it in an airtight freezer container. Thaw overnight in the refrigerator before serving.
Final Thoughts
I hope this gluten-free honey cake brings a touch of sweetness and tradition to your Rosh Hashanah celebration. Baking this cake is more than just following a recipe; it’s about creating memories, sharing joy, and embracing the hope for a sweet new year. Don’t be afraid to experiment with variations and make it your own. And most importantly, enjoy the process and the delicious results! Share your creations with loved ones and let the aroma of honey fill your home with warmth and happiness. Shana Tova!