
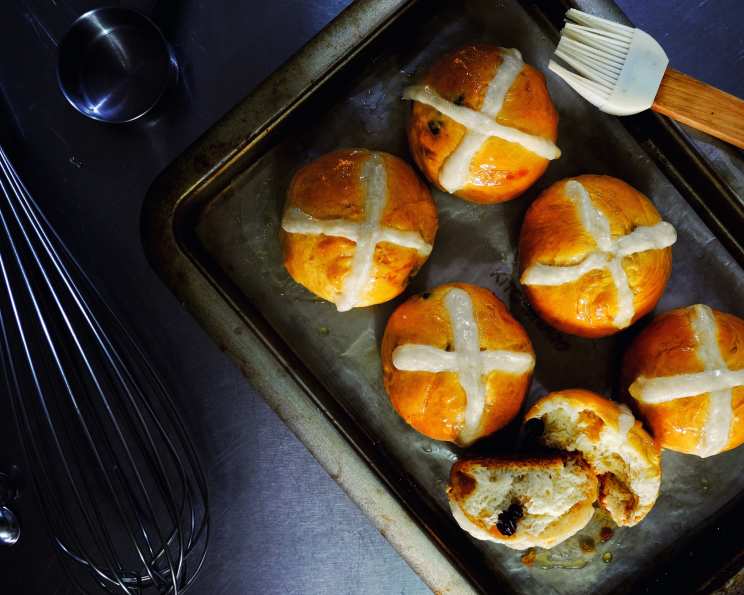
Gluten-Free Hot Cross Buns: A Taste of Spring
The aroma of cinnamon and warm spices baking in the oven always transports me back to my childhood Easter mornings. I remember peering into the oven, mesmerized as these humble buns transformed into golden-brown treasures, their crosses proudly displayed. The first bite, warm and sweet with juicy raisins, was pure bliss, a taste of spring and the promise of brighter days. Now, recreating that same joy for those following a gluten-free diet is a mission close to my heart.
Recipe Overview
- Prep Time: 3 hours 30 minutes
- Cook Time: 20 minutes
- Total Time: 3 hours 50 minutes
- Yield: 15 buns
- Dietary Type: Gluten-Free
Ingredients
- 285 ml milk
- 50 g butter
- 500 g gluten-free baking mix
- 1 teaspoon salt
- 30 ml maple syrup
- 7 g yeast, easy-blend
- 1 egg, beaten
- 100 g raisins
- 1 orange zest
- 1 teaspoon ground cinnamon
- 75 g gluten-free flour
- 30 ml maple syrup (for glaze)
Equipment Needed
- Large mixing bowl
- Small saucepan
- Measuring cups and spoons
- Cling film
- Baking tray
- Parchment paper
- Piping bag (or a zip-top bag with a corner snipped off)
Instructions
-
Begin by gently warming the milk in a small saucepan until it reaches a boil. Immediately remove the saucepan from the heat and add the butter. Allow the butter to melt completely in the warm milk, then set the mixture aside to cool to lukewarm. This step is crucial; if the milk is too hot, it will kill the yeast.
-
In a large mixing bowl, combine the gluten-free baking mix, salt, maple syrup, and easy-blend yeast. Make a well in the center of the dry ingredients.
-
Pour the cooled milk and butter mixture into the well.
-
Add the beaten egg to the bowl.
-
Using a wooden spoon or your hands, combine all the ingredients until a sticky dough forms. Don’t worry if it seems a little wet; that’s normal for gluten-free dough.
-
Lightly flour a work surface with gluten-free flour. Tip the dough onto the floured surface and gently knead it for about 5 minutes, until it becomes smoother and more elastic. Gluten-free dough won’t be quite as elastic as traditional dough, but kneading helps develop its structure.
-
Transfer the dough to a lightly oiled bowl. Cover the bowl with cling film and place it in a warm place to rise. Let the dough rise until it has doubled in volume, which should take approximately 1 hour.
-
Once the dough has doubled, gently deflate it. Add the raisins, orange zest and ground cinnamon to the dough and knead them in until they are evenly distributed.
-
Cover the dough again and let it rise for another hour in a warm place. This second rise is important for developing the flavor and texture of the buns.
-
After the second rise, divide the dough into 15 even pieces, each weighing approximately 75 grams.
-
Roll each piece of dough into a smooth ball.
-
Arrange the dough balls on a baking tray lined with parchment paper, leaving some space between each bun.
-
Set the buns aside to proof for a final hour. This third rise allows them to become light and airy before baking.
-
Preheat your oven to 200°C (390°F).
-
While the buns are proofing, prepare the cross mixture. In a small bowl, mix the gluten-free flour with about 5 tablespoons of water, forming a thick, smooth paste.
-
Spoon the cross mixture into a piping bag fitted with a small round tip. If you don’t have a piping bag, you can use a zip-top bag and snip off a tiny corner.
-
Pipe the cross mixture onto the buns to create the crosses. Make sure to apply even pressure to create clean, straight lines.
-
Bake the buns in the preheated oven for 20 minutes, or until they are golden brown.
-
While the buns are still warm, brush them generously with maple syrup to give them a beautiful shine and a touch of extra sweetness.
Expert Tips & Tricks
- Warmth is Key: Ensure your milk is lukewarm, not hot, before adding it to the yeast mixture. Hot milk will kill the yeast and prevent the dough from rising.
- Gluten-Free Flour Blend: Using a high-quality gluten-free baking mix is crucial for achieving the right texture. Look for a blend that contains xanthan gum, which helps bind the dough.
- Don’t Over-Knead: Gluten-free dough doesn’t need as much kneading as traditional dough. Over-kneading can make it tough.
- Proofing Environment: Create a warm, humid environment for proofing the dough. You can do this by placing the bowl in a slightly warmed oven (turned off!) with a bowl of hot water.
- Cross Consistency: For a smoother cross, whisk the flour and water mixture very thoroughly to eliminate any lumps.
Serving & Storage Suggestions
Serve your warm Gluten-Free Hot Cross Buns fresh from the oven for the best flavor and texture. They are delicious on their own or with a smear of butter or your favorite jam.
Store leftover buns in an airtight container at room temperature for up to 2 days, or in the refrigerator for up to 5 days. You can also freeze them for longer storage (up to 2 months). To reheat, wrap the buns in foil and warm them in a preheated oven at 175°C (350°F) for about 10 minutes, or until heated through. Alternatively, you can microwave them for a few seconds.
Nutritional Information
| Nutrient | Amount per Serving | % Daily Value |
|---|---|---|
| Calories | 94.1 kcal | N/A |
| Calories from Fat | N/A | 36% |
| Total Fat | 3.8 g | 5% |
| Saturated Fat | 2.2 g | 11% |
| Cholesterol | 22.1 mg | 7% |
| Sodium | 194.2 mg | 8% |
| Total Carbohydrate | 13.8 g | 4% |
| Dietary Fiber | 0.6 g | 2% |
| Sugars | 7.2 g | 28% |
| Protein | 2 g | 3% |
Variations & Substitutions
- Dairy-Free: Substitute the milk with a dairy-free alternative, such as almond milk, soy milk, or oat milk. Use a dairy-free butter substitute.
- Spice it Up: Add a pinch of ground cloves or nutmeg to the dough for a richer, warmer flavor.
- Citrus Zest: Experiment with different citrus zests, such as lemon or grapefruit, for a unique twist.
- Dried Fruit: Replace the raisins with other dried fruits, such as cranberries, currants, or chopped apricots.
- Chocolate Chips: For a decadent treat, add some gluten-free chocolate chips to the dough.
FAQs (Frequently Asked Questions)
Q: Why are my gluten-free hot cross buns dense?
A: Gluten-free dough can be denser than traditional dough. Ensure you’re using a good quality gluten-free baking mix and that you don’t over-knead the dough. Also, make sure your yeast is fresh and active.
Q: Can I make the dough ahead of time?
A: Yes, you can make the dough ahead of time and store it in the refrigerator for up to 24 hours. Allow it to come to room temperature before shaping and baking.
Q: My crosses are disappearing during baking. What am I doing wrong?
A: Ensure your cross mixture is thick enough. If it’s too thin, it will spread during baking. Also, avoid over-proofing the buns, as this can cause the crosses to flatten.
Q: Can I freeze the baked hot cross buns?
A: Yes, you can freeze the baked hot cross buns. Wrap them individually in plastic wrap and then place them in a freezer-safe bag. They will keep for up to 2 months.
Q: What’s the best way to reheat the buns?
A: The best way to reheat the buns is to wrap them in foil and warm them in a preheated oven at 175°C (350°F) for about 10 minutes, or until heated through. This will help retain their moisture and prevent them from drying out.
Final Thoughts
These Gluten-Free Hot Cross Buns are a testament to the fact that everyone can enjoy a classic Easter treat, regardless of dietary restrictions. The blend of warm spices, sweet raisins, and a touch of citrus creates a symphony of flavors that will tantalize your taste buds. So, gather your ingredients, preheat your oven, and embark on a baking adventure that will fill your home with the irresistible aroma of spring. I encourage you to try this recipe and share your creations with loved ones. Feel free to experiment with variations and let me know what you think! Pair these delightful buns with a cup of hot tea or coffee for the perfect Easter morning indulgence. Happy baking!