
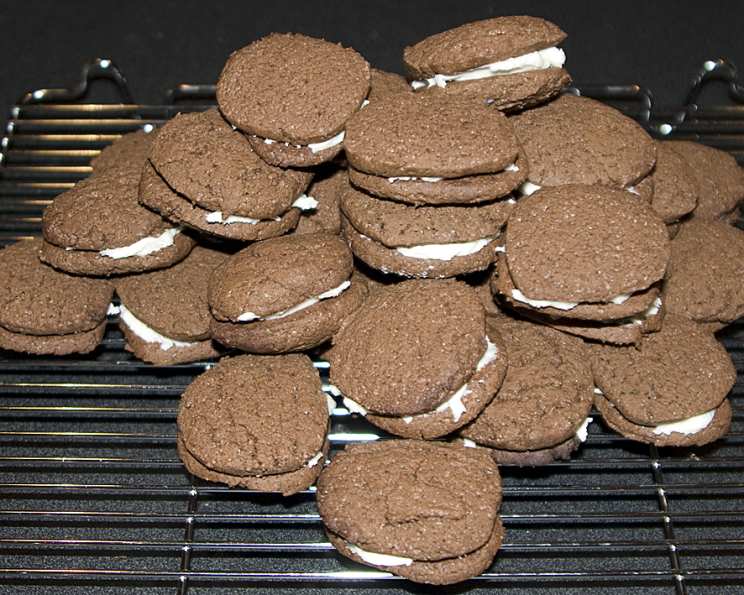
Gluten-Free Oreo Cookies: A Nostalgic Treat Reimagined
I can still vividly recall the sheer delight of twisting apart a classic Oreo cookie, carefully scraping off the creamy filling with my teeth, and then savoring the crisp, chocolatey wafers. It was a simple pleasure, a comforting ritual that defined childhood for so many of us. Discovering I had Celiac’s disease felt like losing access to a cherished memory. But what if that memory could be brought back, reimagined for a gluten-free world? That’s precisely what these gluten-free Oreo cookies accomplish – a near-perfect recreation of that iconic flavor and texture, allowing you to relive those carefree moments without any compromise.
Recipe Overview
- Prep Time: 30 minutes
- Cook Time: 10 minutes
- Total Time: 40 minutes
- Yields: 45 filled cookies
- Serves: 45
- Dietary Type: Gluten-Free
Ingredients
For the Dough:
- ¾ cup rice flour
- ¾ cup tapioca flour
- ¾ cup cornstarch
- 1 teaspoon xanthan gum
- 2 teaspoons egg substitute
- ⅔ cup cocoa
- 1 teaspoon baking powder
- 1 teaspoon baking soda
- ½ teaspoon salt
- ¾ cup butter, softened
- 1 cup white sugar
- 1 egg
- 1 teaspoon vanilla extract
- 1-2 teaspoons milk, as needed
For the Filling:
- 2 cups confectioners’ sugar
- 3 tablespoons shortening
- ¼ teaspoon vanilla extract
- 2 tablespoons hot water
Equipment Needed
- Medium bowl
- Mixer (handheld or stand mixer)
- Spatula
- Foil
- Cookie sheet
- Cooling rack
- Optional: Cookie stamp
Instructions
-
Begin by preheating your oven to 350°F (175°C).
-
In a medium bowl, whisk together the rice flour, tapioca flour, cornstarch, xanthan gum, egg substitute, cocoa, baking powder, baking soda, and salt. This ensures that all the dry ingredients are evenly distributed, which is crucial for a consistent texture. Set aside.
-
In the bowl of your mixer, cream together the softened butter and white sugar until the mixture is light and fluffy. This process incorporates air into the butter, which helps to create a tender cookie.
-
Add the egg and vanilla extract to the creamed butter and sugar, and beat well until fully incorporated.
-
Gradually add the dry ingredients to the wet ingredients in three additions, mixing until just combined after each addition. Be careful not to overmix the dough, as this can develop the gluten (even though we don’t want it!) from the alternative flours and result in a tough cookie. If the dough becomes too stiff, add the milk one teaspoon at a time until it reaches a workable consistency. The dough should be firm but pliable.
-
Shape the dough into two 10-inch x 1 ½-inch rolls. The size is a recommendation, not a hard and fast rule. The goal is to get two logs about the same length that are easy to slice into evenly sized cookies.
-
Wrap the dough rolls tightly in foil and chill in the refrigerator for 15-20 minutes. This chilling time helps to firm up the dough, making it easier to slice and prevent the cookies from spreading too much during baking.
-
Remove the chilled dough from the refrigerator and cut into ⅛-inch thick slices. Precision is key here! Thicker cookies take longer to bake.
-
If you have a cookie stamp, gently press it onto the sliced cookies at this point to give them a more authentic Oreo look. This is completely optional but adds a nice touch.
-
Place the sliced cookies on an ungreased cookie sheet. It’s important to use an ungreased cookie sheet to prevent the cookies from spreading too much.
-
Bake the cookies in the preheated oven for 10 minutes. Keep a close eye on them, as baking times may vary slightly depending on your oven. The cookies are done when they are set around the edges and slightly soft in the center. They will firm up as they cool.
-
Let the cookies cool on the cookie sheet for only a few minutes before transferring them to a wire rack to cool completely. This prevents them from sticking to the pan and allows them to cool evenly.
-
While the cookies are cooling, prepare the filling. In a bowl, combine the confectioners’ sugar, shortening, vanilla extract, and hot water. Add the hot water gradually, mixing until you achieve a smooth, creamy consistency that is easy to spread.
-
Once the cookies have cooled completely, spread a generous amount of filling onto the flat side of one cookie and top with another cookie, pressing gently to adhere. Repeat with the remaining cookies and filling.
Expert Tips & Tricks
- Achieving the Right Dough Consistency: The texture of the dough is crucial. If it’s too dry, the cookies will be crumbly. If it’s too wet, they’ll spread too much in the oven. Add milk sparingly, just until the dough comes together.
- Even Baking: For consistently baked cookies, rotate the cookie sheet halfway through the baking time. This helps to ensure that all the cookies are exposed to the same amount of heat.
- Perfect Filling Texture: The consistency of the filling is also important. If it’s too thick, it will be difficult to spread. If it’s too thin, it will run off the cookies. Add the hot water gradually until you achieve the desired consistency.
- Preventing Sticking: If you find that the cookies are sticking to the cookie sheet, line it with parchment paper. This will make it easier to remove the cookies and prevent them from breaking.
Serving & Storage Suggestions
These gluten-free Oreo cookies are best enjoyed fresh, but they can be stored in an airtight container at room temperature for up to 3 days. For longer storage, you can freeze them for up to 2 months. Thaw the cookies at room temperature before serving. They are perfect with a glass of cold milk, a cup of coffee, or simply as a sweet treat on their own. They are also a great addition to lunchboxes or as a dessert for parties and gatherings.
Nutritional Information
| Nutrient | Amount per Serving | % Daily Value |
|---|---|---|
| Calories | 97.3 kcal | N/A |
| Calories from Fat | 37 g | 39% |
| Total Fat | 4.2 g | 6% |
| Saturated Fat | 2.2 g | 11% |
| Cholesterol | 12.3 mg | 4% |
| Sodium | 91.3 mg | 3% |
| Total Carbohydrate | 14.6 g | 4% |
| Dietary Fiber | 0.3 g | 1% |
| Sugars | 9.7 g | N/A |
| Protein | 0.6 g | 1% |
Note: Nutritional information is an estimate and may vary depending on specific ingredients and portion sizes.
Variations & Substitutions
- Dairy-Free: Substitute the butter with a dairy-free butter alternative and the egg with a flax egg (1 tablespoon flaxseed meal mixed with 3 tablespoons water, let sit for 5 minutes).
- Different Flavored Fillings: Experiment with different extracts in the filling, such as peppermint, almond, or lemon, to create unique flavor combinations.
- Chocolate Variation: Add a tablespoon of unsweetened cocoa powder to the filling for an extra chocolatey treat.
- Spice it Up: Add a pinch of cinnamon or nutmeg to the dough for a warm, spiced cookie.
FAQs (Frequently Asked Questions)
Q: Can I use a different gluten-free flour blend?
A: While this recipe is specifically formulated for the flours listed, you can experiment with other gluten-free blends. However, the texture and taste may vary, so adjust the liquid accordingly.
Q: Why is it important to chill the dough?
A: Chilling the dough helps to prevent the cookies from spreading too much during baking and makes them easier to slice evenly.
Q: Can I make the dough ahead of time?
A: Yes, you can make the dough ahead of time and store it in the refrigerator for up to 2 days. Wrap it tightly in plastic wrap to prevent it from drying out.
Q: How do I know when the cookies are done?
A: The cookies are done when they are set around the edges and slightly soft in the center. They will firm up as they cool.
Q: Can I freeze the filled cookies?
A: Yes, you can freeze the filled cookies for up to 2 months. Wrap them individually in plastic wrap and then place them in an airtight container.
Final Thoughts
Creating these gluten-free Oreo cookies is more than just baking; it’s about reclaiming a cherished memory and sharing it with those you love. Don’t be intimidated by the seemingly long list of ingredients. The process is straightforward, and the results are well worth the effort. So, gather your ingredients, preheat your oven, and get ready to experience the joy of a classic cookie, reimagined for a gluten-free world. I encourage you to try this recipe and share your creations with friends and family. And don’t hesitate to experiment with different flavor variations to make these cookies your own. Happy baking!