
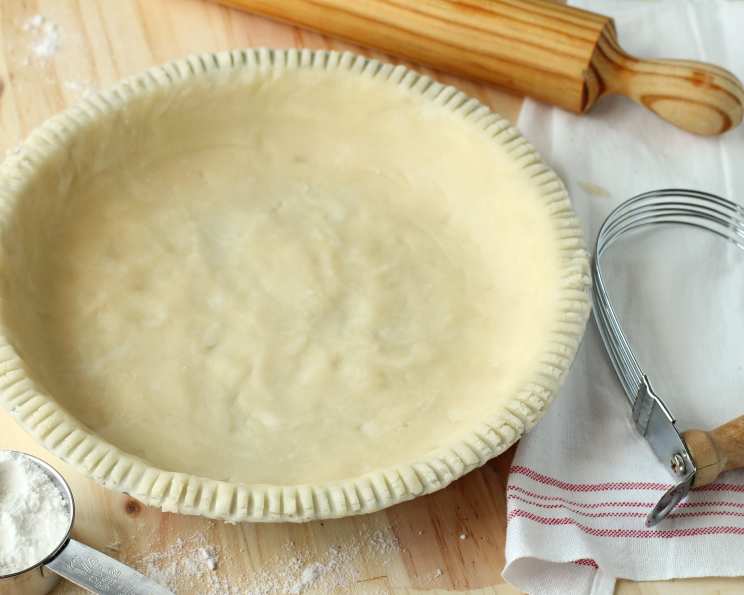
The Surprisingly Simple Gluten-Free Pie Crust
My grandmother, bless her heart, was the queen of pie. Every Thanksgiving and Christmas, her table groaned under the weight of pumpkin, apple, pecan – you name it, she baked it. But it wasn’t just the fillings that were magical; it was her crust. Flaky, tender, and impossibly golden, it was the stuff of legends. When I had to go gluten-free, I thought those pie-filled holidays were gone forever. I couldn’t have been more wrong! After years of experimenting, I’ve finally cracked the code to a gluten-free pie crust that would make even Grandma proud. This recipe is surprisingly simple, and the results are spectacular – a tender, flavorful crust that perfectly complements any filling.
Recipe Overview
- Prep Time: 10 minutes
- Cook Time: 15 minutes
- Total Time: 25 minutes
- Servings: 8
- Yield: 1 9-inch pie crust
- Dietary Type: Gluten-Free
Ingredients
- ¾ cup rice flour
- 1 teaspoon honey
- ¼ teaspoon sea salt
- ½ teaspoon xanthan gum
- ⅓ cup butter (cold and cut into small cubes) or ⅓ cup vegetable oil (chilled)
- 2 tablespoons cold water
Equipment Needed
- 9-inch pie pan
- Mixing bowl
- Pastry blender or fork (if using butter)
- Aluminum foil
- Rolling pin
- Fork
Instructions
- In a mixing bowl, stir together the rice flour, honey, sea salt, and xanthan gum. Ensure the xanthan gum is evenly distributed throughout the flour mixture. This is crucial for binding the ingredients and preventing a crumbly crust.
- If using butter: Cut in the cold, cubed butter into the dry ingredients using a pastry blender or a fork. Work quickly to keep the butter cold. The mixture should resemble coarse crumbs with small pieces of butter still visible. If using vegetable oil: Pour the chilled vegetable oil into the flour mixture.
- Add the cold water a little at a time, mixing gently after each addition, until a ball of dough starts to form. Be careful not to overwork the dough, as this can lead to a tough crust. The dough should be moist but not sticky.
- Place the dough between two sheets of aluminum foil.
- Using a rolling pin, roll out the dough to approximately 1/8 inch thickness. Roll from the center outwards, rotating the dough occasionally to ensure even thickness.
- Carefully peel off the top sheet of foil.
- Invert the dough onto a 9-inch pie pan. Gently peel off the remaining foil sheet.
- Crimp or flute the edges of the crust to create a decorative border.
- Prick the bottom of the crust several times with a fork. This will prevent the crust from puffing up during baking.
- Bake in a preheated oven at 350°F (175°C) for 15 minutes, or until the crust is golden brown.
- If you are using this crust for a no-bake pie, bake until it is a light golden brown. If using this crust for a filled pie, you may need to blind bake it first, depending on the filling. To blind bake, line the crust with parchment paper and fill with pie weights or dried beans. Bake for 10-12 minutes, then remove the parchment paper and weights and bake for another 3-5 minutes, or until lightly golden.
Expert Tips & Tricks
- Keep everything cold! Cold ingredients are key to a flaky pie crust. Chill the butter (or oil) and water thoroughly before starting. You can even chill the rice flour for 15-20 minutes before using it.
- Don’t overmix! Overmixing develops the gluten (or in this case, overworks the xanthan gum), resulting in a tough crust. Mix just until the dough comes together.
- Use a kitchen scale: For the most accurate measurements, especially with gluten-free baking, use a kitchen scale to weigh your ingredients.
- Blind baking: If your pie filling requires a longer baking time than the crust, blind bake the crust first to prevent it from becoming soggy.
- Crust too dry? Add a teaspoon of ice water at a time until the dough comes together.
- Crust too wet? Add a tablespoon of rice flour at a time until the dough is workable.
- For a sweeter crust: Add an additional teaspoon of honey or a tablespoon of powdered sugar to the dry ingredients.
Serving & Storage Suggestions
Serve your pie immediately after baking, or let it cool completely and refrigerate for later. A gluten-free pie crust is best served within 1-2 days of baking.
- Room Temperature: Baked pies can be stored at room temperature for up to 2 days, but are best stored in the refrigerator, particularly if the filling contains dairy or eggs.
- Refrigerator: Store baked pies in the refrigerator for up to 3-4 days. Cover loosely with plastic wrap or foil.
- Freezer: For longer storage, freeze the baked pie for up to 2-3 months. Wrap the pie tightly in plastic wrap, then in foil. Thaw in the refrigerator overnight before serving.
- Reheating: To reheat a chilled or frozen pie, bake in a preheated oven at 350°F (175°C) until warmed through, about 15-20 minutes.
Nutritional Information
| Nutrient | Amount per Serving | % Daily Value |
|---|---|---|
| Calories | 200 kcal | 10% |
| Total Fat | 12g | 18% |
| Saturated Fat | 7g | 35% |
| Cholesterol | 30mg | 10% |
| Sodium | 75mg | 3% |
| Total Carbohydrate | 20g | 7% |
| Dietary Fiber | 1g | 4% |
| Sugars | 2g | |
| Protein | 2g | 4% |
Note: Nutritional information is an estimate and may vary depending on specific ingredients and portion sizes.
Variations & Substitutions
- Gluten-Free Flour Blend: While this recipe uses rice flour, you can substitute a gluten-free all-purpose flour blend. Be sure to choose a blend that contains xanthan gum or add extra xanthan gum to the recipe.
- Dairy-Free Option: Use chilled coconut oil or vegetable shortening instead of butter. Make sure the coconut oil is solid but not rock hard.
- Sweetener: You can substitute the honey with maple syrup or agave nectar.
- Spice it up!: Add a pinch of cinnamon, nutmeg, or ginger to the dry ingredients for a warm, spiced flavor.
- Savory Crust: Omit the honey for a savory pie crust, perfect for quiches or pot pies. Consider adding herbs like thyme, rosemary, or sage.
FAQs (Frequently Asked Questions)
Q: Why is xanthan gum important in gluten-free baking?
A: Xanthan gum acts as a binder, mimicking the role of gluten in traditional flour. It helps to create structure and prevents the crust from becoming too crumbly.
Q: Can I make this dough ahead of time?
A: Yes! You can wrap the dough tightly in plastic wrap and refrigerate it for up to 2 days or freeze it for up to 2 months. Thaw completely in the refrigerator before rolling out.
Q: My crust is cracking when I roll it out. What am I doing wrong?
A: The dough is likely too dry. Add a teaspoon of ice water at a time until the dough becomes more pliable.
Q: Can I use this crust for a quiche?
A: Absolutely! Just omit the honey for a savory version. Blind bake the crust before adding the quiche filling.
Q: What if my crust browns too quickly in the oven?
A: Tent the crust with aluminum foil to prevent further browning.
Final Thoughts
This gluten-free pie crust recipe has been a game-changer in my kitchen, and I truly believe it can be for you too! Don’t be intimidated by gluten-free baking; with a few simple tricks, you can create a pie crust that’s just as delicious (if not more so!) than the traditional version. I encourage you to try it, experiment with different fillings, and most importantly, share your creations with loved ones. Happy baking! I’d love to hear about your experience – feel free to leave a comment below!