
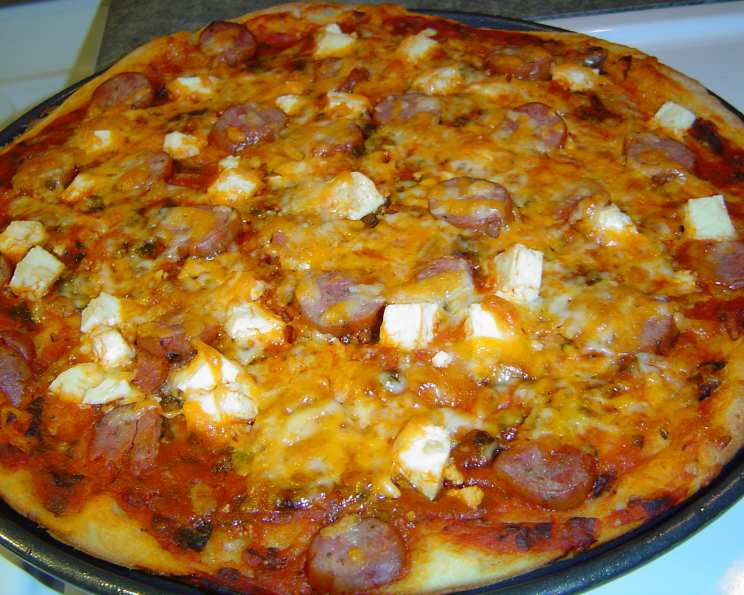
The Ultimate Gluten-Free Pizza Crust: A Recipe for Deliciousness
Pizza night was always a sacred event in our family. As a child, the aroma of baking dough, simmering tomato sauce, and melting mozzarella filled our home with warmth and anticipation. But when I developed a gluten intolerance, I thought those cherished pizza nights were a thing of the past. The store-bought gluten-free crusts were often cardboard-like, brittle, and utterly disappointing. Determined to reclaim my pizza tradition, I embarked on a quest to create a gluten-free crust that was not only edible but actually enjoyable. And after countless trials and a few epic failures, I finally cracked the code. This recipe captures that hard-won victory – a pizza crust so good, you won’t believe it’s gluten-free.
Recipe Overview
- Prep Time: 20 minutes
- Cook Time: 25-30 minutes
- Total Time: 45-50 minutes
- Servings: 6
- Yield: 1 15-inch pizza
- Dietary Type: Gluten-Free
Ingredients
- 3/4 cup gluten-free flour mix
- Bean Flour Mix:
- 1/4 cup light bean flour (such as chickpea/garbanzo flour) or 1/4 cup dark bean flour
- 1/4 cup cornstarch
- 1/4 cup tapioca starch
- 1 teaspoon xanthan gum
- 1 1/2 teaspoons baking powder
- 1/2 teaspoon salt
- 1/2 tablespoon vegetable oil
- 1 egg
- 1/2 teaspoon vinegar
- 2 teaspoons sugar
- 1 cup lukewarm water
- 1 package yeast (approximately 2 1/4 teaspoons)
Equipment Needed
- Baking sheet or 15-inch round pizza pan
- Small bowl
- Large mixing bowl
- Whisk
- Measuring cups and spoons
Instructions
-
Begin by preparing your baking surface. Generously spray a baking sheet or a 15-inch round pizza pan with vegetable oil. This will prevent the crust from sticking.
-
Preheat your oven to 425 degrees Fahrenheit (220 degrees Celsius). Ensuring the oven is fully preheated is essential for a crisp crust.
-
In a small bowl, whisk together the gluten-free flour mix, bean flour, cornstarch, tapioca starch, xanthan gum, baking powder, and salt. Whisking ensures the dry ingredients are evenly distributed. Set aside.
-
In a larger mixing bowl, place the vegetable oil, egg, vinegar, and 1 teaspoon of sugar.
-
Measure the lukewarm water and add the remaining 1 teaspoon of sugar to it.
-
Drop in the yeast to dissolve in the sweetened water. Let it sit for 5-10 minutes until it becomes foamy which indicates that the yeast is alive.
-
Beat the egg-oil mix slightly, then add the yeast water to the mixture.
-
Beat in half of the flour mixture into the wet ingredients. Mix until just combined.
-
Stir in the remaining flour mixture and beat until the batter is smooth and well combined. It will be more like a thick batter than a traditional dough.
-
Pour the batter into the prepared pan, and spread it evenly using a spatula or your hands. Aim for a slightly thicker edge, as this will create a nice crust.
-
Now it’s time to add your toppings. Spread your favorite pizza sauce over the crust, leaving a small border for the crust to bake nicely. Then, add your desired toppings.
-
Bake in the preheated oven for 25 to 30 minutes, or until the crust is golden brown and the toppings are cooked to your liking. The baking time may vary depending on your oven. Watch carefully to prevent burning.
Expert Tips & Tricks
- Bean Flour Choice: The type of bean flour you use can affect the flavor. Chickpea flour (also known as garbanzo bean flour or chana flour) has a slightly nutty taste that complements many pizza toppings. Fava bean flour has a more pronounced flavor and may require adjusting other ingredients to balance the taste.
- Xanthan Gum is Key: Do not omit the xanthan gum! It acts as a binder in gluten-free baking, providing structure and preventing the crust from becoming crumbly.
- Pre-Baking the Crust: For a crispier crust, you can pre-bake the crust for 10 minutes before adding the toppings. This will help to set the crust and prevent it from becoming soggy.
- Even Topping Distribution: Ensure your toppings are evenly distributed to avoid unevenly cooked areas.
- Check for Doneness: To ensure the crust is fully cooked, insert a toothpick into the center. It should come out clean.
- Adjusting for Altitude: If you live at a high altitude, you may need to adjust the amount of baking powder. Start with a slightly smaller amount (about 1 teaspoon) and adjust as needed.
- Adding Flavor to the Crust: Consider adding herbs and spices directly to the dough. Garlic powder, oregano, basil, or Italian seasoning can add a delicious flavor boost.
Serving & Storage Suggestions
Allow the pizza to cool slightly before slicing and serving. A pizza cutter or a large knife works well. This gluten-free pizza is best enjoyed fresh, while the crust is still warm and crispy.
Storage: Leftover pizza can be stored in the refrigerator for up to 3 days. Place the slices in an airtight container to prevent them from drying out.
Reheating: To reheat, you can use the oven, microwave, or a skillet. For the oven, preheat to 350°F (175°C) and bake for 5-10 minutes, or until heated through. Microwaving is quicker, but the crust may become slightly soft. Reheating in a skillet over medium heat can help to crisp up the crust again.
Nutritional Information
Here’s an approximate nutritional breakdown per slice (assuming 6 slices per pizza, without toppings):
| Nutrient | Amount per Serving | % Daily Value |
|---|---|---|
| Calories | 312.7 kcal | N/A |
| Calories from Fat | 108 kcal | N/A |
| Total Fat | 12.1 g | 18% |
| Saturated Fat | 2.5 g | 12% |
| Cholesterol | 211.5 mg | 70% |
| Sodium | 1788.5 mg | 74% |
| Total Carbohydrate | 42.3 g | 14% |
| Dietary Fiber | 1.8 g | 7% |
| Sugars | 8.8 g | N/A |
| Protein | 9.1 g | 18% |
Note: Nutritional information is an estimate and will vary depending on the specific ingredients and toppings used.
Variations & Substitutions
- Dairy-Free: Omit the egg and substitute it with 1 tablespoon of applesauce or mashed banana. Consider adding an extra tablespoon of water to compensate for the lost moisture.
- Vegan: Follow the dairy-free substitution above and ensure all your toppings are vegan-friendly.
- Different Bean Flour: Experiment with other bean flours like soy flour or lentil flour. Keep in mind that each type of bean flour has a distinct flavor and may require some adjustments to the recipe.
- Herb Infused Crust: Add dried herbs like oregano, basil, or rosemary to the flour mixture for an extra layer of flavor.
- Sweet Pizza Crust: Reduce the salt to 1/4 teaspoon and increase the sugar to 1 tablespoon for a sweeter crust suitable for dessert pizzas with fruit and chocolate.
FAQs (Frequently Asked Questions)
Q: Can I make this dough ahead of time?
A: It’s best to use the dough immediately after mixing. Due to the gluten-free nature, it doesn’t rise or improve with resting.
Q: What kind of gluten-free flour mix should I use?
A: A general-purpose gluten-free flour blend works best. Avoid blends that are heavily weighted towards one type of flour (like rice flour), as this can affect the texture.
Q: My crust is gummy. What did I do wrong?
A: Overmixing can sometimes lead to a gummy texture. Be sure to mix the dough just until combined. Also, ensure your oven temperature is accurate.
Q: Can I freeze the baked pizza crust?
A: Yes, you can freeze the baked crust. Let it cool completely, then wrap it tightly in plastic wrap and foil. It can be stored in the freezer for up to 2 months.
Q: What if I don’t have xanthan gum?
A: Xanthan gum is crucial for binding in gluten-free baking. If you absolutely can’t find it, you could try substituting with guar gum, but use only about 3/4 teaspoon as it’s stronger. The texture may be slightly different.
Final Thoughts
This gluten-free pizza crust recipe has been a game-changer for me, and I truly believe it can be for you too. It’s a testament to the fact that gluten-free doesn’t have to mean flavor-free or texture-compromised. Roll up your sleeves, gather your ingredients, and prepare to experience the joy of homemade pizza once again. I encourage you to experiment with different toppings and share your creations with loved ones. And please, let me know how it turns out! Your feedback is invaluable as we continue to refine and perfect the art of gluten-free baking.