
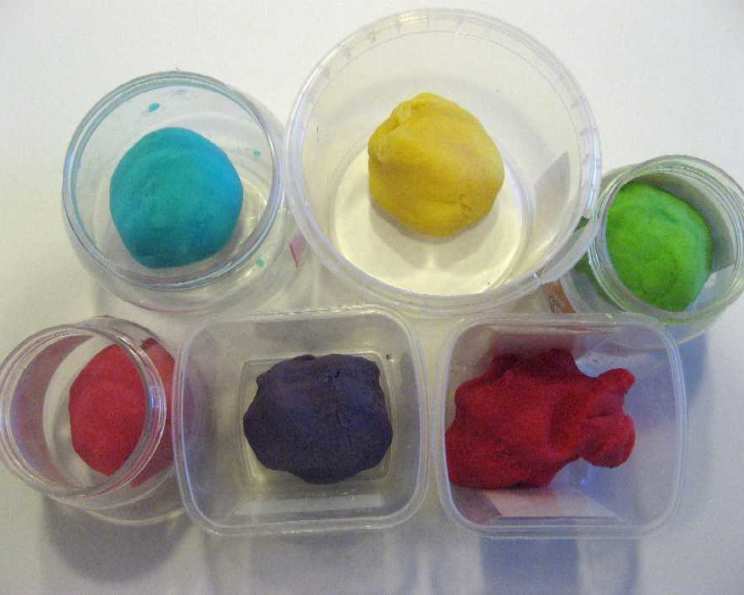
Gluten-Free Play Dough: A Recipe for Safe, Creative Fun
I remember the sheer joy of playing with Play-Doh as a child, the squishy texture between my fingers, the endless possibilities for creation. But as a professional chef, I’m also acutely aware of ingredients and potential allergens. When my niece was diagnosed with celiac disease, I realized that even something as seemingly harmless as Play-Doh could be a source of worry. That’s when I set out to create a gluten-free version that would be just as fun and engaging, without any of the anxieties. This recipe is the result – a safe, easy, and incredibly satisfying play dough that will keep little hands (and big ones too!) entertained for hours.
Recipe Overview
- Prep Time: 15 minutes
- Cook Time: 5 minutes
- Total Time: 20 minutes
- Yields: Approximately 6 small tins
- Dietary Type: Gluten-Free
Ingredients
- 1 cup rice flour
- 1 cup cornflour
- 1 cup salt
- 4 teaspoons cream of tartar
- 2 tablespoons vegetable oil
- 2 cups water
- Food coloring (gel or liquid)
Equipment Needed
- Large measuring pitcher
- Small saucepan
- Wooden spoon
- Airtight containers for storage
Instructions
-
In a large measuring pitcher, mix together the rice flour, cornflour, salt, and cream of tartar. These dry ingredients form the base of your play dough, providing the right texture and consistency.
-
Add the vegetable oil and water to the dry ingredients in the pitcher. Whisk thoroughly until the mixture is smooth and relatively lump-free. Don’t worry if there are a few tiny lumps; they’ll cook out.
-
Divide the mixture into separate portions, about 1 cup each, depending on how many different colors of play dough you want to make. It’s easiest to do one color at a time.
-
Pour one cup of the white mixture into a small saucepan. Place the saucepan over low heat.
-
Add food coloring to the mixture in the saucepan. Start with a few drops at a time, stirring well after each addition, until you reach your desired color intensity. Gel food coloring tends to be more concentrated than liquid, so use it sparingly.
-
Stir constantly with a wooden spoon. The mixture will be very runny at first, almost like a thin soup. Keep stirring; this is crucial to prevent burning and ensure even cooking.
-
Continue cooking over low heat for approximately 5 minutes. As the mixture heats up, it will begin to thicken quite rapidly. It will go from runny to a thick, doughy consistency in a matter of moments. Be prepared to stir vigorously!
-
Once the mixture has formed a ball and pulls away from the sides of the saucepan, remove it from the heat.
-
Carefully knead the hot play dough on a clean, lightly floured surface (using rice flour or cornflour) to remove any remaining lumps and create a smooth, pliable texture. Be cautious, as it will be hot at first. If it’s too hot to handle comfortably, let it cool slightly before kneading.
-
Repeat steps 4-9 with the remaining portions of the white mixture, adding different food coloring to each to create a variety of vibrant colors.
-
Allow the play dough to cool completely before storing it in airtight containers. This will prevent it from drying out and extend its shelf life.
Expert Tips & Tricks
- Cream of tartar is essential for the play dough’s elasticity and texture. Don’t skip it!
- If your play dough feels too sticky, knead in a little more rice flour or cornflour until it reaches the desired consistency.
- If the play dough becomes dry over time, try kneading in a few drops of water to rehydrate it.
- For a smoother texture, you can use a stand mixer with a dough hook to knead the play dough, especially for larger batches.
- Add a few drops of essential oils (such as lavender or chamomile) to create a calming and sensory-rich play experience.
- To create a glittery effect, add a small amount of non-toxic glitter to the play dough during the kneading process.
- If you find the salt crystals are a little too coarse, you can blend the salt in a food processor for a few seconds to create a finer consistency.
- When cooking the playdough, ensure the heat is on low. Too high a heat and it can easily burn on the bottom of the pan, which is difficult to fix.
Serving & Storage Suggestions
This gluten-free play dough is ready to be enjoyed immediately after it has cooled. Encourage children to explore their creativity by using cookie cutters, rolling pins, and other tools to create various shapes and designs.
Store the play dough in airtight containers at room temperature. Properly stored, it should last for several months. If the play dough becomes dry or crumbly, try kneading in a few drops of water to restore its pliability. Discard the play dough if it develops mold or an unpleasant odor.
Nutritional Information
Please note that this nutritional information is an estimate and may vary based on specific ingredients and preparation methods. Since this is a play dough, nutritional values are less important than safety, but is included here as an indicator of the contents.
| Nutrient | Amount per Serving |
|---|---|
| Calories | Approximately 100 kcal |
| Total Fat | Less than 1g |
| Sodium | High (due to salt content) |
| Total Carbohydrate | Approximately 20g |
| Protein | Less than 1g |
Variations & Substitutions
- For a vegan version, ensure your vegetable oil and food coloring are vegan-friendly.
- You can experiment with different flour blends to achieve slightly different textures. Try using a blend of rice flour, tapioca starch, and potato starch.
- Add natural colorants such as beet juice powder (for pink), spinach powder (for green), or turmeric powder (for yellow).
- For a scented play dough, add a few drops of your favorite essential oils or extracts during the kneading process.
- Edible glitter can be kneaded into the playdough for an extra special touch.
FAQs (Frequently Asked Questions)
Q: Is this play dough safe for children who tend to put things in their mouths?
A: While this recipe uses food-grade ingredients, it is very salty and not intended for consumption. Adult supervision is always recommended, especially for young children.
Q: How do I prevent the play dough from drying out?
A: The key is to store the play dough in airtight containers when not in use. This will prevent moisture loss and keep it pliable.
Q: Can I use regular flour instead of rice flour and cornflour?
A: No, this recipe is specifically designed for gluten-free ingredients. Using regular flour will result in a different texture and will not be safe for those with gluten sensitivities.
Q: What if my play dough is too sticky?
A: Gradually knead in a small amount of rice flour or cornflour until it reaches the desired consistency.
Q: How long does this play dough last?
A: Properly stored in airtight containers, this play dough can last for several months. Check it periodically and discard if it becomes moldy or develops an unpleasant odor.
Final Thoughts
Creating this gluten-free play dough is not just about providing a safe and enjoyable activity for children; it’s about fostering creativity, imagination, and sensory exploration. It is a rewarding experience knowing you are providing something that is both fun and safe. I encourage you to try this recipe and share the joy of play with your loved ones. Experiment with different colors, scents, and textures to create a truly unique play dough experience. And most importantly, have fun!