
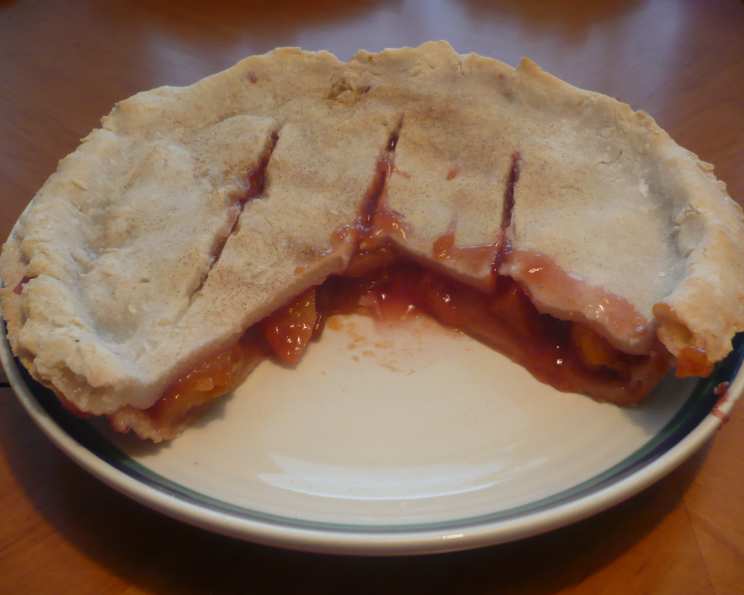
Gluten-Free Plum Pie: A Taste of Late Summer
There’s something deeply comforting about the scent of warm fruit baking in the oven, a fragrance that instantly transports me back to my grandmother’s kitchen. I remember standing on a stool, mesmerized as she carefully arranged glistening plum slices in a pie dish, her hands dusted with flour. The sweet-tart aroma would fill the entire house, promising a slice of pure, unadulterated happiness. Now, crafting my own gluten-free version, I can recreate that same cherished memory, adapting it for everyone to enjoy.
Recipe Overview
- Prep Time: 20 minutes
- Cook Time: 1 hour
- Total Time: 1 hour 20 minutes
- Servings: 8
- Yield: 1 pie
- Dietary Type: Gluten-Free
Ingredients
- 2 (9-inch) unbaked gluten-free pie shells
- 4 cups sliced plums
- 3 tablespoons minute tapioca
- 1/3 cup sugar
- 1/4 teaspoon cinnamon
- 2 teaspoons lemon juice
- 1/2 teaspoon sugar (for topping)
Equipment Needed
- 9-inch pie dish
- Rolling pin
- Small bowl
- Measuring cups and spoons
- Pastry wheel or knife (optional)
Instructions
-
If you haven’t already, gently roll one of the gluten-free pie shells out slightly to form a top crust. A light dusting of gluten-free flour can prevent sticking. Place it on parchment paper for easy handling later.
-
In a large bowl, combine the sliced plums and minute tapioca. Stir gently to ensure the tapioca is evenly distributed. Let this mixture stand for 15 minutes. This allows the tapioca to absorb some of the plum juices, which helps to thicken the filling during baking and prevents the pie from becoming too runny.
-
After the 15-minute rest, add the 1/3 cup of sugar and the cinnamon to the plum mixture. Stir everything together until well combined. The sugar will draw out even more of the plums’ natural juices, creating a delicious syrup.
-
Carefully arrange the plum mixture in the remaining unbaked pie shell. Distribute the plums evenly to ensure each slice of pie gets a generous portion.
-
Sprinkle the lemon juice evenly over the plum filling. The lemon juice brightens the flavor of the plums and adds a touch of acidity that balances the sweetness.
-
Moisten the edges of the bottom pie crust with water. This will help the top crust adhere properly, creating a good seal and preventing the filling from leaking out during baking.
-
Carefully place the rolled-out second crust over the plum filling. Center it as best you can.
-
Trim the edges of the crust using a pastry wheel or a sharp knife, leaving about an inch of overhang. This ensures a clean, even edge.
-
Crimp the edges of the crust to seal. You can use a fork to press the edges together, or create a decorative crimp with your fingers. Sealing the crust well is crucial for preventing leaks and creating a beautiful, finished pie.
-
Cut several slashes in the top crust. These vents allow steam to escape during baking, which prevents the crust from puffing up and potentially cracking.
-
Sprinkle the top crust with the remaining 1/2 teaspoon of sugar. This adds a touch of sweetness and helps the crust to brown beautifully.
-
Bake on the bottom shelf of a preheated 350°F (175°C) oven for about 1 hour. Placing the pie on the bottom shelf helps to ensure that the bottom crust bakes through completely. Check the pie after about 45 minutes; if the crust is browning too quickly, you can loosely tent it with foil to prevent burning.
-
The pie is done when the crust is golden brown and the filling is bubbling. Let the pie cool completely on a wire rack before slicing and serving. This is crucial; cutting into a hot pie will result in a runny filling.
Expert Tips & Tricks
- Blind Baking: For an extra-crisp bottom crust, consider blind baking the bottom crust for 15 minutes before adding the filling. Line the crust with parchment paper, fill with pie weights or dried beans, and bake. Remove the weights and parchment, then continue with the recipe.
- Egg Wash: For a shinier crust, brush the top with an egg wash (1 egg yolk whisked with 1 tablespoon of milk or water) before sprinkling with sugar.
- Thickening Power: If your plums are exceptionally juicy, you may want to increase the amount of minute tapioca to 4 tablespoons. You can also use cornstarch as a substitute, but minute tapioca provides a clearer, less starchy finish.
- Preventing a Soggy Bottom: Besides blind baking, ensure the pie is baked on the lowest rack to get the most direct heat.
Serving & Storage Suggestions
Serve the gluten-free plum pie slightly warm or at room temperature. A scoop of vanilla ice cream or a dollop of whipped cream complements the sweet-tart flavors perfectly.
- Storage: Leftover pie can be stored at room temperature for up to 2 days or in the refrigerator for up to 4 days. Cover loosely with plastic wrap or store in an airtight container.
- Freezing: For longer storage, the baked pie can be frozen. Wrap it tightly in plastic wrap, then in foil, and freeze for up to 3 months. Thaw overnight in the refrigerator before serving. Reheat in a 350°F (175°C) oven for 15-20 minutes, or until warmed through.
Nutritional Information
Please note that these values are estimates and can vary based on specific ingredients used.
| Nutrient | Amount per Serving | % Daily Value |
|---|---|---|
| Calories | 250 kcal | 13% |
| Total Fat | 10g | 15% |
| Saturated Fat | 3g | 15% |
| Cholesterol | 0mg | 0% |
| Sodium | 150mg | 7% |
| Total Carbohydrate | 40g | 15% |
| Dietary Fiber | 2g | 8% |
| Sugars | 25g | – |
| Protein | 2g | 4% |
Variations & Substitutions
- Other Fruits: This recipe works beautifully with other stone fruits like peaches, nectarines, or apricots. You can even use a mix of different fruits for a more complex flavor.
- Spice it Up: Experiment with different spices like cardamom, ginger, or nutmeg. A pinch of almond extract can also enhance the flavor.
- Crust Alternatives: If you don’t have gluten-free pie crusts readily available, you can make your own using a blend of gluten-free flours, such as rice flour, tapioca starch, and almond flour.
- Vegan Option: Ensure your gluten-free pie crust is vegan. Some brands may contain butter.
FAQs (Frequently Asked Questions)
Q: Why do I need to let the plum and tapioca mixture sit before adding it to the crust?
A: Letting the mixture sit allows the tapioca to absorb excess moisture from the plums, which helps to prevent the pie from becoming too watery during baking.
Q: Can I use frozen plums in this recipe?
A: Yes, you can use frozen plums. Thaw them completely and drain off any excess liquid before using them in the recipe. You may need to increase the amount of tapioca slightly to compensate for the added moisture.
Q: How do I prevent the crust from burning?
A: If the crust is browning too quickly, loosely tent it with foil during the last 15-20 minutes of baking.
Q: My pie filling is still runny after baking. What did I do wrong?
A: This can happen if the plums were very juicy or if the pie wasn’t baked long enough. Next time, try increasing the amount of tapioca or blind baking the crust. Ensure the pie cools completely before slicing.
Q: Can I make this pie ahead of time?
A: Yes, you can bake the pie a day ahead of time. Let it cool completely, then cover it loosely and store it at room temperature or in the refrigerator.
Final Thoughts
This gluten-free plum pie is more than just a dessert; it’s a celebration of seasonal flavors and a reminder of simpler times. Don’t be afraid to experiment with different variations and make it your own. Whether you’re sharing it with family and friends or enjoying a quiet slice on your own, I hope this pie brings you as much joy as it brings me. And please, share your baking adventures and any delicious tweaks you discover along the way! Perhaps a dollop of crème fraîche alongside?