
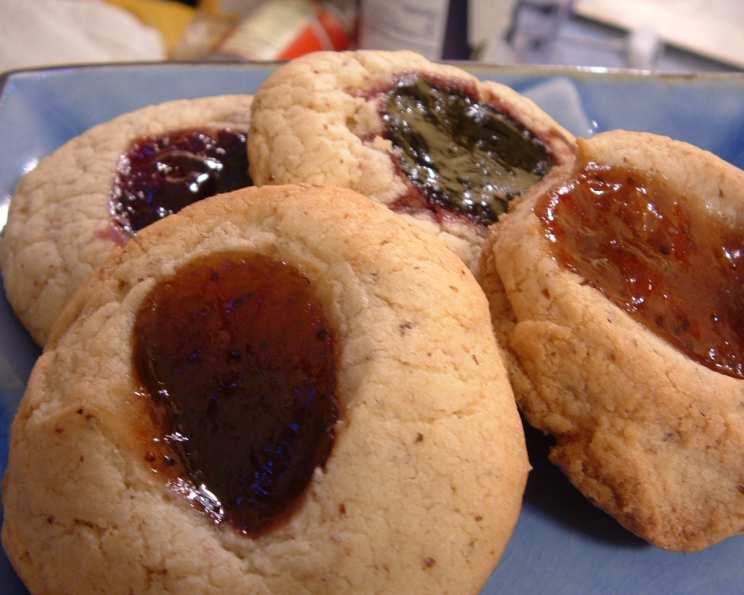
Gluten-Free Thumbprint Cookies: A Culinary Embrace
The scent of baking cookies has always been my personal time machine. Just a whiff, and I’m instantly transported back to my grandmother’s sun-drenched kitchen. She wasn’t much for complicated recipes, but her thumbprint cookies, each filled with a shimmering dollop of homemade raspberry jam, were legendary. Now, navigating the world of gluten-free baking, I’ve learned to recreate that same magic, adapting her classic recipe so everyone can experience the joy of these tender, buttery treats. These cookies aren’t just dessert; they’re edible hugs that evoke warmth and nostalgia with every bite.
Recipe Overview
- Prep Time: 1 hour 15 minutes (includes 1 hour refrigeration)
- Cook Time: 18-20 minutes
- Total Time: 1 hour 33-35 minutes
- Yields: 3 dozen
- Serves: 36
- Dietary Type: Gluten-Free
Ingredients
- 1 cup butter, softened
- 3 ounces cream cheese, softened
- 1 cup sugar
- 1 egg yolk
- 1 tablespoon vanilla extract
- 1/2 tablespoon xanthan gum
- 1 cup almond meal
- 1/2 cup rice flour
- 3/4 cup potato starch
- 1/4 cup coconut flour
- Assorted jelly or jam, to taste
Equipment Needed
- Mixing bowls
- Electric mixer (stand or hand-held)
- Measuring cups and spoons
- Cookie sheets
- Cooling rack
Instructions
-
In a large mixing bowl, cream together the softened butter, softened cream cheese, and sugar until the mixture is light and fluffy. This step is crucial for achieving that melt-in-your-mouth texture, so don’t rush it. Use an electric mixer for best results, and scrape down the sides of the bowl occasionally to ensure everything is evenly incorporated.
-
Add the egg yolk and vanilla extract to the creamed mixture. Mix well until everything is fully combined. The egg yolk adds richness and helps bind the ingredients. The vanilla enhances the overall flavor profile, creating a delightful aroma as they bake.
-
Now, it’s time to incorporate the gluten-free ingredients. Add the xanthan gum, almond meal, rice flour, potato starch, and coconut flour to the bowl. Mix well until a smooth dough forms. The xanthan gum is essential for mimicking the binding properties of gluten in traditional cookies, giving them structure and preventing them from crumbling. The combination of almond meal, rice flour, potato starch, and coconut flour creates a lovely texture and flavor.
-
If you’re feeling creative and want to add a touch of color, now is the time to dye the dough. Divide the dough into portions and mix in a few drops of food coloring to each. Remember to use gel food coloring as liquid can affect the consistency of the dough.
-
Cover the dough and refrigerate for about 1 hour. This chilling period is crucial because it allows the gluten-free flours to fully hydrate and prevents the cookies from spreading too much during baking. Do not freeze the dough. Freezing will make it difficult to work with and can result in misshapen cookies.
-
Preheat your oven to 350°F (175°C). While the oven is heating, prepare your cookie sheets. You can use parchment paper or silicone baking mats to prevent the cookies from sticking.
-
Remove the chilled dough from the refrigerator. Roll the dough into 1-inch balls. Work the dough gently, similar to forming meatballs. Space the dough balls evenly on the prepared cookie sheets, leaving about 1 inch between each cookie.
-
Use your finger or a small kitchen implement, like the back of a spoon, to create a depression in the center of each cookie. This is where the jam or jelly will go.
-
Fill each depression with your choice of jelly or jam. Don’t overfill; just add enough to create a small “jam puddle.” Keep in mind that the cookies will spread slightly during baking, so try to keep the filling contained within the depression.
-
Bake in the preheated oven for 18-20 minutes, or until the bottoms of the cookies just begin to brown. Keep a close eye on them, as baking times can vary depending on your oven.
-
Remove the cookie sheets from the oven and let the cookies rest on the sheet for 5-10 minutes, or until they have set slightly. This will make them easier to transfer to a cooling rack.
-
Transfer the cookies to a cooling rack to cool completely. This prevents them from becoming soggy on the bottom.
Expert Tips & Tricks
- Cream cheese temperature matters: Ensure both the butter and cream cheese are truly softened for a smooth, lump-free dough.
- Don’t overmix: Overmixing the dough after adding the flours can result in tough cookies. Mix just until combined.
- Prevent Spreading: If your cookies are spreading too much, try chilling the dough for a longer period.
- Jam Selection: Use a high-quality jam or jelly for the best flavor. Seedless varieties work well for a smoother texture.
- Add a touch of almond extract: A few drops of almond extract to the dough can enhance the nutty flavor.
- Dust with Powdered Sugar: For an extra touch of elegance, dust the cooled cookies with powdered sugar.
Serving & Storage Suggestions
These gluten-free thumbprint cookies are best served at room temperature. Arrange them artfully on a platter for a delightful presentation. They pair perfectly with a cup of tea, coffee, or a glass of milk.
Storage: Store the cookies in an airtight container at room temperature for up to 3 days, or in the refrigerator for up to a week. They can also be frozen for up to 2 months. To freeze, place the cooled cookies in a single layer on a baking sheet and freeze until solid. Then, transfer them to an airtight container or freezer bag. Thaw at room temperature before serving.
Nutritional Information
(Estimated per cookie)
| Nutrient | Amount per Serving | % Daily Value* |
|---|---|---|
| Calories | 112.5 kcal | N/A |
| Total Fat | 7.4 g | 11% |
| Saturated Fat | 3.9 g | 19% |
| Cholesterol | 21.4 mg | 7% |
| Sodium | 45.4 mg | 1% |
| Total Carbohydrate | 10.7 g | 3% |
| Dietary Fiber | 0.6 g | 2% |
| Sugars | 5.8 g | N/A |
| Protein | 1.2 g | 2% |
*Percent Daily Values are based on a 2,000 calorie diet.
Variations & Substitutions
- Dairy-Free: Substitute the butter with a vegan butter alternative and the cream cheese with a dairy-free cream cheese substitute.
- Nut-Free: Replace the almond meal with an equal amount of oat flour or sunflower seed flour.
- Different Flours: Experiment with different gluten-free flour blends to find your favorite combination. A blend of brown rice flour, tapioca starch, and sorghum flour can also work well.
- Flavor Variations: Add citrus zest (lemon, orange, or lime) to the dough for a bright, zesty flavor.
- Filling Options: Use chocolate ganache, caramel, or even a dollop of peanut butter instead of jam.
- Spice it up: Add 1/2 teaspoon of cinnamon, nutmeg, or cardamom to the dough for a warm, spiced flavor.
FAQs (Frequently Asked Questions)
Q: Why are my cookies spreading too much?
A: The dough may not have been chilled long enough. Make sure to chill the dough for at least an hour. Also, ensure your oven temperature is accurate.
Q: Can I use a different type of gluten-free flour blend?
A: Yes, you can experiment with different gluten-free flour blends, but keep in mind that the texture and flavor of the cookies may vary.
Q: Can I make the dough ahead of time?
A: Yes, you can make the dough ahead of time and store it in the refrigerator for up to 2 days. Just be sure to bring it to room temperature slightly before rolling it into balls.
Q: What if I don’t have xanthan gum?
A: Xanthan gum helps bind the gluten-free ingredients. If you omit it, the cookies may be more crumbly. You can try using 1 tablespoon of ground flaxseed meal mixed with 3 tablespoons of water as a substitute. Let it sit for 5 minutes to thicken before adding it to the dough.
Q: How do I prevent the jam from burning during baking?
A: Use a heat-stable jam or jelly and avoid overfilling the depressions in the cookies. If the jam starts to bubble excessively, you can reduce the oven temperature slightly.
Final Thoughts
These gluten-free thumbprint cookies are a delightful treat that’s perfect for any occasion. Whether you’re baking for a holiday gathering, a special celebration, or simply a sweet afternoon snack, these cookies are sure to impress. Don’t be afraid to get creative with the fillings and flavors to create your own signature thumbprint cookie. I encourage you to try this recipe and share your creations with loved ones. Baking is an act of love, and these cookies are a delicious way to spread joy and warmth. Enjoy!