
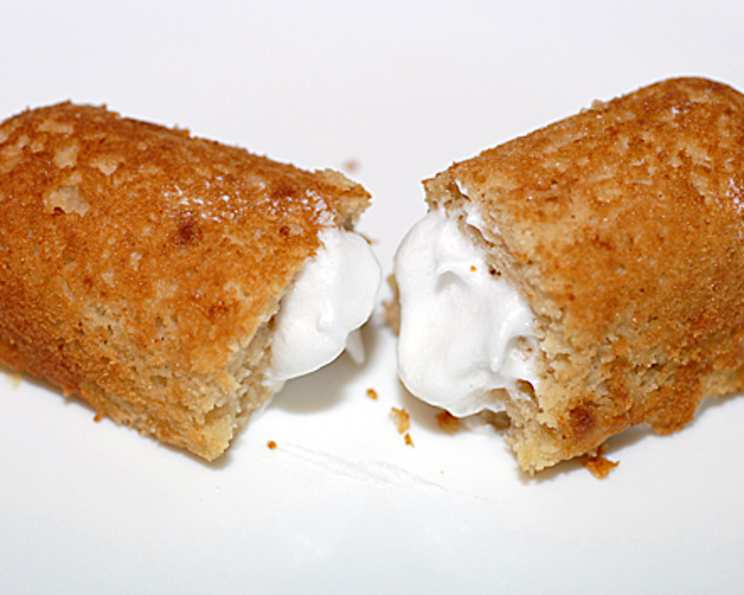
Gluten-Free Twinkies: A Nostalgic Treat Reimagined
The first time I saw a Twinkie, I was probably five years old, standing on tiptoe at the corner store counter. Its golden hue, perfectly rectangular shape, and mysterious creamy filling were irresistible. It was a pure, unadulterated sugary bliss that I recall fondly and I’m excited to recreate that experience gluten-free!
Recipe Overview
- Prep Time: 20 minutes
- Cook Time: 12 minutes
- Total Time: 32 minutes
- Servings: 8
- Yield: 8 Twinkies
- Dietary Type: Gluten-Free, Dairy-Free Optional
Ingredients
For the Twinkies:
- 3 eggs, separated
- 1/4 cup grapeseed oil
- 1/4 cup agave nectar
- 1 tablespoon vanilla extract
- 1 tablespoon lemon juice
- 6 tablespoons coconut flour
- 1/2 teaspoon baking soda
- 1/4 teaspoon Celtic sea salt
For the Filling:
- 2 egg whites
- 1/4 cup agave nectar
Note: If you prefer a dairy-free alternative, you can replace the egg whites in the filling with whipped aquafaba (chickpea brine).
Equipment Needed
- Large bowl
- Medium bowl
- Electric mixer (handheld or stand mixer)
- Spatula
- Twinkie molds (or a muffin tin)
- Twinkie filling injector (or a piping bag with a small tip)
Instructions
-
Prepare the Egg Whites: In a large bowl, using an electric mixer, whip the egg whites until stiff peaks form. This step is crucial for achieving a light and airy texture in the Twinkies. Once the peaks are formed, set the bowl aside. Be careful not to overwhip, as this can cause the whites to become dry.
-
Whip the Egg Yolks: In a medium bowl, whip the egg yolks until they turn pale yellow. This usually takes a minute or two with an electric mixer. Incorporating air into the yolks will contribute to the overall lightness of the final product.
-
Add Wet Ingredients: To the whipped egg yolks, add the grapeseed oil and agave nectar. Whip these ingredients together until well combined. The mixture should be smooth and emulsified.
-
Incorporate Vanilla and Lemon: Add the vanilla extract and lemon juice to the egg yolk mixture. Whip until evenly distributed. The lemon juice adds a subtle tang that balances the sweetness of the agave nectar.
-
Combine Dry Ingredients: In a separate medium bowl, whisk together the coconut flour, baking soda, and Celtic sea salt. Make sure there are no lumps in the coconut flour before adding it to the wet ingredients.
-
Blend Wet and Dry Ingredients: Gradually add the dry ingredients to the wet ingredients, blending until smooth. The batter will be relatively thick due to the nature of coconut flour. Don’t overmix, as this can develop the gluten in the coconut flour and result in a tougher Twinkie.
-
Fold in Egg Whites: Gently fold the whipped egg whites into the yolk-flour mixture. Be careful not to deflate the egg whites, as this will affect the rise of the Twinkies. Fold until just combined; a few streaks of egg white are perfectly fine.
-
Fill the Molds: Spoon the batter into the Twinkie molds until they are half full. If you don’t have Twinkie molds, you can use a muffin tin. However, the shape will be different. This recipe makes 8 Twinkies.
-
Bake: Bake in a preheated oven at 350°F (175°C) for 11-12 minutes. The Twinkies should be golden brown and spring back lightly when touched. Check for doneness by inserting a toothpick into the center; it should come out clean.
-
Cool: Remove the Twinkies from the oven and allow them to cool completely in the molds before attempting to remove them. This prevents them from breaking apart.
-
Prepare the Filling: While the Twinkies are cooling, prepare the filling. In a clean bowl, whip the egg whites until stiff peaks form.
-
Sweeten the Filling: Gradually blend in the agave nectar and re-whip until stiff peaks form again. The filling should be glossy and hold its shape.
-
Fill the Twinkies: Place the filling in a Twinkie filling injector (or a piping bag with a small tip).
-
Inject the Filling: Once the Twinkies are completely cooled, place them flat side up (the bottom side). Inject the filling into the Twinkie in 3 spots on its flat side. This ensures that the filling is evenly distributed throughout the Twinkie.
-
Serve: Serve immediately and enjoy your homemade gluten-free Twinkies!
Expert Tips & Tricks
- Achieving a Light Texture: The key to a light and airy Twinkie is properly whipped egg whites. Make sure the bowl and beaters are clean and free of any grease, as this can prevent the egg whites from whipping properly.
- Coconut Flour Considerations: Coconut flour is highly absorbent, so it’s essential to measure it accurately. Avoid packing the flour into the measuring cup.
- Preventing Dryness: If your Twinkies tend to be dry, try adding a tablespoon of applesauce or mashed banana to the batter. This will help retain moisture.
- Dairy-Free Filling: Substitute the egg whites in the filling with an equal amount of whipped aquafaba (chickpea brine). This will create a vegan and dairy-free filling option.
- Flavor Variations: Add a few drops of lemon or orange extract to the filling for a citrusy twist.
Serving & Storage Suggestions
These gluten-free Twinkies are best served fresh, but they can be stored in an airtight container in the refrigerator for up to 3 days. If you want to store them for longer, you can freeze them for up to 1 month. Thaw them in the refrigerator before serving.
To serve, you can dust them with powdered sugar or drizzle them with melted chocolate for an extra touch of indulgence. They also pair well with a glass of cold milk (dairy or non-dairy) or a cup of coffee.
Nutritional Information
| Nutrient | Amount per Serving | % Daily Value |
|---|---|---|
| Calories | 195 kcal | N/A |
| Total Fat | 17g | 26% |
| Saturated Fat | 2.5g | 12% |
| Cholesterol | 159mg | 53% |
| Sodium | 383mg | 16% |
| Total Carbohydrate | 1g | 0% |
| Dietary Fiber | 0g | 0% |
| Sugars | 1g | N/A |
| Protein | 7g | 14% |
Note: Nutritional information is an estimate and may vary based on specific ingredients and portion sizes.
Variations & Substitutions
- Extracts: For vanilla extract you can use almond, orange, or lemon extract for a more pronounced flavor.
- Sweeteners: You can use honey or maple syrup instead of agave nectar. Just be sure to adjust the amount to taste.
- Flour Blend: While this recipe uses coconut flour, you could experiment with a gluten-free all-purpose flour blend. The texture might be slightly different, so be sure to monitor the baking time closely.
- Chocolate Twinkies: Add cocoa powder to the Twinkie batter for a chocolate version.
FAQs (Frequently Asked Questions)
Q: Can I use a different type of oil instead of grapeseed oil?
A: Yes, you can substitute with any neutral-flavored oil, such as avocado oil or light olive oil. Avoid using strongly flavored oils like extra virgin olive oil, as they will affect the taste of the Twinkies.
Q: My Twinkies are sinking in the middle. What am I doing wrong?
A: This is likely due to not whipping the egg whites enough or deflating them when folding them into the batter. Make sure to whip the egg whites to stiff peaks and gently fold them in.
Q: Can I make these ahead of time?
A: Yes, you can bake the Twinkies ahead of time and store them in an airtight container. However, it’s best to fill them with the cream just before serving to prevent them from becoming soggy.
Q: What can I use if I don’t have a Twinkie filling injector?
A: A piping bag with a small round tip will work just as well. If you don’t have a piping bag, you can use a plastic bag with a corner snipped off.
Q: Can I add food coloring to the filling?
A: Yes, you can add a drop or two of food coloring to the filling to make it more visually appealing.
Final Thoughts
Now it’s your turn to embark on a gluten-free baking adventure and create your own homemade Twinkies. It’s a delightful way to satisfy your sweet tooth while catering to dietary needs. Don’t hesitate to experiment with different flavors and variations to personalize this classic treat. Happy baking, and be sure to share your creations and feedback with me!