
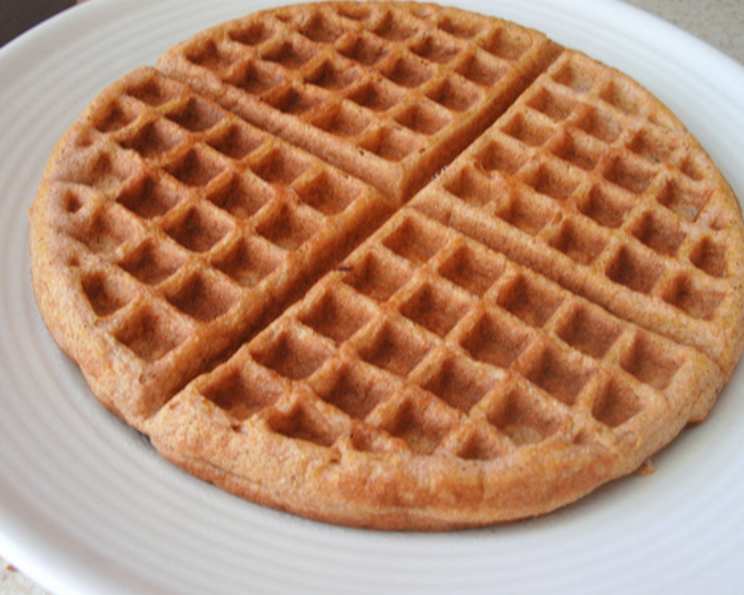
Gluten-Free Waffles: A Deliciously Simple Start to Your Day
The scent of warm waffles always takes me back to Sunday mornings at my grandmother’s house. Her secret ingredient wasn’t anything fancy – just a whole lot of love, and a cast-iron waffle iron that seemed older than time itself. While those weren’t gluten-free (or waistline-friendly!), I’ve spent years perfecting a version that captures the same cozy feeling, without any of the gluten. This recipe delivers a deliciously satisfying and subtly sweet waffle, perfect for starting the day off right.
Recipe Overview
- Prep Time: 5 minutes
- Cook Time: 5 minutes
- Total Time: 10 minutes
- Yields: 1 round waffle
- Serves: 1-2
- Dietary Type: Gluten-Free
Ingredients
- 2 whole eggs
- 1 tablespoon coconut milk
- 2 tablespoons pumpkin puree
- 1 teaspoon melted coconut oil
- 1 1⁄2 tablespoons coconut flour, sifted
- 1 tablespoon sugar
- 1⁄4 teaspoon aluminum free baking soda
- 1⁄16 teaspoon himalayan sea salt
Equipment Needed
- Waffle iron
- Small bowl
- Whisk
- Sifter (optional, but recommended)
- Spatula
Instructions
- Begin by preheating your waffle iron. It’s important to let it warm up properly, so allow at least three minutes for it to reach the correct temperature. Be sure to grease your waffle iron thoroughly before adding the batter; a little cooking spray or melted coconut oil works wonders.
- While the waffle iron is warming, prepare the batter. In a small bowl, whisk together the eggs, coconut milk, and melted coconut oil until well combined. This creates the liquid base for your waffles.
- In a separate small bowl, sift together the coconut flour, sugar, baking soda, and sea salt. Sifting is especially crucial with coconut flour as it tends to clump. By sifting it, you’ll ensure a smoother batter and a more even texture in your waffles.
- Gradually add the sifted dry ingredients to the bowl with the liquid ingredients. Whisk slowly and lightly until just smooth. Be careful not to overmix; a few small lumps are okay.
- Once the waffle iron is heated, pour the batter into the center of the hot waffle iron and spread it out slightly. There’s no need to spread it all the way to the edges; the heat will take care of the rest.
- Gently press the other half of the waffle iron down and let the waffle cook for 4-5 minutes. Cooking time can vary depending on your waffle iron, so keep an eye on it. You’ll know it’s ready when it’s golden brown and releases easily from the iron.
- Open the waffle iron and let the waffle cool for about 3 minutes. Allowing it to cool slightly in the waffle iron helps it to crisp up.
- Carefully slide a small spatula underneath the waffle, loosening it gently. Remove the waffle from the iron and serve immediately.
Expert Tips & Tricks
- Coconut flour is thirsty! It absorbs a lot of liquid, so don’t be surprised by the texture of the batter. It should be thicker than traditional waffle batter. If it seems too thick, add a tiny splash more of coconut milk, a teaspoon at a time, until you reach the desired consistency.
- Don’t skip the sifting! As I mentioned earlier, coconut flour has a tendency to clump. Sifting it will help prevent lumps in your batter and ensure a more even texture in your finished waffles.
- Grease is key. Be generous with the cooking spray or coconut oil on your waffle iron. This will prevent the waffles from sticking and make them easier to remove.
- Waffle iron temperature is crucial. If your waffle iron isn’t hot enough, the waffles will be soggy. If it’s too hot, they’ll burn. Experiment with your waffle iron to find the sweet spot.
- For extra flavor, try adding a pinch of cinnamon or nutmeg to the dry ingredients.
- For crispier waffles, preheat your oven to 200°F (93°C) and place the cooked waffles on a wire rack in the oven to keep them warm and crispy until serving.
Serving & Storage Suggestions
These gluten-free waffles are best enjoyed fresh off the waffle iron, while they’re still warm and crispy. Top them with your favorite toppings, such as:
- Pure organic maple syrup
- Fresh berries (strawberries, blueberries, raspberries)
- Sliced bananas
- A dollop of whipped cream or coconut whipped cream (for a dairy-free option)
- Nut butter (peanut, almond, or cashew)
- Chocolate chips
If you have any leftover waffles, store them in an airtight container in the refrigerator for up to 3 days. To reheat, you can toast them in a toaster oven or regular toaster until warmed through and crispy. You can also reheat them in a skillet over medium heat, flipping occasionally, until warmed through. For longer storage, you can freeze the waffles. Let them cool completely, then wrap them individually in plastic wrap and place them in a freezer bag. They can be frozen for up to 2 months. To reheat, simply toast them from frozen or bake them in a preheated oven at 350°F (175°C) for 5-10 minutes, or until warmed through.
Nutritional Information
| Nutrient | Amount per Serving | % Daily Value |
|---|---|---|
| Calories | 263.8 kcal | N/A |
| Calories from Fat | 154 g | 59% |
| Total Fat | 17.2 g | 26% |
| Saturated Fat | 9.9 g | 49% |
| Cholesterol | 372 mg | 124% |
| Sodium | 603 mg | 25% |
| Total Carbohydrate | 14.7 g | 4% |
| Dietary Fiber | 0.1 g | 0% |
| Sugars | 13.1 g | 52% |
| Protein | 13 g | 26% |
Note: Nutritional information is an estimate and may vary based on specific ingredients and serving sizes.
Variations & Substitutions
- Dairy-Free: This recipe is already dairy-free as it uses coconut milk. Ensure your toppings are also dairy-free to keep the entire dish dairy-free.
- Sweetness: Adjust the amount of sugar to your liking. You can also use other sweeteners like honey or maple syrup.
- Spices: Add a pinch of cinnamon, nutmeg, or cardamom to the batter for a warm and inviting flavor.
- Extracts: Add a teaspoon of vanilla extract or almond extract for a boost of flavor.
- Mix-ins: Fold in blueberries, chocolate chips, or chopped nuts for added texture and flavor.
- Pumpkin Spice Waffles: Increase the amount of pumpkin puree to 1/4 cup and add 1/2 teaspoon of pumpkin pie spice to the batter for a seasonal twist.
FAQs (Frequently Asked Questions)
Q: Why are my gluten-free waffles sticking to the waffle iron?
A: Be sure to grease your waffle iron generously with cooking spray or melted coconut oil before adding the batter. Also, make sure your waffle iron is preheated to the correct temperature.
Q: Can I make this recipe ahead of time?
A: Yes, you can make the batter ahead of time and store it in the refrigerator for up to 24 hours. You may need to add a little more coconut milk to thin it out before cooking.
Q: Can I freeze these waffles?
A: Yes, let them cool completely, then wrap them individually in plastic wrap and place them in a freezer bag. They can be frozen for up to 2 months.
Q: Are these waffles suitable for a vegan diet?
A: No, this recipe contains eggs. To make it vegan, you’ll need to find an egg replacement recipe suitable for waffles.
Q: My waffles are too dense. What can I do?
A: Make sure you are not overmixing the batter. Overmixing can develop the gluten (even in gluten-free flour), which can result in dense waffles. Whisk the batter until just combined.
Final Thoughts
These gluten-free waffles are more than just a breakfast dish; they’re a warm hug on a plate. Easy to make and endlessly adaptable, they’re perfect for lazy weekend mornings or a quick weekday treat. Don’t be afraid to experiment with toppings and variations to create your own signature waffle masterpiece. I encourage you to try this recipe and share your experience! I am confident that this gluten-free waffle recipe will become a new favorite in your household. Bon appétit!