
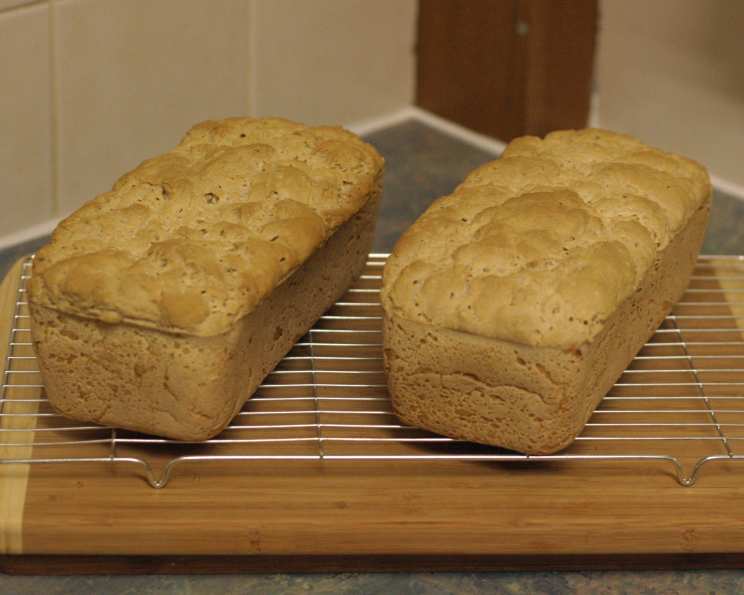
Gluten-Free White Bread – Almost Supermarket Style!
There’s something about the smell of baking bread that instantly transports me back to my grandmother’s kitchen. She always had a loaf cooling on the counter, its crust a perfect golden brown. After being diagnosed with a gluten intolerance, I thought those comforting aromas and the simple pleasure of a sandwich made with soft, yielding white bread were lost forever. But after years of experimenting, I’ve finally cracked the code – this recipe brings back those memories, offering a tender, flavorful, gluten-free loaf that’s remarkably similar to the classic supermarket variety, and it’s now even dairy-free friendly!
Recipe Overview
- Prep Time: 1 hour 40 minutes (includes rising time)
- Cook Time: 40 minutes
- Total Time: 2 hours 20 minutes
- Servings: Approx. 12 slices
- Yields: 1 loaf
- Dietary Type: Gluten-Free, Dairy-Free (optional)
Ingredients
- 2/3 cup sorghum flour (also called juwar flour)
- 2/3 cup cornflour or 2/3 cup potato starch
- 7 tablespoons tapioca flour
- 3 1/2 tablespoons maize flour (masa de harina)
- 6 g active dry yeast (not rapid rise)
- 1 tablespoon sugar
- 1 cup water of 40 degrees Celsius (104 degrees Fahrenheit) (minus three tablespoons if using whole eggs)
- 1 cup cornflour or 1 cup potato starch
- 1/4 cup soymilk (or other dairy-free milk alternative)
- 2 teaspoons xanthan gum
- 1 1/2 teaspoons salt
- 1 tablespoon vegan margarine or 1 tablespoon butter
- 3 whole eggs (if reducing the water) or 3 egg whites, beaten
- 1 teaspoon vinegar (cider, white or rice)
Equipment Needed
- Large mixing bowl
- Electric mixer
- Measuring cups and spoons
- 8 1/2″ x 4″ bread loaf pan
- Cooling rack
- Cake tester or toothpick
- Small bowl
Instructions
-
Proof the Yeast: In a small bowl, combine the yeast, sugar, and water (from the 1 cup) according to recipe. Let stand for about five minutes, or until foamy. This step ensures your yeast is active and ready to leaven the bread.
-
Create the Base Flour Mix: In a large bowl, mix together the sorghum flour, cornflour (or potato starch), tapioca flour, and maize flour. Use an electric mixer at low speed to thoroughly blend these dry ingredients. This creates the foundation for your gluten-free flour blend.
-
Add the Remaining Dry Ingredients: Measure out two cups of the basic flour mix you just created. (Any leftover flour mix can be saved for future baking projects.) To the two cups of flour, add the remaining cornflour (or potato starch), xanthan gum, and salt. Again, use the mixer at low speed to thoroughly combine these dry ingredients. The xanthan gum is crucial for mimicking the elasticity of gluten.
-
Combine Wet and Dry Ingredients: Now, add the yeast mixture, margarine (or butter), vinegar, soymilk, and eggs (or egg whites) to the bowl with the dry ingredients. Beat the mixture on high speed for two minutes to create a soft, runny batter. Don’t be alarmed by the consistency; this is typical for gluten-free bread dough.
-
First Rise: Use a non-stick (or grease and flour) an 8 1/2″ x 4″ bread loaf pan. Fill the loaf pan with the batter and allow the batter to double in size. This may take 1-1.5 hours, depending on the temperature of your kitchen. Cover with plastic wrap or a damp cloth to prevent the surface from drying out. Find a warm place in your house to place the bread to proof; this will shorten the rising time.
-
Preheat the Oven: Preheat your oven to 220 degrees Celsius (425 degrees Fahrenheit). Make sure your oven is fully preheated before baking for best results.
-
Bake: Once the dough has doubled, place the bread in the preheated oven for twenty minutes, or until lightly browned. Then, cover the bread with aluminum foil to prevent the top from burning, and continue to bake for another twenty minutes, or until a cake tester inserted into the center comes out clean.
-
Cooling: Turn the bread out onto a cooling rack and allow it to cool completely before slicing. This is important to prevent the bread from becoming gummy.
Expert Tips & Tricks
- Yeast is Key: Always proof your yeast to ensure it’s active. If it doesn’t foam, your bread won’t rise properly.
- Measuring Matters: Gluten-free baking is more precise than traditional baking. Use a kitchen scale for the most accurate measurements, especially for the flours.
- Don’t Overmix: Overmixing gluten-free dough can result in a tough bread. Mix only until just combined.
- Temperature Considerations: The rising time will vary depending on the temperature of your kitchen. A warm environment will speed up the process. You can also place the loaf pan in a slightly warmed oven (turned off) to create a consistent rising environment.
- Preventing a Soggy Bottom: Make sure the bread is fully cooled before slicing. Cutting into it while warm will compress the loaf and make it seem gummy.
Serving & Storage Suggestions
This gluten-free white bread is perfect for sandwiches, toast, or as a side for soups and salads. To serve, slice the cooled bread with a serrated knife for clean, even slices.
- Room Temperature: Store the bread in an airtight container at room temperature for up to 2 days.
- Refrigerator: For longer storage, keep it in the refrigerator for up to 5 days.
- Freezer: The bread freezes well. Slice it before freezing for easy portioning. Wrap tightly in plastic wrap and then in a freezer bag. It can be stored in the freezer for up to 2 months.
- Reheating: To reheat, toast a slice or two in a toaster or toaster oven. You can also warm the entire loaf in a low oven (150°C/300°F) for about 15-20 minutes.
Nutritional Information
Note: Nutritional information is an estimate and may vary based on specific ingredients and portion sizes.
| Nutrient | Amount per Serving (approx. 1 slice) | % Daily Value |
|---|---|---|
| Calories | 109 kcal | 5% |
| Total Fat | 2.17 g | 3% |
| Saturated Fat | 0.53 g | 3% |
| Cholesterol | 46.5 mg | 16% |
| Sodium | 313 mg | 13% |
| Total Carbohydrate | 19.36 g | 6% |
| Dietary Fiber | 1.79 g | 7% |
| Sugars | 1.53 g | 6% |
| Protein | 3.59 g | 7% |
Variations & Substitutions
- Dairy-Free: Ensure you use vegan margarine and a dairy-free milk alternative like almond milk, rice milk, or oat milk.
- Egg-Free: While the recipe suggests egg whites as a substitute, you could also try using an egg replacer. Follow the instructions on the egg replacer packaging for the equivalent of 3 eggs. Be aware that this could alter the texture slightly.
- Different Flours: While this blend works well, you can experiment with other gluten-free flours, but keep in mind that each flour has different properties and may affect the outcome. Brown rice flour or millet flour could be used in small amounts.
- Herbed Bread: Add 1-2 tablespoons of dried herbs (such as rosemary, thyme, or oregano) to the dry ingredients for a flavorful twist.
- Sweet Bread: Increase the sugar to 2-3 tablespoons and add a teaspoon of vanilla extract for a slightly sweeter bread.
FAQs (Frequently Asked Questions)
Q: Why is my gluten-free bread gummy?
A: This is often due to underbaking or cutting the bread before it’s fully cooled. Make sure to bake until a cake tester comes out clean and allow the bread to cool completely on a wire rack.
Q: Can I use rapid-rise yeast instead of active dry yeast?
A: Active dry yeast is recommended for best results, but you can use rapid-rise yeast. If you do, you may need to reduce the rising time.
Q: What can I use instead of masa de harina?
A: Masa de harina adds a unique flavor, but if you can’t find it, you can substitute it with an equal amount of fine white rice flour.
Q: My dough didn’t rise very much. What went wrong?
A: Possible reasons include inactive yeast, a too-cold environment, or not enough moisture. Make sure your yeast is fresh, the rising environment is warm, and you follow the recipe measurements accurately.
Q: Can I make this bread in a bread machine?
A: While possible, gluten-free bread machines have specific settings. This recipe may require some adjustments and monitoring, as gluten-free dough behaves differently.
Final Thoughts
Embark on this gluten-free baking adventure and rediscover the joy of homemade bread. This recipe is a testament to the fact that you don’t have to sacrifice taste or texture when living gluten-free. Once you’ve mastered this recipe, I encourage you to experiment with different variations and share your feedback. Imagine a slice of this warm, comforting bread toasted and topped with your favorite jam or avocado – a simple pleasure that’s now within reach!