
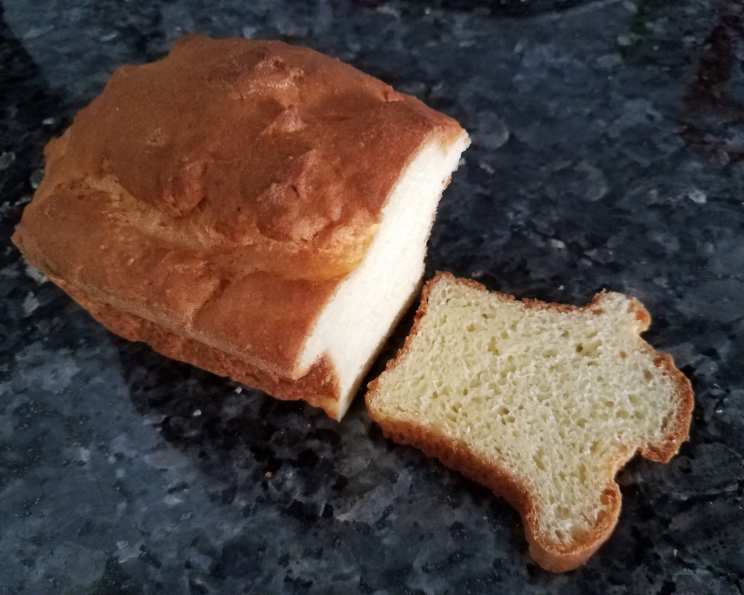
The Easiest, Best-Tasting Gluten-Free White Bread
I still remember the disappointment of my first attempt at gluten-free bread. It emerged from the oven dense, crumbly, and tasting vaguely of…well, nothing good. It was a far cry from the fluffy, fragrant loaves my grandmother used to bake. Determined to recreate that nostalgic taste and texture without gluten, I embarked on a quest, experimenting with countless flour blends and techniques. Finally, after much trial and error, I discovered the secret to a truly satisfying gluten-free white bread. This recipe is the culmination of that journey – a loaf that’s surprisingly easy to make, boasts a wonderful flavor, and, most importantly, won’t leave you feeling like you’re missing out.
Recipe Overview
- Prep Time: 30 minutes
- Cook Time: 50-60 minutes
- Total Time: 2 hours 15 minutes (includes rising and cooling)
- Servings: Approximately 12 slices
- Yield: 1 loaf
- Dietary Type: Gluten-Free
Ingredients
- 2 cups gluten-free flour (recommended: recipe #110497)
- 1 1/2 teaspoons xanthan gum
- 1/2 teaspoon salt
- 1 teaspoon egg substitute
- 1/2 teaspoon unflavored gelatin (optional)
- 2 tablespoons sugar
- 2 1/4 teaspoons dry active yeast
- 2 small eggs (or 1 egg plus one egg white, medium)
- 3 tablespoons butter, softened
- 1 teaspoon vinegar (or dough enhancer)
- 1 cup warm water
Equipment Needed
- 8 1/2 x 4 1/2 inch bread pan
- Mixing bowls
- Electric mixer (stand or hand mixer)
- Measuring cups and spoons
- Plastic wrap
- Aluminum foil
- Cooling rack
Instructions
- Combine the dry ingredients: In a large bowl, whisk together the gluten-free flour, xanthan gum, salt, egg substitute, gelatin (if using), and sugar. This dry mix can be prepared in advance and stored in a ziplock bag for months.
- Preheat the oven: Preheat your oven to 400 degrees F (200 degrees C).
- Prepare the pan: Grease an 8 1/2 x 4 1/2 inch bread pan thoroughly. You can then flour it with rice flour to prevent sticking, or grease and flour muffin tins if you prefer to make buns instead of a loaf.
- Combine wet ingredients: In the bowl of a heavy-duty mixer, whisk together the eggs and vinegar (or dough enhancer). Add the softened butter.
- Add water: Add about 3/4 of the warm water to the wet ingredients. It’s important that the water is warm, not hot, to activate the yeast properly.
- Combine wet and dry: Combine the dry active yeast with the dry mix. With the mixer on low speed, slowly add the dry ingredients to the wet ingredients.
- Adjust consistency: The mixture should resemble a very thick cake batter. Add more of the warm water as needed to achieve this consistency. Don’t be afraid to add almost all of the remaining water; gluten-free dough tends to be wetter than traditional dough.
- Beat the dough: Turn the mixer to high speed and beat for 4 minutes. This step is crucial for developing the structure of the gluten-free dough.
- Transfer to pan: Pour the batter into the prepared bread pan.
- First Rise: Cover the pan with plastic wrap and let it rise in a warm place (such as on top of a preheating oven, but not directly on a hot burner) until the dough has doubled in size. This may take anywhere from 45 minutes to an hour, depending on the warmth of your environment.
- Bake: Bake in the preheated 400°F (200°C) oven for 50 to 60 minutes for a loaf, or 30 to 40 minutes for rolls.
- Control crust color: After 10 minutes of baking, cover the loaf with aluminum foil for a lighter crust. For a medium crust, cover it after 20 minutes. This prevents the top from browning too quickly while the inside bakes through.
- Cool: Remove the bread from the oven and allow it to cool in the pan for 20 minutes before slicing. This allows the bread to firm up and prevents it from crumbling when cut.
Expert Tips & Tricks
- Flour is key: Using the recommended gluten-free flour blend (recipe #110497) is critical for the best results. Different gluten-free flour blends have varying starch and protein compositions, which can significantly affect the texture of the bread.
- Don’t skip the xanthan gum: Xanthan gum acts as a binder in gluten-free baking, providing structure and preventing the bread from becoming too crumbly.
- Warmth is crucial: Provide a warm environment for the dough to rise. This encourages the yeast to activate and leaven the bread properly.
- Beat it well: The 4-minute beating time is essential for incorporating air into the batter and creating a lighter texture.
- Check for doneness: If you’re unsure whether the bread is done, insert a toothpick into the center. If it comes out clean, the bread is ready. The internal temperature should be around 200-210°F (93-99°C).
- Oven variations: Baking times may vary depending on your oven. Keep a close eye on the bread and adjust the baking time as needed.
- Gelatin option: The gelatin helps with the bread’s elasticity and reduces crumbliness. If you prefer a vegan option, you can omit it.
Serving & Storage Suggestions
This gluten-free white bread is delicious served warm with butter, jam, or your favorite toppings. It’s also perfect for sandwiches, toast, or as a side with soups and salads.
To store, allow the bread to cool completely before wrapping it tightly in plastic wrap or placing it in an airtight container. It will keep at room temperature for 2-3 days, in the refrigerator for up to a week, or in the freezer for up to 2 months.
To reheat, you can toast slices of bread or warm the entire loaf in a low oven (around 300°F/150°C) for 10-15 minutes. Freezing the bread in individual slices makes for easy toasting straight from frozen.
Nutritional Information
Note: Nutritional information is an estimate and may vary based on specific ingredients and serving size.
| Nutrient | Amount per Serving | % Daily Value |
|---|---|---|
| Calories | 220 kcal | 11% |
| Total Fat | 8g | 12% |
| Saturated Fat | 5g | 25% |
| Cholesterol | 75mg | 25% |
| Sodium | 300mg | 13% |
| Total Carbohydrate | 30g | 10% |
| Dietary Fiber | 1g | 4% |
| Sugars | 4g | N/A |
| Protein | 4g | 8% |
Variations & Substitutions
- Dairy-Free: Substitute the butter with a dairy-free butter alternative or coconut oil.
- Egg-Free: Use a flax egg (1 tablespoon ground flaxseed mixed with 3 tablespoons water, let sit for 5 minutes to thicken) in place of the eggs. Be aware that this may alter the texture slightly.
- Sweet Bread: Increase the sugar to 1/4 cup for a sweeter bread. You can also add a teaspoon of vanilla extract.
- Savory Bread: Add herbs such as rosemary, thyme, or oregano to the dry ingredients for a savory twist.
- Add Seeds: Mix in sunflower seeds, pumpkin seeds, or flax seeds for added flavor and texture.
FAQs (Frequently Asked Questions)
Q: Can I use a different gluten-free flour blend?
A: While you can experiment, using the recommended flour blend (recipe #110497) will yield the best results. Different blends have varying starch and protein ratios, which can affect the bread’s texture and rise.
Q: Why is xanthan gum so important in gluten-free baking?
A: Xanthan gum acts as a binder, mimicking the role of gluten in traditional bread. It provides structure, prevents the bread from becoming too crumbly, and helps to improve its overall texture.
Q: Can I make this bread without a mixer?
A: While a mixer is recommended for achieving the best texture, you can try making it by hand. Be sure to whisk the ingredients thoroughly to incorporate air into the batter.
Q: My bread didn’t rise properly. What could be the reason?
A: Several factors can affect the rise. Make sure your yeast is fresh, the water is warm (not hot), and the dough is placed in a warm environment to rise.
Q: How do I prevent the crust from getting too dark?
A: Covering the bread with aluminum foil after 10-20 minutes of baking will help to prevent the crust from browning too quickly.
Final Thoughts
This gluten-free white bread recipe has truly become a staple in my kitchen. It’s reliable, forgiving, and yields a loaf that I’m genuinely proud to share. I encourage you to give it a try and experience the satisfaction of baking your own delicious, gluten-free bread at home. Feel free to experiment with variations and substitutions to customize it to your liking. And most importantly, don’t be afraid to embrace the process and have fun! Happy baking!