
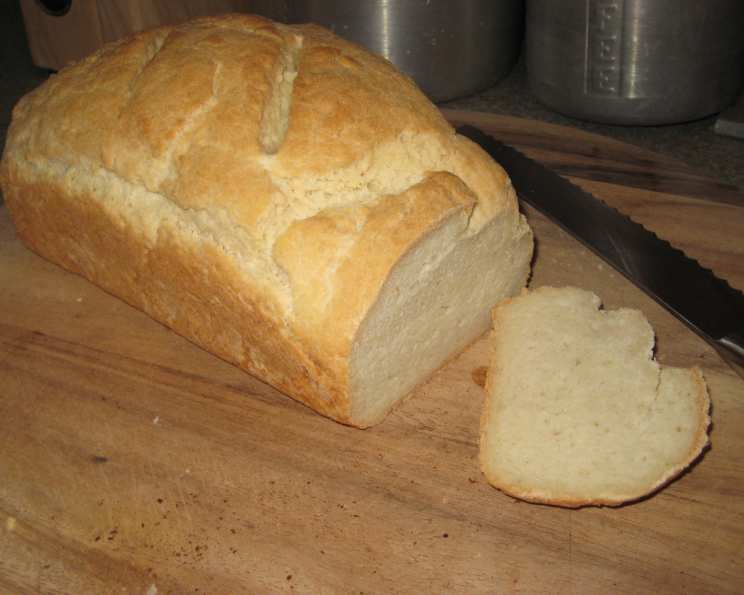
Gluten & Lactose-Free Bread: A Baker’s Dream Come True
I’ll never forget the day my dear friend Sarah was diagnosed with both gluten and lactose intolerances. Her love for bread was legendary, a cornerstone of every meal, every celebration. The look on her face was heartbreaking. But it ignited a fire in me – a challenge to recreate that simple pleasure, that comforting slice of normalcy, without any compromise on taste or texture. This recipe, born from that challenge, is a testament to the fact that dietary restrictions shouldn’t mean sacrificing joy.
Recipe Overview
- Prep Time: 15 minutes
- Cook Time: 40-45 minutes
- Total Time: 55-60 minutes
- Yields: 1 loaf
- Dietary Type: Gluten-Free, Dairy-Free
Ingredients
Dry Ingredients:
- 2 cups rice flour
- 1/2 cup potato starch
- 1/2 cup tapioca flour
- 1/3 cup cornstarch
- 1 tablespoon xanthan gum
- 1 1/2 teaspoons salt
- 3 tablespoons granulated sugar
- 1 tablespoon egg substitute
- 1 tablespoon Red Star active dry yeast or 1 tablespoon other active dry yeast
Liquids:
- 4 egg whites
- 4 tablespoons canola oil
- 1 teaspoon cider vinegar
- 1 1/4 cups water
Equipment Needed
- Medium-sized bowl
- Whisk or spoon
- Large bread machine (optional)
- 9 x 5-inch loaf pan
- Plastic wrap
- Wire rack
Instructions
- In a medium-sized bowl, carefully measure all of the dry ingredients: rice flour, potato starch, tapioca flour, cornstarch, xanthan gum, salt, granulated sugar, egg substitute, and active dry yeast.
- Thoroughly stir or whisk the dry ingredients together to ensure they are evenly combined. This step is crucial for even distribution of the xanthan gum, which acts as a binder in gluten-free baking.
- In a separate bowl, combine the liquid ingredients: egg whites, canola oil, cider vinegar, and water. Mix well until the mixture is uniform. The cider vinegar helps to activate the yeast and contributes to a better texture.
- Large Bread Machine Method: If using a bread machine, transfer the wet and dry ingredients, along with the yeast, to the baking pan of your bread machine. Follow the order suggested by your bread machine’s manufacturer.
- Press start on your bread machine.
- During the kneading cycle, the mixture will be very thick. It’s helpful to assist the mixing process by gently scraping down the sides of the pan with a spatula.
- If your bread machine is programmable, use one rise cycle and one knead cycle.
- Remove the loaf from the bread machine upon completion of the baking cycle. Allow it to cool on a wire rack before slicing.
- Oven Method: Preheat your oven to 375°F (190°C).
- Lightly oil a 9 x 5-inch loaf pan. This will prevent the bread from sticking.
- Add the yeast to the dry ingredient mix and then beat in the liquids.
- Beat the mixture for 2 minutes. This step helps to develop some structure in the dough.
- Scrape the dough into the prepared loaf pan. It will be quite thick and sticky.
- Cover the loaf pan with plastic wrap.
- Let the dough rise in a warm place until it reaches the top of the pan. This may take longer than traditional bread due to the absence of gluten. Keep a close eye on it.
- Bake for 40-45 minutes, or until the top is lightly browned. A toothpick inserted into the center should come out clean.
- Cool the bread on a wire rack completely before slicing. This is important to prevent the bread from becoming gummy.
Expert Tips & Tricks
- Xanthan Gum is Key: Don’t skip the xanthan gum! It provides the elasticity that gluten normally provides, preventing the bread from being crumbly.
- Warm Water Matters: Make sure the water is warm (around 110°F) to activate the yeast, but not too hot, or it will kill the yeast.
- Patience is a Virtue: Gluten-free doughs often rise slower. Be patient and give it ample time in a warm, draft-free place.
- Cool Completely: Gluten-free bread is often best after it’s completely cooled. Resist the temptation to slice it while it’s still warm.
- Dealing with Density: Gluten-free bread can sometimes be dense. Adding a touch more liquid (a tablespoon at a time) can help, but be careful not to make the dough too wet.
- Consider adding 1/4 tsp of cream of tartar to help with the crumb structure and prevent a gummy texture.
Serving & Storage Suggestions
This Gluten & Lactose-Free Bread is delicious served warm with a drizzle of olive oil and a sprinkle of herbs. It makes excellent toast, sandwiches, or can be used in gluten-free French toast.
- Storage: Store the cooled bread in an airtight container at room temperature for up to 3 days.
- Refrigeration: For longer storage, refrigerate for up to a week.
- Freezing: For extended storage, slice the bread and freeze it in a freezer-safe bag for up to 2 months. Thaw slices as needed.
- Reheating: To reheat, toast slices in a toaster or warm the entire loaf in a low oven (300°F) for 10-15 minutes.
Nutritional Information
Please note that the following values are estimates and can vary based on specific ingredient brands and measurements.
| Nutrient | Amount per Serving | % Daily Value |
|---|---|---|
| Calories | 209 kcal | 10% |
| Total Fat | 7.2g | 9% |
| Saturated Fat | 0.6g | 3% |
| Cholesterol | 0mg | 0% |
| Sodium | 345mg | 15% |
| Total Carbohydrate | 32.5g | 12% |
| Dietary Fiber | 1.2g | 4% |
| Sugars | 3.8g | – |
| Protein | 4.0g | 8% |
Variations & Substitutions
- Oil Variations: Instead of canola oil, you can use another neutral-tasting oil such as sunflower oil or avocado oil.
- Sweetener Alternatives: If you prefer, you can substitute the granulated sugar with honey or maple syrup.
- Flour Mixes: Experiment with different gluten-free flour blends. A blend of brown rice flour, sorghum flour, and tapioca starch can provide a slightly different flavor profile.
- Add-Ins: Get creative with add-ins! Consider adding seeds (sunflower, pumpkin, flax), dried fruits (raisins, cranberries), or nuts (walnuts, pecans) to the dough for added flavor and texture.
- To create a savory bread, replace the sugar with an equal amount of herbs such as rosemary, thyme, or oregano.
FAQs (Frequently Asked Questions)
Q: Why is xanthan gum so important in gluten-free baking?
A: Xanthan gum acts as a binder and emulsifier, mimicking the role of gluten in traditional bread. It helps to create structure and prevent the bread from being too crumbly.
Q: Can I use a different type of yeast?
A: Yes, you can use instant yeast instead of active dry yeast. If using instant yeast, you can add it directly to the dry ingredients without proofing it first.
Q: How do I know when the bread is done baking?
A: The best way to check for doneness is to insert a toothpick into the center of the loaf. If it comes out clean, the bread is done. The top should also be lightly browned.
Q: My bread is gummy. What did I do wrong?
A: Gummy bread is often a result of underbaking or slicing the bread before it has cooled completely. Ensure the bread is fully baked and allow it to cool completely on a wire rack before slicing.
Q: Can I make this recipe without a bread machine?
A: Yes, the recipe includes instructions for both bread machine and oven methods. The oven method requires a bit more hands-on time, but it yields equally delicious results.
Final Thoughts
This Gluten & Lactose-Free Bread recipe is more than just a set of instructions; it’s an invitation to rediscover the simple joy of bread, regardless of dietary restrictions. I encourage you to try it, experiment with different variations, and share your creations with loved ones. Whether you’re baking for yourself or someone special, this recipe is a testament to the fact that everyone deserves a delicious slice of bread in their life. Enjoy!