
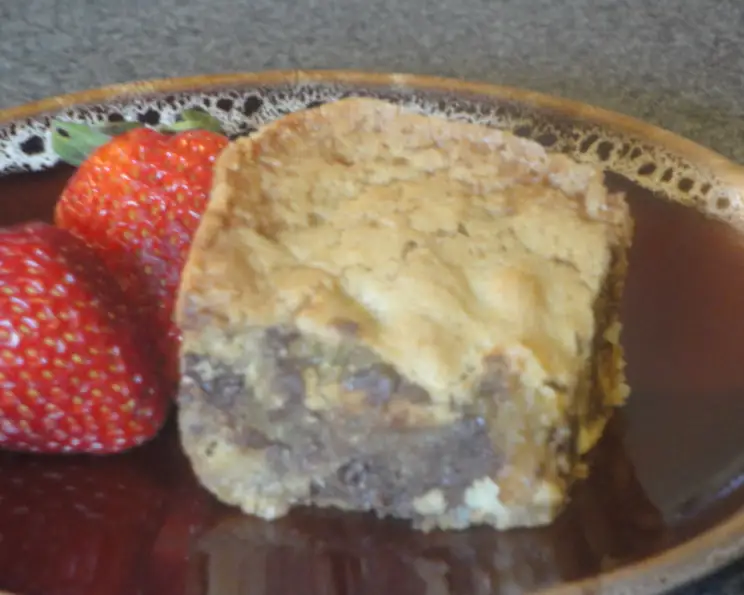
Godiva Brownies: A Taste of Michigan’s Best
The scent of melting white chocolate always transports me back to my grandmother’s kitchen. She wasn’t a fancy baker, but she had a knack for turning simple ingredients into expressions of love. One Christmas, she surprised us with a batch of brownies so rich and decadent, they were unlike anything I’d ever tasted. They were intensely sweet, almost fudgy, with rivers of white chocolate running through them – a pure, unadulterated indulgence. These Godiva Brownies remind me of that childhood Christmas, and the warmth and happiness shared around her table.
Recipe Overview
- Prep Time: 15 minutes
- Cook Time: 30 minutes
- Total Time: 45 minutes
- Yields: 24 squares
- Dietary Type: Not Gluten-Free
Ingredients
- 2 1/4 cups all-purpose flour
- 2 1/2 teaspoons baking powder
- 1/2 teaspoon salt
- 3/4 cup unsalted butter, softened
- 1 1/4 cups granulated sugar
- 1 1/4 cups packed brown sugar
- 1 teaspoon vanilla extract
- 3 tablespoons Godiva white chocolate liqueur
- 3 eggs
- 2 cups white chocolate chips
Equipment Needed
- 9 x 13 inch baking pan
- Small mixing bowl
- Large mixing bowl
- Electric mixer (handheld or stand mixer)
- Measuring cups and spoons
- Wire rack
Instructions
-
Preheat your oven to 350°F (175°C). Ensure your oven rack is positioned in the center of the oven for even baking.
-
Grease a 9 x 13 inch baking pan thoroughly. You can use butter, shortening, or cooking spray. For extra insurance against sticking, line the pan with parchment paper, leaving an overhang for easy brownie removal later.
-
In a small bowl, combine the all-purpose flour, baking powder, and salt. Whisk these dry ingredients together to ensure the baking powder is evenly distributed, which will help the brownies rise properly. Set aside.
-
In a large bowl, cream together the softened unsalted butter, granulated sugar, brown sugar, vanilla extract, and Godiva white chocolate liqueur until the mixture is smooth and light. Use an electric mixer for this step, starting on low speed and gradually increasing to medium speed. This process incorporates air into the butter and sugar, creating a tender brownie.
-
Beat in the eggs, one at a time, into the creamed mixture. Make sure each egg is fully incorporated before adding the next. Overmixing at this stage can develop the gluten in the flour and result in tougher brownies.
-
Gradually stir in the flour mixture into the wet ingredients. Gently fold the dry ingredients into the wet ingredients using a spatula or wooden spoon. Mix until just combined. Be careful not to overmix, as this can lead to tough brownies. A few streaks of flour are okay at this point.
-
Mix in the white chocolate chips. Distribute them evenly throughout the batter.
-
Spread the batter evenly into the prepared baking pan. Use a spatula or offset spatula to smooth the surface of the batter. This will ensure that the brownies bake evenly.
-
Bake for 30 minutes. To check for doneness, insert a toothpick into the center of the brownies. If the toothpick comes out with moist crumbs attached, the brownies are done. If it comes out clean, they may be slightly overbaked. Remember that ovens can vary, so keep a close eye on the brownies during the last few minutes of baking.
-
Cool in the pan on a wire rack. Allow the brownies to cool completely before cutting them into squares. This will prevent them from crumbling and allow the flavors to meld together. The cooling process can take several hours.
-
Once completely cooled, cut into squares. Use a sharp knife to cut the brownies into even squares. For cleaner cuts, you can run the knife under hot water and wipe it dry between each cut.
Expert Tips & Tricks
- For extra fudgy brownies, slightly underbake them. The center should still be a little gooey when you remove them from the oven.
- If you don’t have Godiva white chocolate liqueur, you can substitute it with another white chocolate liqueur or omit it altogether. The vanilla extract will still provide a nice flavor. Alternatively, you can use a tablespoon of milk or cream and a few drops of white chocolate extract.
- To prevent the white chocolate chips from sinking to the bottom of the brownies, toss them with a tablespoon of flour before adding them to the batter.
- For a richer flavor, use high-quality white chocolate chips.
- If you like nuts in your brownies, you can add a cup of chopped walnuts or pecans to the batter.
- For a marbled effect, melt some dark chocolate and swirl it into the brownie batter before baking.
Serving & Storage Suggestions
Serve these Godiva Brownies at room temperature or slightly warmed. A scoop of vanilla ice cream or a dollop of whipped cream complements the richness of the brownies perfectly. They are also delicious with a cup of coffee or a glass of milk.
To store leftover brownies, keep them in an airtight container at room temperature for up to 3 days. For longer storage, you can refrigerate them for up to a week or freeze them for up to 3 months. To freeze, wrap the brownies individually in plastic wrap and then place them in a freezer bag. To reheat, thaw them in the refrigerator overnight or at room temperature for a few hours. You can also microwave them for a few seconds until they are slightly warmed.
Nutritional Information
| Nutrient | Amount per Serving | % Daily Value |
|---|---|---|
| Calories | 263.4 kcal | N/A |
| Calories from Fat | 99 kcal | 38% |
| Total Fat | 11 g | 16% |
| Saturated Fat | 6.6 g | 33% |
| Cholesterol | 41.5 mg | 13% |
| Sodium | 112.2 mg | 4% |
| Total Carbohydrate | 39.2 g | 13% |
| Dietary Fiber | 0.3 g | 1% |
| Sugars | 29.9 g | N/A |
| Protein | 2.9 g | 5% |
Note: Nutritional information is an estimate and may vary based on specific ingredients and preparation methods.
Variations & Substitutions
- Dark Chocolate Godiva Brownies: Substitute half of the white chocolate chips with dark chocolate chips for a richer, more complex flavor. You can also add a tablespoon of cocoa powder to the dry ingredients.
- Espresso Godiva Brownies: Add a teaspoon of instant espresso powder to the dry ingredients to enhance the chocolate flavor.
- Peppermint Godiva Brownies: Add 1/2 teaspoon of peppermint extract to the batter and top the brownies with crushed peppermint candies after baking.
- Salted Caramel Godiva Brownies: Drizzle salted caramel sauce over the baked brownies before cutting them into squares.
- Gluten-Free Godiva Brownies: Substitute the all-purpose flour with a gluten-free all-purpose flour blend. You may need to adjust the amount of liquid in the recipe to achieve the desired consistency.
FAQs (Frequently Asked Questions)
Q: Can I use salted butter instead of unsalted butter?
A: Yes, you can use salted butter, but you should reduce the amount of salt added to the dry ingredients by half or omit it entirely.
Q: My brownies are too gooey in the middle. What did I do wrong?
A: This can be due to a few reasons. Your oven temperature might be off, or you may have underbaked the brownies. Next time, use an oven thermometer to ensure accurate temperature and bake for a few extra minutes, checking for doneness with a toothpick.
Q: Can I make these brownies ahead of time?
A: Absolutely! These brownies are great made ahead of time. Just store them in an airtight container at room temperature or in the refrigerator.
Q: Can I freeze these brownies?
A: Yes, you can freeze them for up to 3 months. Wrap them tightly in plastic wrap and then place them in a freezer bag. Thaw them overnight in the refrigerator before serving.
Q: What is the best way to cut the brownies into neat squares?
A: Let the brownies cool completely, then use a sharp knife. For extra clean cuts, dip the knife in hot water and wipe it dry between each cut.
Final Thoughts
These Godiva Brownies are more than just a dessert; they’re an experience. They are perfect for celebrations, cozy nights in, or any time you crave a little indulgence. Don’t be afraid to experiment with different variations and make them your own. I hope you enjoy baking and sharing these decadent treats! I’d love to hear your feedback and see your creations. Perhaps pair them with a rich, dark coffee or a chilled glass of dessert wine for the ultimate treat. Happy baking!