
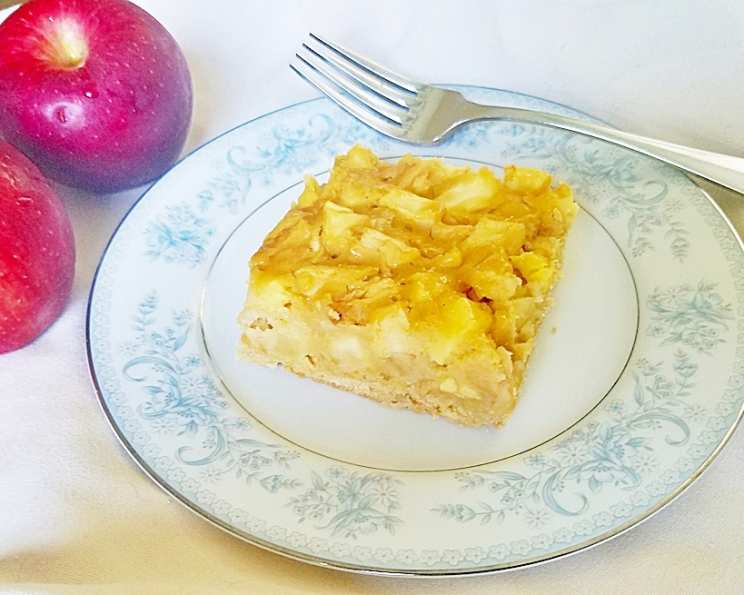
Golden Apple Bars: A Slice of Autumn Nostalgia
The scent of apples baking in cinnamon and brown sugar always transports me back to my grandmother’s kitchen. I remember standing on a small stool, eagerly watching her peel and dice apples for what she called her “Apple Goodness Bars.” The warmth from the oven, the sweet aroma filling the air, and the promise of a gooey, apple-filled treat are etched in my memory. These Golden Apple Bars capture that same comforting essence, offering a slice of autumn nostalgia in every bite. They are so delicious, you might want to make them more than once a week, just like my family!
Recipe Overview
- Prep Time: 20 minutes
- Cook Time: 37 minutes
- Total Time: 57 minutes
- Servings: 12
- Yield: 12 bars
- Dietary Type: Vegetarian
Ingredients
For the Cookie Layer:
- 3/4 cup (1 1/2 sticks) butter, softened
- 3/4 cup packed brown sugar
- 2 cups all-purpose flour
For the Apple Layer:
- 8 tart apples, such as Granny Smith or Honeycrisp, peeled and diced
- 1 teaspoon lemon juice
- 1/4 cup (1/2 stick) butter
- 3/4 cup packed brown sugar
- 1 large egg, lightly beaten
- 1 teaspoon vanilla extract
- 1 cup all-purpose flour
- 1 teaspoon baking powder
Equipment Needed
- 9″ x 13″ baking pan
- Large bowl
- Medium bowl
- Mixer (hand or stand)
- Measuring cups and spoons
- Peeler
- Cutting board
- Knife
Instructions
-
Preheat your oven to 350 degrees F (175 degrees C). Ensure the oven rack is positioned in the center.
-
Prepare the cookie layer: In a large bowl, cream together the softened butter and brown sugar until light and fluffy, using a mixer.
-
Gradually beat in the flour until a dough forms. Be careful not to overmix.
-
Grease a 9″ x 13″ baking pan thoroughly with cooking spray or butter.
-
Press the dough evenly over the bottom and 1″ up the sides of the prepared baking pan. This forms the crust for the bars. Use your fingers or the back of a spoon to achieve an even thickness.
-
Bake the crust in the preheated 350 degree F (175 degrees C) oven for 12 minutes, or until lightly browned. Keep a close eye on it to prevent burning. Remove from oven.
-
Prepare the apple layer: Core, peel, and dice the apples into approximately 1/2-inch pieces. Place them in a large bowl and toss with the lemon juice. The lemon juice will prevent the apples from browning.
-
In a medium-sized bowl, melt the butter in the microwave or in a saucepan over low heat. Remove from heat.
-
Blend the melted butter with the brown sugar in the same bowl. Use a whisk or spoon to combine well.
-
Add the egg, vanilla extract, baking powder, and flour to the butter and brown sugar mixture. Mix thoroughly until all ingredients are well incorporated and the batter is smooth.
-
Combine the batter in the large bowl with the diced apples. Mix gently but thoroughly to ensure the apples are evenly coated with the batter.
-
Spread the apple mixture evenly over the pre-baked cookie layer in the baking pan.
-
Bake in the 350 degree F (175 degrees C) oven for an additional 25 minutes, or until the apples are fork-tender and the topping is golden brown. You can test the doneness by inserting a fork into the apple filling; it should slide in easily.
-
Remove from the oven and allow to cool completely in the pan before cutting into squares or bars. This will help the bars to set properly.
-
Cut into 12 large servings.
Expert Tips & Tricks
- For a richer crust: Use melted butter instead of softened butter in the crust recipe. This will result in a chewier, almost caramel-like crust.
- Prevent a soggy bottom crust: Blind bake the crust for an extra 5 minutes before adding the apple filling. To blind bake, line the crust with parchment paper and fill with pie weights or dried beans to prevent it from puffing up.
- Spice it up: Add 1/2 teaspoon of ground cinnamon, nutmeg, or apple pie spice to the apple mixture for added warmth and flavor.
- Caramel Drizzle: For extra decadence, drizzle warm caramel sauce over the cooled apple bars before serving.
- Crisp topping: For a little bit of crunch, sprinkle rolled oats on top of the apple mixture before baking.
Serving & Storage Suggestions
These Golden Apple Bars are delicious served warm or at room temperature. They pair perfectly with a scoop of vanilla ice cream, a dollop of whipped cream, or a sprinkle of powdered sugar. For a cozy touch, serve with a warm cup of coffee or tea.
To store leftovers, cover the baking pan tightly with plastic wrap or transfer the bars to an airtight container. They will keep at room temperature for up to 2 days, in the refrigerator for up to 5 days, or in the freezer for up to 3 months. To reheat, warm individual bars in the microwave for 20-30 seconds or bake in a preheated oven at 350 degrees F (175 degrees C) for 5-10 minutes. If frozen, thaw completely before reheating.
Nutritional Information
| Nutrient | Amount per Serving | % Daily Value |
|---|---|---|
| Calories | 424 kcal | 21% |
| Total Fat | 16g | 21% |
| Saturated Fat | 10g | 50% |
| Cholesterol | 56mg | 19% |
| Sodium | 181mg | 8% |
| Total Carbohydrate | 68g | 25% |
| Dietary Fiber | 4g | 14% |
| Sugars | 40g | – |
| Protein | 4g | 8% |
Note: Nutritional information is an estimate and may vary based on specific ingredients and portion sizes.
Variations & Substitutions
- Gluten-Free: Substitute the all-purpose flour in both the crust and apple layer with a gluten-free all-purpose flour blend. Be sure to choose a blend that contains xanthan gum for binding.
- Dairy-Free: Use a dairy-free butter substitute in both the crust and apple layer. Coconut oil can also be used, but it will impart a slight coconut flavor.
- Lower Sugar: Reduce the amount of brown sugar in both the crust and apple layer by 1/4 cup each. You can also use a sugar substitute like stevia or monk fruit sweetener.
- Different Apples: Experiment with different types of apples, such as Fuji, Gala, or Braeburn, for varying levels of sweetness and tartness. A mix of different apples can also add complexity to the flavor.
- Add Nuts: Sprinkle chopped walnuts, pecans, or almonds over the apple mixture before baking for added crunch and flavor.
FAQs (Frequently Asked Questions)
Q: Can I use store-bought pie crust instead of making the cookie crust?
A: While a store-bought pie crust can be used in a pinch, the cookie crust provides a unique texture and flavor that complements the apple filling. It’s worth the extra effort to make it from scratch!
Q: My apple bars are too runny. What did I do wrong?
A: This can happen if the apples release too much moisture during baking. Be sure to use tart apples, as they tend to hold their shape better. You can also add a tablespoon of cornstarch to the apple mixture to help absorb excess moisture.
Q: Can I freeze these apple bars?
A: Yes, these apple bars freeze well. Allow them to cool completely, then cut them into individual squares and wrap them tightly in plastic wrap. Store them in a freezer-safe bag or container for up to 3 months. Thaw completely before serving.
Q: How do I prevent the crust from burning while baking?
A: If you notice the crust browning too quickly, tent the baking pan with aluminum foil during the last 10-15 minutes of baking. This will prevent the crust from burning while allowing the apple filling to cook through.
Q: Can I add other fruits to the apple filling?
A: Absolutely! Feel free to add other fruits like pears, cranberries, or raisins to the apple filling for added flavor and texture. Just be sure to adjust the baking time accordingly.
Final Thoughts
These Golden Apple Bars are more than just a dessert; they’re a warm hug on a cool day. The combination of the buttery cookie crust, the tender apples, and the sweet-and-spiced filling is simply irresistible. Whether you’re baking for a special occasion or simply craving a taste of home, these apple bars are sure to bring joy to your kitchen and your table. So, preheat your oven, gather your ingredients, and get ready to create a batch of these delicious bars. Don’t be afraid to experiment with variations and substitutions to make them your own. And most importantly, enjoy every bite!