
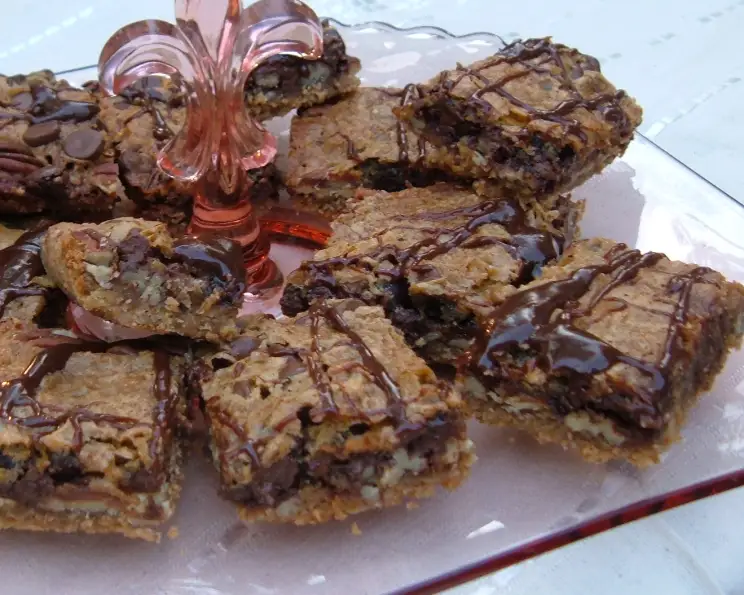
Goldy Bear’s Lethal Layers
The scent of warm pecans and melting chocolate still takes me back to my childhood kitchen. My grandmother, a true master of Southern baking, had a well-worn copy of Diane Mott Davidson’s mysteries, and she insisted on baking every recipe Goldy Bear ever encountered. These “Lethal Layers,” as she playfully called them (with a wink to the book’s plot), were a particular favorite. The buttery, crumbly crust topped with chewy, sweet pecan filling and a generous sprinkle of chocolate chips? Utterly irresistible. It wasn’t just the taste, but the feeling of cozy contentment that came with each bite.
Recipe Overview
- Prep Time: 15 minutes
- Cook Time: 30 minutes
- Total Time: 45 minutes
- Servings: 32
- Yield: 1 pan
- Dietary Type: Not Gluten-Free
Ingredients
For the Crust:
- ½ cup unsalted butter, softened
- ½ cup dark brown sugar, packed
- 1 cup all-purpose flour
- Additional flour for dusting
For the Filling:
- 1-2 cups pecan halves
- 2 eggs
- 1 cup firmly packed dark brown sugar
- 1 teaspoon vanilla extract
- ½ teaspoon salt
- 1 teaspoon baking powder
- ¼ cup all-purpose flour (measured with salt and baking powder)
- 1 cup chocolate chips (semi-sweet or dark)
Equipment Needed
- Food processor or pastry cutter
- 9×13 inch baking pan
- Measuring cups and spoons
- Mixing bowls
- Electric mixer or whisk
Instructions
- Preheat your oven to 375°F (190°C). Make sure the oven rack is in the center position for even baking.
- Prepare the crust: In a food processor fitted with a metal blade, combine the softened butter, dark brown sugar, and all-purpose flour. Pulse until coarse crumbs form. You can also achieve this by using two knives or a pastry cutter, working the butter into the dry ingredients until a crumbly texture is achieved.
- Press the crust: Lightly butter a 9×13 inch baking pan. Evenly pat the crumb mixture into the bottom of the prepared pan, creating a firm, compact crust. If the dough is too sticky, lightly dust your hands with additional flour to prevent sticking.
- Bake the crust: Place the pan in the preheated oven and bake for 10 minutes. This pre-baking step ensures the crust is sturdy enough to hold the filling. Remove from the oven and let cool completely.
- Prepare the pecan layer: Spread the pecan halves evenly over the cooled crust. You can use anywhere from 1 to 2 cups depending on how pecan-heavy you like your dessert. A single layer of pecans is usually sufficient.
- Make the filling: In a mixing bowl, beat the eggs with the dark brown sugar until the mixture is thick and pale in color. This incorporates air into the filling, creating a lighter texture. Add the vanilla extract and mix well.
- Combine dry ingredients: In a separate small bowl or measuring cup, add the salt and baking powder to the bottom of a ¼ cup measuring cup. Fill the rest of the measuring cup with all-purpose flour. This ensures the leavening agents are evenly distributed.
- Incorporate dry ingredients: Gently stir the flour mixture into the egg mixture until just combined. Avoid overmixing, as this can develop the gluten in the flour and result in a tougher filling.
- Assemble the layers: Carefully pour the egg mixture over the pecans and crust. Spread it evenly to ensure all the pecans are coated.
- Sprinkle with chocolate: Sprinkle the chocolate chips evenly over the top of the mixture.
- Bake: Bake in the preheated oven at 375°F (190°C) for 20 minutes, or until the center is set. To check for doneness, gently jiggle the pan. The edges should be set, and the center should have only a slight wobble.
- Cool: Remove from the oven and let cool completely in the pan before cutting into squares. This allows the filling to set properly and prevents the bars from falling apart.
Expert Tips & Tricks
- Toast the pecans: For an even richer flavor, lightly toast the pecan halves in a dry skillet over medium heat for a few minutes before adding them to the crust. Watch them carefully to prevent burning!
- Adjust sweetness: If you prefer a less sweet dessert, you can reduce the amount of brown sugar in the filling by ¼ cup.
- Room temperature ingredients: Using butter and eggs at room temperature helps them emulsify properly, resulting in a smoother and more consistent batter.
- Prevent sticking: If you’re concerned about the bars sticking to the pan, line the baking pan with parchment paper, leaving an overhang on the sides. This will make it easy to lift the entire dessert out of the pan after baking.
Serving & Storage Suggestions
These bars are best served at room temperature. Cut them into squares or rectangles and arrange them on a platter for an elegant presentation. They pair well with a scoop of vanilla ice cream or a dollop of whipped cream.
To store, keep the bars in an airtight container at room temperature for up to 3 days, in the refrigerator for up to a week, or in the freezer for up to 2 months. If freezing, wrap them individually in plastic wrap before placing them in a freezer-safe container. To reheat, let them thaw at room temperature or warm them gently in a low oven.
Nutritional Information
| Nutrient | Amount per Serving | % Daily Value |
|---|---|---|
| Calories | 130 kcal | N/A |
| Calories from Fat | 63 kcal | N/A |
| Total Fat | 7g | 10% |
| Saturated Fat | 3g | 15% |
| Cholesterol | 21mg | 6% |
| Sodium | 57mg | 2% |
| Total Carbohydrate | 17g | 5% |
| Dietary Fiber | 1g | 2% |
| Sugars | 13g | N/A |
| Protein | 1g | 2% |
Note: Nutritional information is an estimate and may vary based on specific ingredients and portion sizes.
Variations & Substitutions
- Gluten-Free: Substitute the all-purpose flour in the crust and filling with a gluten-free all-purpose blend. You may need to adjust the liquid slightly to achieve the desired consistency.
- Nut Variations: Experiment with different nuts, such as walnuts, almonds, or a mix of your favorites.
- Chocolate Variations: Use milk chocolate, white chocolate, or even peanut butter chips instead of semi-sweet chocolate chips.
- Spiced Filling: Add a pinch of ground cinnamon, nutmeg, or cloves to the filling for a warm, spiced flavor.
- Caramel Swirl: Drizzle caramel sauce over the pecan layer before pouring the filling on top for an extra touch of indulgence.
FAQs (Frequently Asked Questions)
Q: Can I make this recipe ahead of time?
A: Yes, you can bake the bars a day or two in advance and store them in an airtight container at room temperature.
Q: Can I use a different size pan?
A: While a 9×13 inch pan is recommended, you can use an 8×8 inch pan for thicker bars. Adjust the baking time accordingly.
Q: How do I prevent the crust from becoming soggy?
A: Pre-baking the crust is crucial for preventing a soggy bottom. Make sure to let the crust cool completely before adding the filling.
Q: My filling is too runny. What did I do wrong?
A: Ensure you are using the correct amount of flour and that you are not overmixing the batter. Overmixing can develop the gluten and make the filling thin.
Q: Can I freeze these bars?
A: Yes, these bars freeze well. Wrap them individually in plastic wrap before placing them in a freezer-safe container.
Final Thoughts
These Goldy Bear’s Lethal Layers are more than just a dessert; they’re a nostalgic journey back to the comforting aromas of home baking. With their buttery crust, pecan-studded filling, and generous sprinkle of chocolate, they’re sure to become a family favorite. So, preheat your oven, gather your ingredients, and prepare to be transported to a world of cozy contentment with every delicious bite. Don’t hesitate to experiment with variations to make them your own, and share your creations with loved ones. After all, the best recipes are those that bring people together. Enjoy!